Start with hardwood lumber and build the frame. Fit it together and test fit it in the opening before gluing the pieces together. Route a groove for the screen and install it with a spline tool. The screen bead finishes the job.
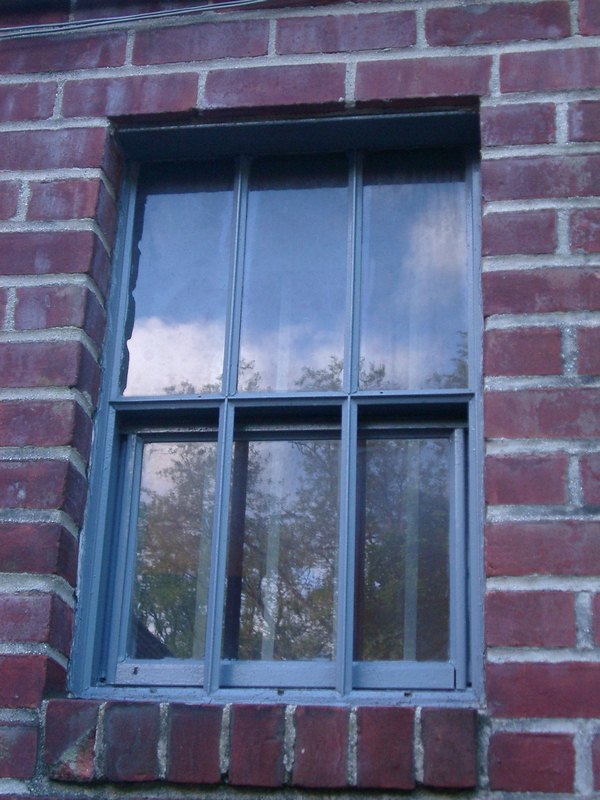
How to Make Custom Window Screens with Wooden Frames
Learn how to make custom window screens with wooden frames. Window screens keep insects, animals, and birds out and let fresh air in. Custom window screens are fairly straightforward to build with the right tools and materials.
Choose a hardwood over soft pine and fir. Popular is fine and paints easy. Oak or other straight-grained hardwoods make a good choice as well.
Read Also:
- How to Remove and Replace Steel Casement Windows with New Windows
- 3 Most Popular Types of Window Sills – How to Choose the Best One?
- Window Cleaning Hacks – How You Can do the Job Easily
- How to Measure for Vinyl Replacement Windows
- Custom Window Design Options for Your Home
- Window Design and Style – Know Your Choices
- Awning Windows are in Rage – Know Why
- Sash Windows: To Replace or Restore?
Measure the Window
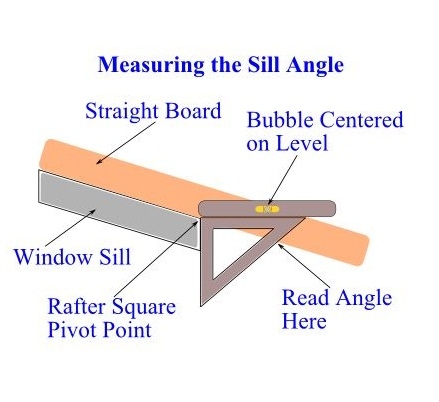
Measure the window opening for the screen on all four sides to within 1/32-inch. Include the angle of the window sill in your measurements since the screen frame will have to accommodate it.
Hold a 12-inch piece of wood on the sill to extend its angle. Use a rafter square and a level to determine the angle. Cut a scrap piece of wood on the table saw with the blade angled to test the measurement.
Build the Custom Window Frame
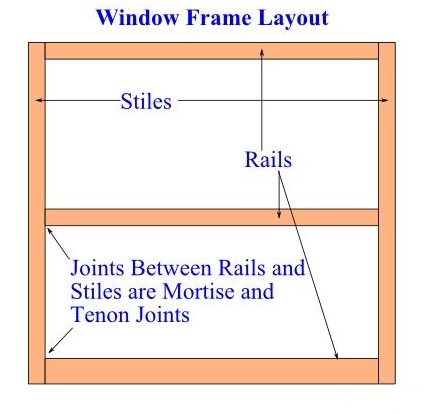
Build a frame with two or three horizontal rails and two vertical stiles. Tall screens benefit from the additional stability added by a center rail. Mill the stiles, top rail, and center rail out of 1 x 3 hardwood.
Use 1 x 4 hardwood for the bottom rail. The rails join with the stiles using mortise and tenon joints. These joints provide a strong joint to keep your screen frames square.
Make the Stiles and Rails
The height of the stiles is the measured height of the window opening. Cut the stiles to length and include the sill angle on the bottom of each. Test fit the stile blanks in the window opening and fine-tune them for a perfect fit.
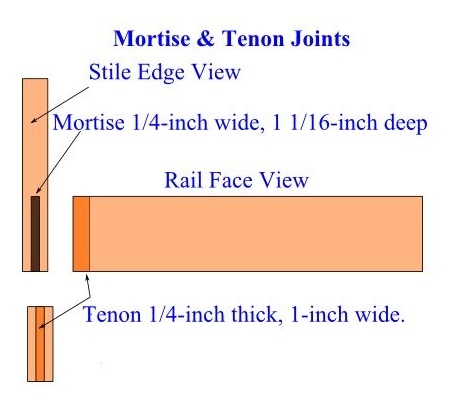
Route a 1/4-inch wide and 1 1/16-inch deep mortise on each stile end and in the middle of a third rail is being added. The mortises are as long as the rails are wide. Square the ends of the mortises with a 1/4-inch wide chisel.
Subtract 3-inches (allows for the tenon length) from the window opening width for the width of the rail blanks.
Cut the rails to this length, and cut the sill angle on the bottom rail. Test fit the bottom rail for the fit of the angle.
On the table saw, cut tenons on the end of each rail by removing a 1-inch wide and 1/4-inch deep piece of material on each face of the rail. Now build the wooden frame of our window screen.
Also Read: How to Write a Creative Essay
Assembly
Fit the pieces together and use two small wood screws at each joint to hold the frame square. Test fit the frame in the window opening.
Now is the time to make adjustments and get the fit right. Take the frame apart, add exterior yellow wood glue to the mortises and tenons, and put it back together.
Clamp the frame, check it for square again and adjust if necessary before the glue sets. Wipe up the glue squeeze-out and let the frameset before adding the screen.
Fitting the Screen
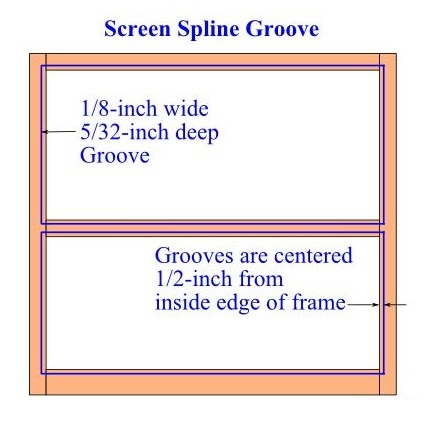
Route a 5/32-inch deep groove around the entire frame with a 1/8-inch straight bit. The groove should be centered 1/2-inch from the inside edges of the frame. If a center rail was included, route two grooves, one for the top opening and one for the bottom opening.
Lay window screen over the frame. Hold the screen in place with spring clamps at each corner. Install screen spline into the groove, working around the frame from one corner. The spline pushes the screen into the groove and holds it in place. As you work, keep the screen straight, taut, and wrinkle-free.
Finishing Up
Add screen bead trim to give the installation a traditional look. The trim is 3/4-inch wide and aligns with the inside edge of the frame to cover the spine. The corners should be miter cut. Hold the bead in place with 5/8-inch brads.
Add hardware at the top to hang the screen and hold it in place at the bottom. Prime and paint the finished custom screen with exterior primer and paint to finish building a window screen with a wooden frame.
Credits and Resources
- Photo by DuBoix at Morguefile.com: https://morguefile.com/p/676999
- Mortise and Tenon Joints; How to Make Custom Window Screens; Extreme How-to: https://extremehowto.com/mortise-and-tenon-joints/
- https://slackylife.com/best-window-screens/


