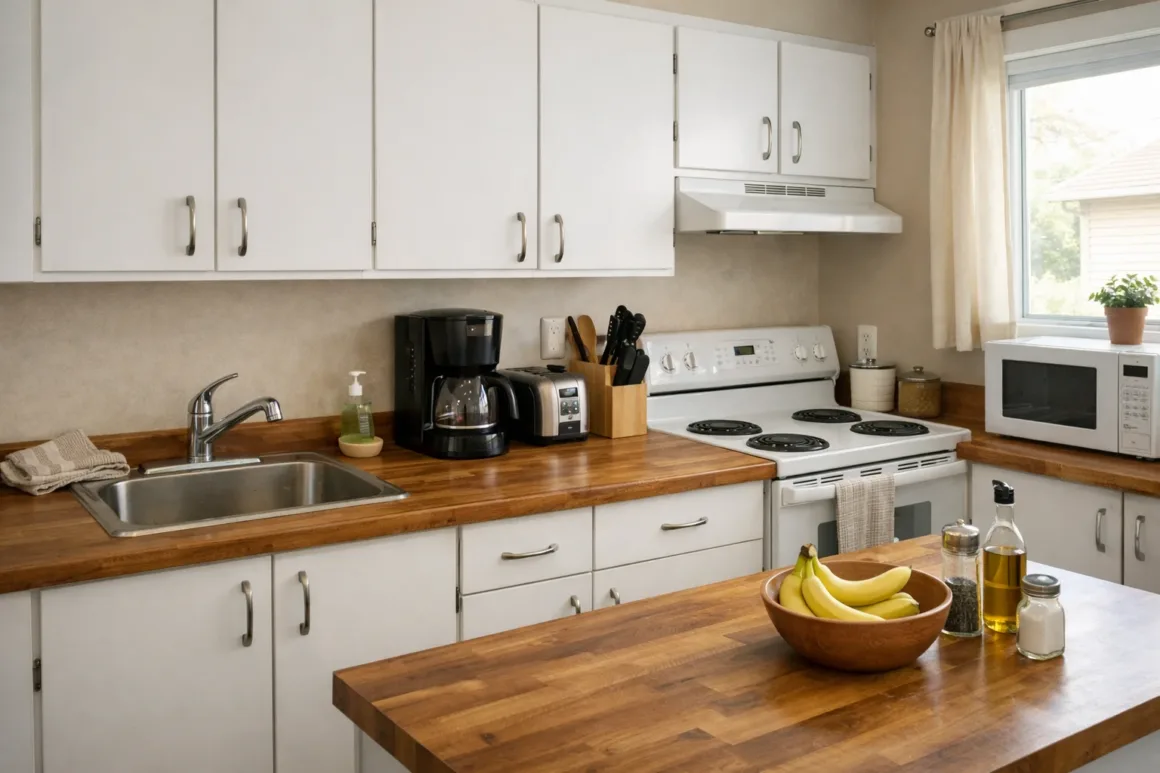
Faux butcher block countertops look like a clever shortcut — warm wood tones without the heavy price tag of solid hardwood slabs. Many homeowners attempt this upgrade hoping for a dramatic transformation over a single weekend. But appearance is only part of the equation. Durability, moisture exposure, and long-term maintenance determine whether this project remains a smart decision or becomes a short-lived cosmetic fix.
What follows looks at the full picture. Not just how to build it, but what it costs in practice, how long it holds up, and where it starts to break down first. The exact steps used in this project are included — but durability comes first.
What Is a Faux Butcher Block Countertop?
A faux butcher block countertop mimics the look of traditional butcher block using standard dimensional lumber, plywood, or layered planks rather than solid hardwood slabs designed for food prep. The goal is visual warmth at minimal cost, not heirloom durability.
Unlike true butcher block, faux versions rely heavily on staining techniques and polyurethane sealing to achieve the finished look. The surface functions more like sealed furniture than a professional prep surface.
Real Cost Breakdown
This project cost $56 in wood, adhesive, and polyurethane when it was completed in 2024. Trim added an additional $18.
Actual DIY costs depend on kitchen size and lumber selection:
- Lumber or plywood base: $40–$150
- Construction adhesive: $10–$25
- Wood filler & sandpaper: $20–$60
- Stain: $15–$40
- Polyurethane sealer: $25–$80
- Optional trim: $15–$50
For a small section, most projects land somewhere between $150 and $400 once everything is included. Among wood-look countertop options, faux butcher block remains one of the lowest-cost upgrades available. The trade-off is lifespan rather than appearance.
The savings shrink if refinishing becomes necessary within a few years.

How Long Do Faux Butcher Block Countertops Last?
Most DIY faux butcher block surfaces last between 3 and 7 years.
Some fail sooner.
Why Most Faux Butcher Block Surfaces Fail Early
Early failure rarely happens in the center of the counter. It starts at the edges — especially around the sink — where water sits longer than expected. Inconsistent sealing and direct food preparation without cutting boards accelerate surface breakdown. Once moisture penetrates the finish, deterioration spreads quickly.
In this project, visible wear began around the sink edge first — an early sign that moisture management determines long-term performance. Water damage around the sink remains the most common failure point in faux butcher block installations.
This surface is aesthetic-first, not abuse-proof.
- Light-use kitchens last longer.
- Sink areas face the highest moisture exposure.
- Standing water shortens lifespan quickly.
- Polyurethane requires periodic maintenance.
Where Faux Butcher Block Works — and Where It Fails
Works well for:
- Budget kitchen refreshes
- Low-traffic homes
- Rental upgrades
- Decor-focused remodels
Struggles in:
- Heavy daily cooking kitchens
- Homes with frequent water splashing
- Areas directly above dishwashers
- Families expecting 10+ year durability
Expectations determine satisfaction more than aesthetics.
For outdoor applications, material performance changes significantly under weather exposure. Review our breakdown of outdoor kitchen countertop materials before choosing wood-based surfaces outside.
Faux vs Real Butcher Block
| Feature | Faux | Real Wood |
|---|---|---|
| Cost | Low | High |
| Weight | Light | Heavy |
| Refinishing | Limited | Multiple Times |
| Moisture Resistance | Moderate | Better if Maintained |
| Lifespan | 3–7 Years | 15+ Years |
The difference is not visual — it is structural and long-term.
Faux Butcher Block vs Laminate
Standard laminate countertops typically outlast faux butcher block when exposed to heavy moisture. Laminate requires less maintenance and no resealing, but it lacks the depth and texture of real wood grain. Faux butcher block offers stronger visual warmth, but demands ongoing surface protection to avoid early wear.
DIY Faux Butcher Block Countertops: Step-by-Step Tutorial
After weighing the trade-offs, this was the build process.
Step 1: Remove Old Countertops
Remove existing countertops carefully. Check for screws inside cabinet corners and disconnect the sink plumbing before lifting the surface.
Step 2: Choose Your Wood
Two 2″x10″ planks and one 2″x8″ plank were used for each section to create thickness. Heavy-duty plywood is an alternative for tighter budgets.
Step 3: Prepare the Planks
- Seal the underside to protect against moisture.
- Trace and cut sink opening using the old countertop as template.
Step 4: Attach to Cabinets
- Test fit sink before gluing.
- Apply construction adhesive.
- Press planks down starting from back. If cabinet proportions feel off during installation, you may need to consider adjusting countertop height before securing the surface permanently.
- Weight the surface while adhesive sets.
Step 5: Fill and Sand Seams
- Apply wood filler to seams.
- Sand smooth with multiple grits.

Step 6: Stain the Surface
Apply base stain evenly. Custom stain blends were used to create variation and mimic butcher block striping.
Step 7: Seal with Polyurethane
Apply multiple thin coats of polyurethane, allowing full drying between coats. Thin layers prevent uneven finish and tackiness.

The sealing stage determines most of the countertop’s lifespan.
If you want a more detailed walkthrough of technique and drying strategy, see our step-by-step guide to applying polyurethane correctly.
Step 8: Optional Trim
Edge trim improves visual finish but does not affect structural durability.
Maintenance Expectations
- Recoat polyurethane at the first signs of dullness.
- Avoid standing water.
- Do not cut directly on surface.
- Use trivets for hot cookware.
If you are comparing finish options before recoating, review the differences between varnish and other clear coats to choose the right protective layer.
Is Faux Butcher Block Worth It?
It makes sense for short-term ownership, rental properties, or cosmetic upgrades on a tight budget. It makes far less sense in high-use family kitchens where long-term durability matters more than visual warmth. The value depends less on aesthetics and more on how long you expect the surface to last.
Final Decision Checklist
This project only makes sense in certain situations.
- You want strong visual impact on a tight budget.
- You understand the 3–7 year lifespan range.
- You accept ongoing maintenance responsibility.
- Your kitchen does not see extreme moisture exposure.
If long-term durability matters more than short-term savings, materials like quartz or stone consistently outperform faux butcher block in longevity. For a full comparison of high-performance surfaces, see our guide to the most durable kitchen countertop.
FAQs
Is faux butcher block waterproof?
No. It resists moisture only as well as its polyurethane seal. Standing water can cause damage over time.
Can you cut directly on faux butcher block?
No. The surface is sealed wood, not designed for direct cutting.
Is faux butcher block cheaper than laminate?
Lumber price fluctuations directly affect project cost. Laminate lasts longer and requires less upkeep.
Does faux butcher block increase home value?
It improves visual appeal but rarely adds measurable resale value compared to higher-end countertop materials.
Author & Editorial Review
- Author: Perla Irish is a design and home living writer specialising in interior materials, furniture performance, and long-term home decision-making. View her published work at Muck Rack.
- Editorial Review: This article was reviewed by the HouseSumo Editorial Board to ensure clarity, neutrality, factual accuracy, and alignment with long-term interior sustainability principles. Content is evaluated for long-term usefulness rather than promotional intent.
Last updated: February 13, 2026


