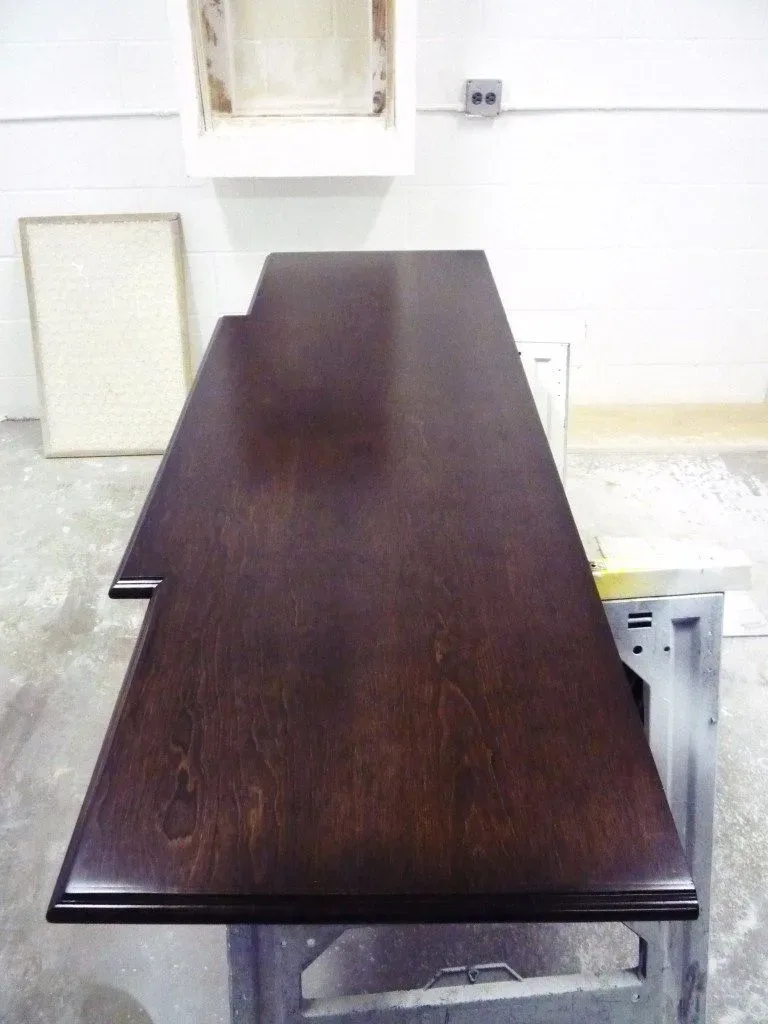
How to Produce a Hand-Rubbed Satin Wood Finish — Probably the most important step in achieving a smooth, professional finish is the final rubout. It is impossible to get a dust-free, absolutely smooth finish without buffing under most field-applied conditions.
Can you get a “good enough” finish without a final rubout? Yes, if you’ve done a good job sanding between each coat prior to the final finish coat.
Yes, If you’ve vacuumed and tack ragged well before the final finish and if you are working in a somewhat controlled environment where dust disturbance can be kept to a minimum. Yes, if you’ve kept your brush, bucket, and spray gun clean, as well as the filter on your HVLP so that there is no transferring of debris to the surface.

How to Produce a Hand-Rubbed Satin Wood Finish
If you cannot do all the above, or if you are simply wanting the very best of finishes you will need to do a final rubout.
Shellac / Varnish Finishing System
There are a number of clear coats that are used with stain work. I have used many of them. The system I prefer and use most of the time is the shellac and varnish system.
The shellac/varnish system works well for brushing or HVLP spray finishing. Many professional painters prefer lacquer for spray finishing because of the fast dry and good spray properties of lacquer. The downside to lacquer is, of course, the odor and the inability to brush and apply it.
Spray application of the lacquer is most of the time impossible in the repaint scenario of an occupied home. Shellac, on the other hand, is also fast drying, sprays, and brushes well, and the odor is far less objectionable. I use Quick 15 (Zinsser) as the varnish component making the whole system quick-drying.
Shellac as a Sealer
Once your staining is dry (see the product label – usually overnight, but some stains can be finished after a few hours), you can begin the finishing.
While shellac is suitable for use as a final finish, it is often used as a fast-drying sealer before a final coat(s) of varnish. The varnish used in conjunction with shellac must be an oil-based varnish (like Quick 15).
Polyurethanes and water-based finishes will not adhere to shellac because it contains a naturally occurring wax.
There are special “de-waxed” shellacs that can be used with other finishes, you will have to search a little bit to find these products. One such shellac is Zinsser’s Seal Coat, which is re-coatable with the clearest finish coats.
Typically, you will apply three coats of finish (or more), in order to get sufficient flim to build for a professional-looking job.
To prevent sanding through the finish and accidentally removing the stain, I don’t do any sanding until I have applied two coats of shellac. Normally, I will apply two coats of shellac, then sand, then apply a final coat of varnish.
The Hand-Rubbed Satin Finish – Part 2
Shellac, unlike some finishes, doesn’t require sanding between coats for proper adhesion. The second coat of shellac will melt into the first without the need to create a surface profile for intercoat adhesion.
Another nice feature of shellac is that it will not re-wet or remove your oil-based stain as an oil-based sanding sealer or varnish might.
After two coats have been applied, you may carefully sand to level and smooth the finish. Remove all sanding dust by following up with a vacuum and a tack rag. Don’t get too aggressive with the first sanding, the finish is still pretty thin and if you are not careful, you will sand through the shellac on the edges and corners.
Steel wool or synthetic wool scouring pads may be used to smooth contoured surfaces and detailed moldings.
Finishing with Varnish
I like to use varnish for my final finish because it is more water and chemically resistant than shellac. Shellac will dissolve if it is cleaned with a cleaner containing ammonia or alcohol – varnish won’t. Shellac will also develop white water spotting if water is left on the surface for long periods of time.
Note: if you are finishing a surface that will likely get water on it, you may want to put two (or three) coats of varnish over the shellac sealer to be sure that water does not come in contact with the underlying shellac.
Why Not Just Use Varnish and Skip the Shellac Altogether?
Because shellac will not re-wet your stain as varnish will. One of the problems with using oil varnish (or oil urethanes) in conjunction with an oil stain, is that you may brush out some of the stain colors when applying the varnish.
Since the solvent in shellac is alcohol and not mineral spirits, it will not re-wet or remove an oil-based stain.
Shellac is water thin and brushes out well, even over itself. Varnish, when used as a final protective coat over two or three quick-drying coats of shellac, doesn’t re-wet or soften the shellac itself either.
The shellac/varnish system gives you a longer working time, better sheen uniformity, and less chance of brush drag as compared to an all-varnish or all-polyurethane finishing system.
Except in situations subject to water, I sand thoroughly (then vac and tack) prior to the final single coat of varnish, this gives me a good level surface to which I add a final chemically resistant clear coat (varnish), and because I am going over shellac I have good working time (relatively speaking) with either quick or slower drying varnish.
Read Also:
The Hand-Rubbed Satin Finish – Part 3
Once the **varnish has dried and cured for a few days (depending on the varnish you use), you can rub out the finish. Start with a light sanding with 400 grit paper – don’t overdo this and be careful on edges and corners. You are trying to knock off any burrs and bumps in the varnish only.

If you sand too heavily you will sand through the varnish down to the shellac leaving an “edge” where the two join. If this happens you will need to re-coat the varnish.
Keep it light. After this very light sanding, using 0000 steel wool, rub down the surface one final time this will smooth and dull the varnish down to a pleasing soft satin sheen while removing (or hiding) any scratches from the 400 grit sanding.
Waxing with Finishing Wax
If you want to raise the sheen back up a bit while adding a final smoothing touch, apply a coat or two of finishing wax.
Paste finishing wax is applied with 0000 steel wool in the direction of the wood grain and after fifteen minutes or so of drying time, is buffed with a clean soft rag or a buffing wheel. It is best to apply two coats. Apply the first coat, let it dry, buff then repeat the process again.
A wax-less finish is a bit easier to maintain in some situations. A waxed surface can smudge (but the smudges easily wipe out with a rag). On the other hand, you can “repair” the gloss of a waxed surface easily by simply re-waxing and buffing it out.
One Final Note:
This method of hand-rubbed “satin” finishing, is usually perfect for interior architectural wood including doors and railings, etc… If you are finishing a musical instrument or a fine finish table top, you will probably want to use lacquer and buff it out to a high gloss.
Lacquer is similar to shellac in that each coat melts into the other – this type of finish works well for high gloss rubbing because there are no “layers” of finish.
Each coat melts into the previous forming one homogenous clear finish, allowing you to rub away without the problem of rubbing through a particular layer of finish, which will leave a worn through the ridge.
Regardless, you still have to be careful not to rub all the way through to the stain, or you will have to (skillfully) repair the stain. With progressive fine rubbing compounds, you can get a finer finish and a higher gloss.
This type of treatment is reserved for the very best pieces of the woodwork and is not the standard used for architectural wood trim.
**Note: Use oil-based varnish over shellac. Do not use polyurethane or water-based acrylics because they will not adhere to shellac. If in doubt Zinsser makes a wax-less shellac called “Seal Coat” use this instead of regular shellac.
Click here for Seal Coat datasheet