Make your own paving stones using discarded concrete. The process is simple and the materials are practically free.
Learn how to make your own paving stones from used concrete. Then learn how to lay the stones into a permanent walkway for your yard and garden.

DIY – Make Your Own Paving Stones
Walkways are functional garden elements, they invite guests to your door, and they also allow visitors to stroll through your grounds and property. Walkway stones can extend into patios and other outdoor living rooms.
Flagstone, slate, and pavers can be purchased from home and garden centers but you can also create walkway stones from recycled materials. Making your own paving stones out of repurposed and recycled material is a way to save money as well as a way to spare your local landfill from construction waste build-up.
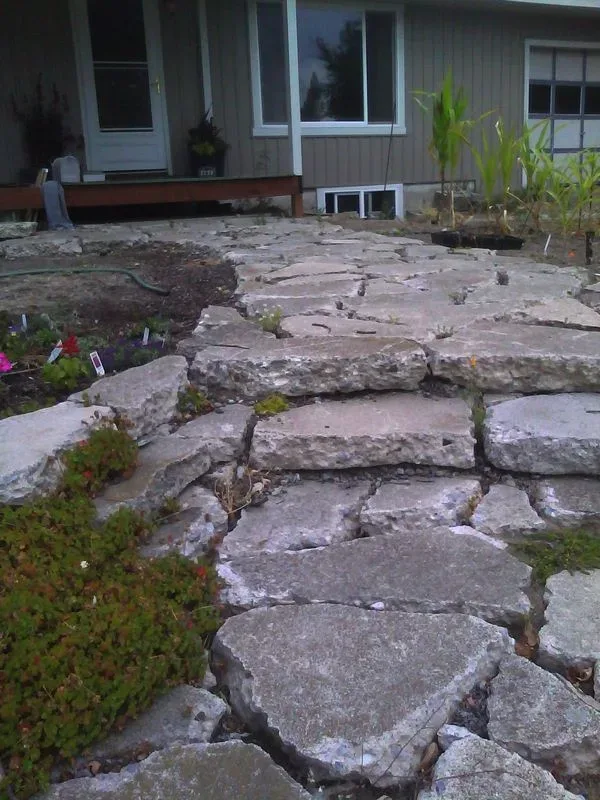
When working with recycled materials, such as used concrete, it is necessary to think creatively. ‘Crazy paving‘, like that pictured above, is a design often used when developing walkways from the irregularly shaped rock. Make sure to consider block paving cleaning when you doing this process.
Read Also:
- How to Make Concrete Molds for Patio Blocks and Walkway Pavers
- Build Stone Pillars for Driveway Entrances or Fence Corners
- How to Choose the Right Stone for Your Kitchen Benchtop
- Easy to Follow Instructions for Making Cornices Yourself
- How to Finish a Basement With Concrete Walls
- The Concept and Design of Cement Walls
Equipment and Tools
You will need the following to put this project together:
- Garden rake
- Shovel
- Sledgehammer
- Pry, or crow, bar
- Hammer
- Concrete Chisel
- Safety Goggles
- Work gloves
Gather Materials
Concrete contractors regularly tear up sidewalks, driveways, and walkways giving you plenty of raw material for your own creations. One way to find contractors is to pay attention to advertising signs placed on newly paved driveways.
Call and find out if the company is willing to drop off waste concrete. Since many contractors have to pay to dump concrete, it is far cheaper for them to drop off waste materials at your home than to pay for its removal or disposal.
Be certain that you have room on your property to accommodate the contractors’ trucks and any equipment they may have. Also, be certain that you have space on your property to accommodate large piles of broken concrete.

Choose concrete that has not been poured over support or chicken wire. Wire filled concrete is difficult to break down and may cause injury. It will also fail to lay correctly. Consider inspecting the concrete prior to its free delivery.
Prepare the Site
Plan your walkway and hardscape features by placing stakes along proposed paths.
Once you are comfortable with your design to grab your shovel and rake. Dig a bed for your stones at a depth of about 6-inches.
Square-edged shovels work well but choose equipment that is comfortable and practical for you.

Rake out the soil to create a level of space. Be aware that your concrete chunks are of varying widths. No matter how to level the bed the pathway will be uneven. One way around this is to lay 4 inches of builder’s sand along the bed. The concrete chunks will sink to desired depths resulting in a flat surface.
Another way to achieve a flat walkway, without sand, is to loosen approximately 4 inches of the soil so that it is malleable enough to be moved by hand. As you place your paving stones adjust the amount of earth beneath them to create an even surface.
Shaping the Stones and Laying the Walkway
After digging out the pathways bed, sort through your concrete pieces. Plan to lay bigger stones at the edges of your walkway and smaller pieces in the middle.
Shape the paving stones as you go along. Use a concrete chisel to score the concrete, follow this action with a blow from a sledgehammer or common hammer to separate the pieces. You can also use a small wood chisel, as pictured. Try a variety of wood and concrete chisels, ones with different widths and styles, to find the one that provides you with the level of detail and precision your design requires.
For safety’s sake wear goggles and gloves. Rough edges easily rip the skin from palms and flying chips can injure eyes.

This small chisel is usually used for wood, but works well on concrete too. Experiment with concrete chisels and chisels of varying widths and sizes. Find the one that gives you the most detail and control.
For small adjustments, you can chip off edges with a hammer. Shaping as you go allows you to make adjustments suitable to both the design and the terrain.
Once the pieces are in place fill the spaces between stones with loose dirt, sand, or gravel. The amount of space between stones varies for both aesthetic and practical reasons.

For a bit of color, try planting small alpine flowers in crevices.
Some people prefer the appearance of larger spaces, while others enjoy a more traditional, compact look. The closer the stones are placed, however, the more likely they are to heave and shift, especially in extreme weather climates.
Although gardeners have successfully created their own walkways and terraces from hypertufa, a substance made of peat moss, cement, and sand, recycled materials are by far the most economical way to make your own paving stones.


 4")


