Applying stain with a spray gun is fast, but it can be messy. It works best when you don’t have to worry too much about overspray.
A new addition or a new house where you don’t have to be concerned about the stain on the plywood subfloor is a prime candidate for spraying wood stain.
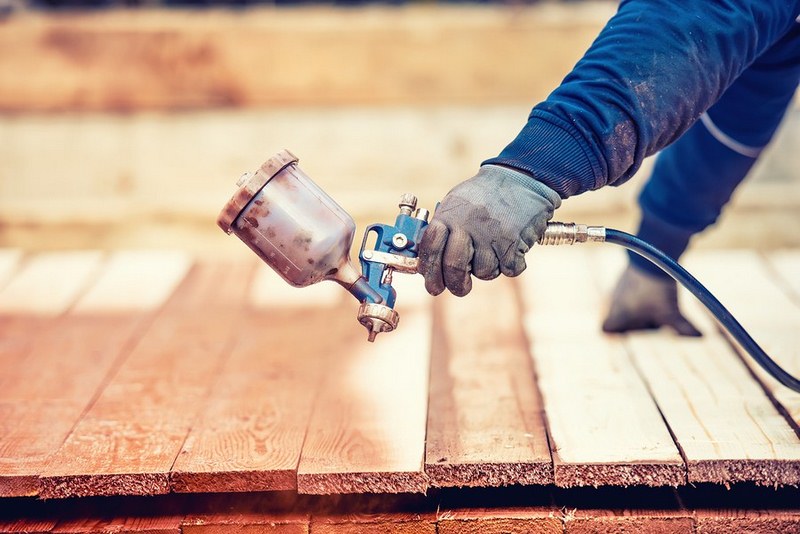
So, whether you’re on team airless or team HVLP, the goal is the same – a smooth, even coat of stain. Just remember, preparation is your best friend.
Cover what needs covering, gear up, and stay safe. And hey, if you’re looking to spruce up your office space, check out “office furniture Adelaide” for some quality pieces to create that perfect workspace vibe.
How to Applying Wood Stain With Sprayer
Read Also:
Covering Up
You will need to cover up anything that you don’t want overspray on. I would not even consider spraying stain if you have carpet or finished flooring down, it is not worth the time needed to cover up all the flooring – use a brush instead.
Block off the HVAC dust: both the cold air return and the heat duct to prevent overspray from being drawn down into the vents.
Personal Protection
You will need at a minimum, to wear a spray paint respirator Do not spray wear there is an open pilot, turn off all pilot lights and any potential sources of ignition.
Provide for good ventilation, but be careful about overspray drifting out onto outdoor items through open windows at the same time. Cover the heat register and cold air returns to prevent drawing overspray down into the ductwork.
Clothing
Depending on how much staining you will be doing, you may want to wear a Tyvek coverall and a spray sock as well as shoe covers and gloves.
Spraying
You can use an airless or HVLP sprayer to apply the stain, either will do a good job. I prefer the HVLP because equipment clean up is much quicker at the end of the day.
An airless rig will require less moving around if you are doing a whole house, but you will have a lot of stain in the line at the end of the day to purge.
Spray and Wipe
You can’t just spray the stain on the wood and leave it – almost all stains will lay on the surface and look awful. You must use a brush to wipe the stain in after application.
If you have a helper, ideally one would apply the stain, and the other brush the stain. It doesn’t take much to wipe the stain, just a stroke with the brush in the direction of the wood grain, then move on.
If you are spraying without a helper, then you can spray out a few jambs and then back brush them before the stain sets up, then spray a few more items and wipe, etc…
Airless Spraying Basics: Spraying With an Airless
You can use an electric cup gun (like the Wagner Optimus Sprayers), or you can use an airless rig. Use a narrow/fine tip, and keep the pressure low.
It doesn’t take much pressure to spray stain. The less pressure, the less overspray there will be drifting in the air.
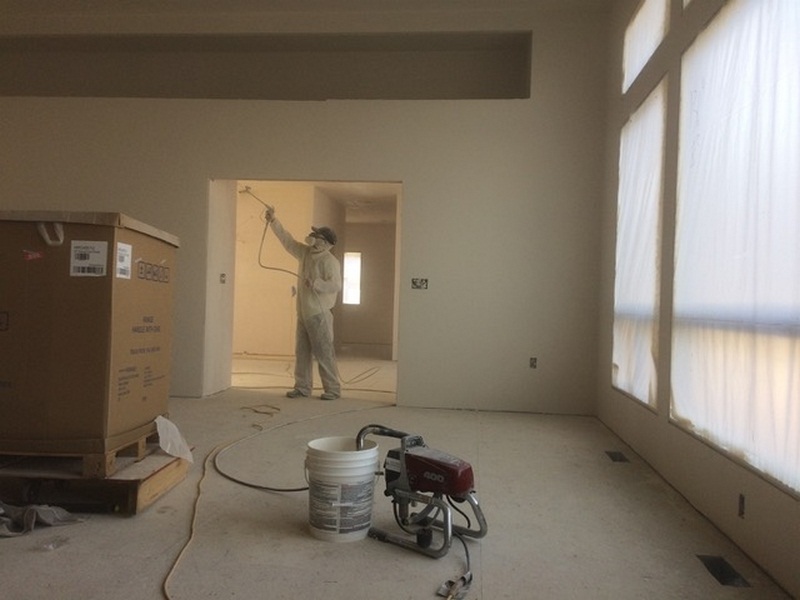
Note: if you are new to airless spraying click here to learn about the dangers of injection injuries caused by airless sprayers and read your manufacturer’s equipment cautions.
Straining and Filtering
Straining
To avoid tip clogging you must strain paint before spraying. Most, if not all sprayers come with an inlet strainer (sometimes referred to as a “rock catcher”) attached to the bottom of the suction tube.
In addition to the inlet strainer, you need to filter the paint with a nylon mesh strainer before using it in the sprayer.
Filtering
For drywall painting, you will almost always be using latex paint. With latex paint, I use a 60 mesh machine manifold filter and a 100 mesh gun filter.
If your spray gun does not allow for a filter then you will have to make due, but the gun filter will cut down on tip clogging.
If you strain your paint and filter your paint you will eliminate almost all tip clogging. I use reversible tips (as do almost all contractors) for the occasional tip clog that might occur even after staining and filtering.
Spray Tips
With latex paint, I use a .517 – .521 tip. I usually spray at around 2000 psi. pressure.
Spray Tip Decoding:
The “5” in the .517 stands for the fan width of the spray pattern when sprayed from a distance of 12″ away. To add confusion the “5” is multiplied by 2 to arrive at the correct fan width. So a .517 tip has a fan width of 10″ when sprayed at a distance of 12″ from the surface.
The “17” stands for the orifice size in thousandths of an inch. So the .517 tip has an orifice (opening) of 17 thousandths of an inch.
General Rules:
With latex wall paints an orifice size of .17 – .21 (such as a .521 tip) is commonly used. With oil paints, the orifice should be around .15 (such as a .415 tip). With stains and thin materials including some enamels, the orifice should be around .11 – .15 (such as a 413 tip).
Tip Variations:
Reversible tips are the most common types of tips used. Reversible tips are self-unclogging when they are turned and triggered to eliminate the clogging particle, whereupon the tip is then returned back and spraying commences again.
Other types of tips are the fine finish tips which contain a type of pre-orifice to help break up the paint into a finer particle size.
There are adjustable tips in which you can by a turn of a knob, vary the width of the spray pattern, for the purpose of controlling overspray or spray output.
Another tip type is the flat tip. Flat tips are sold presumably for cost considerations – they are the least expensive of the spray tips. I never use the flat tips. If you get a clog with a flat tip, you will have to pull the tip guard and tip off the gun to clean it out which is a big inconvenience.
Tip Guards
These are produced by the airless spray manufacturers for the purpose of keeping the airless spray operator’s hands away from the spray tip, to reduce the risk of spray injection. Always use the tip guard when spraying with an airless sprayer.
Other Safety Operation Devices
The Trigger Guard:
Located on the spray gun, used to prevent accidental gun triggering with the goal of reducing the risk of injection injuries.
Pressure Relief Valve:
Sometimes referred to as the “dump” valve. This valve is located on the sprayer itself and it releases the pressure from the machine and “dumps” excess paint under pressure back down into the paint bucket.
Always release the pressure before disassembling the spray gun, or to work on the sprayer (to clean out a filter, etc…) or when the sprayer is not actively in use (such as during lunch breaks, etc…).
This video discusses the basics of the airless sprayer and sprays gun
Spraying With an HVLP
Unless you are using the electric cup gun airless, I don’t favor using an airless sprayer. There is too much clean up involved with the airless rig, and there will be a lot of stains just sitting in the long airless hose before it reaches the tip for spraying.
Most of the stain spraying I have done has been with an HVLP sprayer. Because the HVLP (as a rule) is a siphon or gravity fed cup gun, it does not involve a material line and there is no “wasted” material sitting idle in a long hose. There is more control with the HVLP and less overspray.
HVLP Spraying
HVLP stands for “high volume – low pressure. Contrasted with a conventional compressed air spray gun which uses high pressure, the HVLP is a soft sprayer with much less overspray than a conventional air gun.
The HVLP is a small surface spray gun compared to the airless sprayer, which is a high production, large surface sprayer.
The airless can be used to spray smaller areas such as interior wood trim if you use the right spray tip and pressure setting, but the HVLP will never be a high production gun for large areas.
Most HVLP guns handle thinner viscosity paints and finish better than latexes. With the exception of latex enamels, the HVLP’s will do a great job and give an excellent finish with most oil enamels and clear coats as well as lacquer and shellac.
You probably will need to thin these materials a little bit (some not at all – the bigger your HVLP the better it will spray thicker viscosity materials).
The problem with spraying latex enamels in an HVLP is that you need to thin them quite a bit, which ruins one coat hiding of the paint. I have always preferred to spray latex enamels (or other latex paints – interior or exterior) with an airless sprayer.
Spray Guns
According to hoseadviser, Most of the popular HVLP manufacturers (Graco, Titan, Wagner) have similar features on their spray guns and units.
The fan pattern is adjusted at the nozzle from vertical to horizontal. They have an air valve on the hose or elsewhere to adjust airflow and they have a fluid valve on the gun itself.
One difference between the various guns is the siphon tube. One makes a flex tube that is weighted and will always siphon regardless of the gun angle.
Another makes a siphon tube that you manually turn so that whether you are angle up or down it will spray.
Others have a stationary siphon tube that requires the gun to be sprayed level or either tipped down or up (but not both ways).
I always run the paint through a filter (cup gun type) as I pour it into the cup, that way I can eliminate tip clogging as much as possible. The other regular maintenance item you will need to do ( apart from cleaning the gun itself) is to clean and/or change the filter after each use (clean) and as needed (change).
The video below shows the basic operation of a Graco HVLP. Most of the operational functions are the same or similar to other manufacturers’ HVLP units and spray guns.
I use a Wagner HVLP unit, and with it, I use dedicate one gun to enamels, and one gun to clear shellac, one gun to clear lacquer, and one gun to clear alkyd varnishes.
I also have a stainless steel gun for latex enamels (which I seldom use – but I do occasionally) which has a wider orifice and the stainless parts for exposure to water without rusting.
This video shows the operation of a Turbinaire unit
Bleeder and Non-Bleeder describe whether air flows continuously through the nozzle of the gun – whether or not the gun is triggered.


