So, you’ve got a river rock shower floor, and it’s seen better days. Maybe some stones are loose, or the grout’s looking rough. Don’t worry; fixing it up isn’t as hard as you might think.
With a few tools and some patience, you can make your shower floor look as good as new. This guide will walk you through the steps to repair your river rock shower floor and keep it looking fresh.
Key Takeaways
- River rock shower floors add a natural touch but need regular maintenance.
- Loose stones and deteriorating grout are common issues.
- Basic tools and materials can help fix most problems.
- Proper sealing prevents future damage and simplifies cleaning.
- Regular upkeep extends the life of your shower floor.
Introduction
River rock shower floors are a beautiful addition to any bathroom, offering a natural and earthy look that can transform your space into a spa-like retreat. These types of floors bring a unique aesthetic charm, combining the rustic allure of nature with the modern functionality of a shower. However, like any other part of your home, they can encounter issues over time.
Imagine stepping onto a riverbed every morning as you start your day. The smooth, cool stones beneath your feet can be quite refreshing. But what happens when those stones start coming loose or the grout deteriorates? That’s where a little knowledge and some DIY skills come in handy.
Maintaining a river rock shower floor doesn’t have to be a daunting task. With the right approach, you can keep your shower floor looking as good as new without breaking the bank.
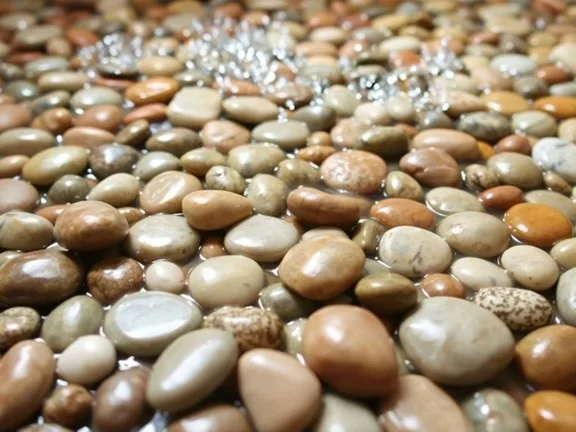
For those who love creating stunning DIY indoor water features with simple steps and affordable materials, a river rock floor can be a great addition. You can adjust water flow and sound by rearranging rocks and pebbles, making it a versatile choice for those looking to enhance their indoor space.
In this article, we’ll walk you through everything you need to know about reviving and maintaining your river rock shower floor, ensuring it remains a beautiful and functional part of your home for years to come.
Understanding River Rock Shower Floors
Benefits of River Rock Shower Floors
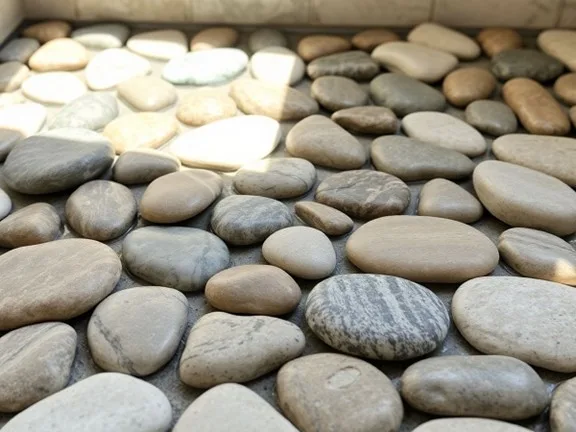
River rock shower floors are a favorite among homeowners who want to bring a touch of nature into their bathrooms. The smooth, rounded stones feel amazing underfoot, almost like a foot massage every time you step in the shower.
Their natural appearance adds a unique, earthy charm to any bathroom, making it stand out from the usual tiles. Plus, the stones are naturally slip-resistant, which is a big plus for safety.
Common Issues with River Rock Shower Floors
Despite their beauty, river rock shower floors are not without their challenges. Over time, issues like “loose river rock shower floor” can emerge, causing discomfort and potential safety hazards.
The stones can become detached due to inadequate adhesion or moisture seeping into the grout. This can lead to a “loose pebble shower floor,” which may require immediate attention to prevent further damage.
Another common problem is grout deterioration. The grout between the stones can wear down due to constant exposure to water and cleaning agents. This can lead to “pebble tile shower floor problems,” such as gaps that allow water to penetrate and cause damage beneath the surface.
In some cases, you might notice a white haze on the stones, often caused by mineral buildup or trapped moisture. This can be an indicator of more serious underlying issues, like efflorescence.
Maintaining a river rock shower floor can be tricky, but understanding these common problems is the first step in keeping your bathroom both beautiful and functional. Regular maintenance and prompt repairs can help preserve the natural beauty of your shower floor for years to come.
Assessing the Damage
Identifying Loose or Missing Stones
When you step into your shower and feel a wobble underfoot, it’s a sign that some of your river rocks might be loose. Loose stones can lead to water seeping underneath, which is a big no-no.
Start by gently pressing each stone with your hand. If it shifts or rocks, it’s loose. Missing stones are even more obvious. You’ll see gaps where the stones used to be. Keep an eye out for these issues as they can cause more significant problems down the line.
Checking for Grout Deterioration
Grout is the glue that holds your river rock floor together. Over time, it can wear away or crack, especially if harsh cleaning agents have been used. Look closely at the grout lines.
Are there cracks? Is the grout crumbling? If so, it’s time for a repair. You might also notice discoloration, which is often due to soap scum or dirt buildup. A quick test is to run a damp cloth over the grout. If it comes away grimy, your grout is deteriorating.
Regular checks and maintenance can save you from costly repairs. Addressing minor issues as they arise is key to keeping your shower floor in top shape.
For those who enjoy a bit of DIY, using paste wax for wood finishing can offer a smooth, glossy finish that enhances the natural beauty of wood, much like maintaining the natural look of your stone floor. Regular application can keep surfaces looking fresh and new.
Tools and Materials Needed for Repair
Getting your river rock shower floor back in shape isn’t as hard as it might seem. But first, you need to gather the right tools and materials. Having everything ready before you start will save you a ton of time and frustration. Here’s what you’ll need:
Tools
- Rubber Mallet: Useful for gently tapping loose stones back into place without damaging them.
- Grout Float: For spreading grout evenly across the surface.
- Nylon Bristle Brush: Essential for cleaning the surface before starting your repairs.
- Sponge: To wipe away excess grout and clean up as you work.
- Bucket: Handy for mixing grout or holding water for rinsing tools.
Materials
- Replacement Stones: Just in case any stones are missing or too damaged to reuse.
- Grout: Choose a waterproof grout suitable for shower floors. It’s available in different colors to match your existing grout.
- Grout Sealer: To protect your new grout from water and stains, extending the life of your repair.
- Epoxy Adhesive: For securely reattaching any loose stones.
Before you dive into the repair, make sure your workspace is clean and dry. A well-prepared surface will make the whole process smoother and more effective.
Once you’ve got all these tools and materials, you’re all set to tackle the repair. Remember, patience is key, and taking your time will lead to the best results.
Step-by-Step Repair Guide
Preparing the Surface
Before diving into any repairs, it’s crucial to start with a clean slate. First, thoroughly clean your river rock shower floor. Use a gentle, stone-safe cleaner to remove any dirt, grime, or soap scum. This will ensure that the adhesive and grout bond effectively. Let the surface dry completely before moving on to the next steps.
Reattaching Loose Stones
Once your floor is clean and dry, it’s time to address any loose stones. Here’s a simple way to do it:
- Gently lift any loose stones, being careful not to chip or crack them.
- Apply a thin layer of tile adhesive to the back of each stone.
- Press the stone firmly back into place, ensuring it sits level with the surrounding stones.
- Wipe away any excess adhesive with a damp cloth.
- Allow the adhesive to cure for the recommended time, usually about 24 hours.
Grouting and Sealing
After reattaching the stones, it’s time to re-grout and seal the area:
- Mix your grout according to the package instructions, aiming for a peanut butter-like consistency.
- Use a rubber float to apply the grout, pressing it into the spaces between the stones.
- Remove excess grout with a damp sponge, being careful not to disturb the stones.
- Once the grout has been set, apply a sealant to protect both the stones and grout from moisture and stains.
Taking the time to properly seal your river rock shower floor can significantly extend its lifespan and maintain its natural beauty. Regular maintenance and care are key to preventing future damage.
With these steps, your river rock shower floor should look refreshed and ready to withstand daily use.
Maintenance Tips to Prevent Future Damage
Keeping your river rock shower floor in top shape isn’t just about repairs—it’s also about smart maintenance. By following a few simple strategies, you can extend the life of your floor and keep it looking fresh.
- Seal Regularly: Make sure to apply a stone sealant every six to twelve months. This will protect the stones from moisture and staining, keeping them looking vibrant.
- Avoid Abrasive Cleaners: Stick to mild, pH-neutral soaps or cleaners specifically made for natural stone. Harsh chemicals can damage the stone and wear away the sealant.
- Use a Soft Bristle Brush: For tougher spots, a soft bristle brush can help without scratching the stones.
- Dry After Cleaning: Always dry the floor after washing to prevent water spots and potential discoloration.
- Shake Out Mats: Regularly clean mats and rugs to prevent dirt and debris from scratching the floor.
Pro Tip: Consistent cleaning and drying not only maintain the aesthetic appeal of your shower floor but also reduce the need for frequent repairs.
By incorporating these maintenance habits, you can ensure your river rock shower floor remains a stunning feature in your bathroom for years to come.
And if you ever need a deep clean or more complex maintenance, hiring professional janitorial services for restaurants can also be a great option for residential spaces, offering expertise and saving you time.
Conclusion
Reviving a river rock shower floor isn’t just about fixing what’s broken; it’s about restoring its natural beauty and ensuring it lasts for years to come. A well-maintained shower floor not only looks stunning but also enhances your bathroom’s overall vibe.
Here’s a quick recap to keep in mind:
- Regularly inspect for any loose stones or grout deterioration.
- Use the right tools and materials for any repairs.
- Follow a step-by-step approach for effective restoration.
Remember, a little effort in maintenance goes a long way. By keeping your shower floor in top shape, you’re not just preserving its aesthetic appeal but also its functionality.
Taking care of your river rock shower floor might seem daunting at first, but with these easy repair tips, you can handle it like a pro. Whether you’re fixing it yourself or hiring someone, understanding the process helps you make informed decisions. Enjoy your beautiful, durable shower floor, and keep it shining bright!
Wrapping It Up: Your River Rock Shower Floor Revival
So there you have it, folks! Bringing your river rock shower floor back to life isn’t as daunting as it seems. With a bit of elbow grease and the right approach, you can tackle those pesky stains and dull spots.
Remember, regular maintenance is key. Keep an eye on the sealant and don’t shy away from calling in the pros if things get out of hand. After all, a little effort goes a long way in keeping your bathroom looking fresh and natural. Happy cleaning!
Frequently Asked Questions
Rust stains can be tricky. You might try using a cleaner made for tile and stone to remove surface rust. If the rust is deep in the grout, it might not come out entirely. Removing the source of the rust is important to prevent it from coming back.
If your floor turns white, it might be due to a reaction with a cleaner or sealer. You can try using a stone stripper to remove any coating. If that doesn’t work, a stone restoration company can help restore the color and shine.
To check if your floor needs sealing, sprinkle a few drops of water on it. If the water beads up, the sealer is still working. If it soaks in, it’s time to reseal to protect against stains.
A penetrating sealer is usually recommended for river rock. It helps protect the stone without changing its appearance. Make sure to wipe off any excess sealer and buff the surface dry.
Vinegar might help with cement haze or efflorescence, but it can also damage the stone if used improperly. It’s safer to use a cleaner specifically made for stone and tile.
This might be due to uneven sealing or mineral deposits. Check if the floor is sealed by seeing if water beads up on the surface. If not, it may need resealing. The white could be mineral buildup, while the darkening might indicate porous stones absorbing moisture.