• DIY
    • Crafts
      • Outdoors & Garden Projects
    • Decorating
      • Exterior Painting & Decorating
      • Painting & Wallpaper
      • Room by Room
    • Furniture
      • Cabinets
      • Tables
    • Woodworking
  • Home Improvement
    • Real Estate
    • Living
    • Entertaining
    • Home Building & Design
      • Home Interior
      • Home Exterior
    • Home Management
      • Home Organization
    • Remodeling
    • Living Areas
    • Bathroom
    • Kitchen
  • Lawn & Garden
    • Lawn Care
    • Vegetable Gardening
    • Landscaping
      • Irrigating
    • Flowers
    • Trees & Shrubs
  • Categories
    • Home Improvement
    • Lawn & Garden
    • Landscaping
    • Real Estate
Housesumo.com
  • DIY
    • Crafts
      • Outdoors & Garden Projects
    • Decorating
      • Exterior Painting & Decorating
      • Painting & Wallpaper
      • Room by Room
    • Furniture
      • Cabinets
      • Tables
    • Woodworking
  • Home Improvement
    • Real Estate
    • Living
    • Entertaining
    • Home Building & Design
      • Home Interior
      • Home Exterior
    • Home Management
      • Home Organization
    • Remodeling
    • Living Areas
    • Bathroom
    • Kitchen
  • Lawn & Garden
    • Lawn Care
    • Vegetable Gardening
    • Landscaping
      • Irrigating
    • Flowers
    • Trees & Shrubs
  • Categories
    • Home Improvement
    • Lawn & Garden
    • Landscaping
    • Real Estate
Featured of How to Program Your Liftmaster Garage Door Remotes
  • Home Improvement
  • DIY
  • Tips

How to Program Your Liftmaster Garage Door Remotes

  • Perla Irish
  • January 14, 2019
Total
7
Shares
7
0
0
0

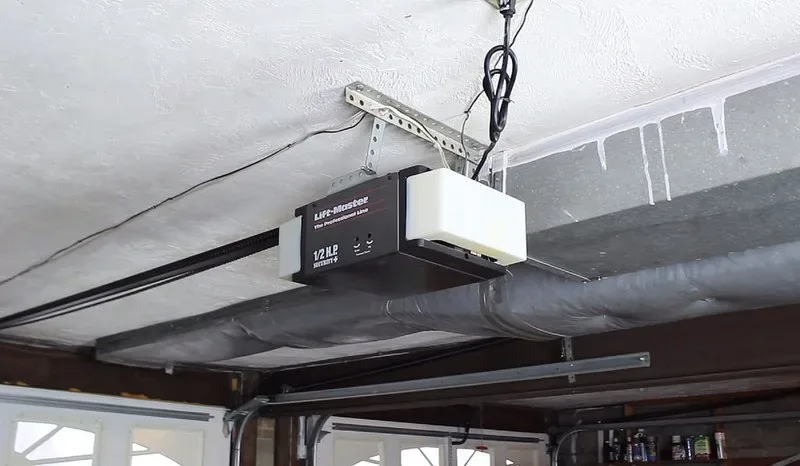
Liftmaster remotes are connected to the LiftMaster 8355W door operator. You can connect this LiftMaster 8355 to any remote and any door.

There are three different remotes that you can program to this door operator. There is the LiftMaster 890MAX, 893MAX, and the 877MAX keypad.

Today we will learn how to set these remotes up to your garage door.

How to Program Your Liftmaster Garage Door Remotes

How to Set Up Your LiftMaster 890MAX to Your Garage Door

This model is good with 315MHz or 390 MHz carport entryway openers and will work with your Liftmaster 8355 garage door opener. Here is how to set it up in 6 easy steps:

  • Press the program button with a safety pin or small pointed edge, until the LED light turns on. This will make it possible for you to program, as it reverts to programming mode.
  • Press the earn’ button on LiftMaster 8355 door opener. After 30 seconds the earn’ light will turn on.
  • Press a button you want to use on the remote. Wait for the LED light to shine on your remote, then slowly press and release the button you previously clicked on the remote.
  • Repeat this until the light blinks. DO NOT press the button again after the light blinks. Press any other button on the remote to exit programming mode.
  • Finally, press the button you programmed on the remote to test if the garage door works with the button you pressed.
  • When the battery needs to be replaced, the LED(s) light will stop flashing. It will indicate the batteries need to be replaced. 890MAX takes 3V2032 or 3V2016 coin cell batteries.

Read Also:

  • How to Buy a Garage Door: Top 7 Features to Look for in a Garage Door
  • Garage Floor Makeover! Makeover that Drab Garage Floor
  • Learn How to Build Shelves to Make Room in a Garage
  • How to Insulate Living Space Above a Garage
  • Garage Door Facelift

How to Set Up Your LiftMaster 893MAX to Your Garage Door

This model is good with 315MHz or 390 MHz carport entryway openers. Make sure your LiftMaster 8355 lights work, as you will need this for programming your remote.

Press the learn button on both your LiftMaster 8355 and your 893MAX remote, then follow these seven steps:

  • Press the button on the visor clip to activate programming mode. Make sure the LED light turns on.
  • Press the earn’ button on the garage door opener, the earn’ led will then light up within 30 seconds.
  • Press the button you want to use, to open the garage door. Wait for a light, then slowly press and release the same button.
  • Repeat until light blinks, do not touch the button again.
  • Press another button other than the one you previously clicked to exit the programming mode. Test it by pressing the button you clicked repeatedly. The garage door opener should then activate.
  • Install the visor clip.
  • The 893MAX is compatible with 3V2032, and 3V2016 coin cell batteries. If the LED light does not work on your remote, this is an indication the batteries will need to be replaced.

How to Set Up Your LiftMaster 877MAX to Your Garage Door

The 877MAX remote can program different garage doors and gates. It works with any color earn button’ on your LiftMaster 8355 door opener. Follow these steps to set up your remote keypad.

  • Open your keypad, and hold the star – * and pound – # buttons until you see flashing lights on the keyboard. Wait for the lights to stop and be a constant solid glow.
  • Enter a 4-digit code of your decision on the keypad.
  • Press the earn’ button on your LiftMaster 8355 until the light turns on Click the enter’ button on your keypad.

Depending on the color of your earn’ button will determine how many times you click the enter’ button.

For yellow – click earn’ once or purple – click earn’ twice. For orange or red – click earn’ 3 times. And for green – click earn’ 4 times.

  • Finally, press the number zero on your pad, to lock in your code. Test your system by typing in your code, and press enter. Your system should work.
  • The 877MAX keyless keypad includes a 9V battery. This remote is compatible with multiple door openers.

Security and convenience are vital qualities to have for your home. It is why it is a good idea to have a LiftMaster 8355, as it is compatible with multiple remotes, and can control various doors, and garages.

With the help of one of these three remotes – LiftMaster 890MAX, 893MAX, and the 877MAX keypad, you are sure to be completely satisfied with these instructions.

0
0
7
0
Total
7
Shares
Pin it 7
Share 0
Tweet 0
Share 0
Share 0
Related Topics
  • doors
  • garage
Previous Article
Featured of 5 Signs Your Roof Needs Replacement
  • Home Renovation
  • DIY
  • Home Improvement

Five Signs Your Roof Needs Replacement

  • Perla Irish
  • January 11, 2019
View Post
Next Article
Featured of Treat Preventative Maintenance of Your Air Conditioning System as Mandatory Not Optional
  • HVAC
  • DIY
  • Home Improvement
  • Tips

Treat Preventative Maintenance of Your Air Conditioning System as Mandatory Not Optional

  • Perla Irish
  • January 14, 2019
View Post

You May Also Like

Modest kitchen with wood-look faux butcher block countertop
View Post
  • Kitchen

DIY Faux Butcher Block Countertops: Cost, Durability & Long-Term Reality

  • Perla Irish
  • February 14, 2026
Modular furniture components arranged as an adaptive interior system rather than fixed standalone pieces.
View Post
  • Furniture

Modular Furniture Beyond Sofas: Designing Interiors That Adapt Over Time

  • Perla Irish
  • January 27, 2026
Flexible living room interior layout illustrated as a system, showing modular seating, storage, and furniture arranged for long-term adaptability rather than fixed styling.
View Post
  • Home Interior

Flexible Living Room Layouts: Designing Spaces That Adapt Over Time

  • Perla Irish
  • January 26, 2026
Neutral living space illustrating eco-friendly interior design through flexible layout and long-term adaptability.
View Post
  • Home Interior

Transforming Your Home With Eco-Friendly Interior Design

  • Perla Irish
  • January 26, 2026
Illustration showing a neutral living room layout with abstract seating zones and circulation space.
View Post
  • Furniture

What Is a Modular Sofa and Why It Works for Modern Living Rooms

  • Perla Irish
  • January 21, 2026
Architectural visualization showing an off-the-plan residential project before construction begins.
View Post
  • Home Building & Design

A Builder’s Guide to Marketing New Property Projects

  • Perla Irish
  • January 13, 2026
Technician checking a refrigerator in a home kitchen in Winter Garden, Florida
View Post
  • Home Improvement

Refrigerator Repair in Winter Garden: A Practical Homeowner’s Guide

  • Perla Irish
  • December 31, 2025
Side-by-side view of common metal finishes showing chrome shine, copper patina, and matte black texture.
View Post
  • Home Improvement
  • Home Interior

How to Choose the Best Metal Plating for Home Fixtures (What Actually Lasts)

  • Perla Irish
  • December 30, 2025

Leave a Reply Cancel reply

Your email address will not be published. Required fields are marked *

This site uses Akismet to reduce spam. Learn how your comment data is processed.

Join 13,000 folks!

Get instant access to our weekly newsletter where we share the best! 100% Privacy. No Spam.

  • Disclosure & Affiliate Policy
  • Privacy Policy
  • Terms of Use
  • About
  • Sitemap
  • Contact Us

Input your search keywords and press Enter.