A smart thermostat is an important part of any air conditioning system. The good news is, that you can easily install it yourself. Just make sure that the thermostat will work with your HVAC unit before you start.
When to Install a Smart Thermostat
The best time to install a smart thermostat is during mild weather when you don’t need to rely heavily on your heating or cooling system. This way, if anything goes wrong during the installation process, you won’t be left without heating or cooling in extreme temperatures.
Getting Professional Help
If you’re not confident in your DIY skills or if you’re worried about damaging your HVAC system, it’s always a good idea to get professional help. Companies like Direct AC offer professional AC installation services in Miami and can guide you through the process of installing a smart thermostat.
Remember, it’s important to choose a reputable company with experience in installing smart thermostats to ensure a smooth and successful installation.
Detailed Guide on How to Install a Smart Thermostat at Home

While installing a smart thermostat might seem overwhelming, it’s a straightforward process when you break it down into manageable steps. This guide is here to assist you, whether you’re an experienced DIY enthusiast or a novice.
Step 1: Check Compatibility with Your HVAC System
Before installation, ensure that your smart thermostat is compatible with your existing HVAC system.
- At the point of purchase, check the wiring requirements of the thermostat and compare these with your system.
- Take note of the types of systems you have in your home (e.g., heat pump or furnace) as this can affect compatibility.
- If replacing an old thermostat with a smart one, survey its location first to ensure it’s suitable for a smart thermostat.
Remember that compatibility is key for efficient operation and longevity of your smart thermostat.
Step 2: Turn Off the Power Supply
To prevent any potential electrical injuries during installation:
- Locate your home’s circuit breaker panel and switch off the power supply to your existing thermostat.
- If there are multiple switches linked to your HVAC system, ensure all are flipped off.
- Test if the power is off by attempting to turn on your AC or heating system.
Step 3: Remove the Cover of Your Old Thermostat
The disassembly process begins with removing the faceplate of your old thermostat.
- Unscrew and remove the faceplate, revealing low-voltage wiring.
- Before touching anything, take a picture of the wiring arrangement for future reference.
- Disconnect the wiring carefully, labeling each wire and corresponding terminal as you go along.
- Once done, unscrew and remove the backplate of the old thermostat.
Keeping your smart thermostat’s instruction manual on hand during this process can provide additional guidance.
Step 4: Attach the New Mounting Plate
Upon removal of the old mounting plate:
- Position your new mounting plate and mark the screw holes.
- Ensure the plate is level before driving in the screws to secure it into place.
- Thread the previously labeled wires through the spaces on the mounting plate.
Consult your smart thermostat’s model manual for further instructions, if necessary.
Step 5: Connect the Wires
Carefully connect the labeled wires to their corresponding terminals on the smart thermostat.
- Make sure each wire is pushed in until you hear a click sound, indicating a secure connection.
- Locate the C wire, which enables some of your thermostat’s features. In some models, an adapter may be present if there’s no C wire.
- Once all wires are connected, lay them flat against the wall to make room for the display plate.
When handling wiring, consider seeking assistance from a licensed thermostat installation expert to ensure safety and proper connections.
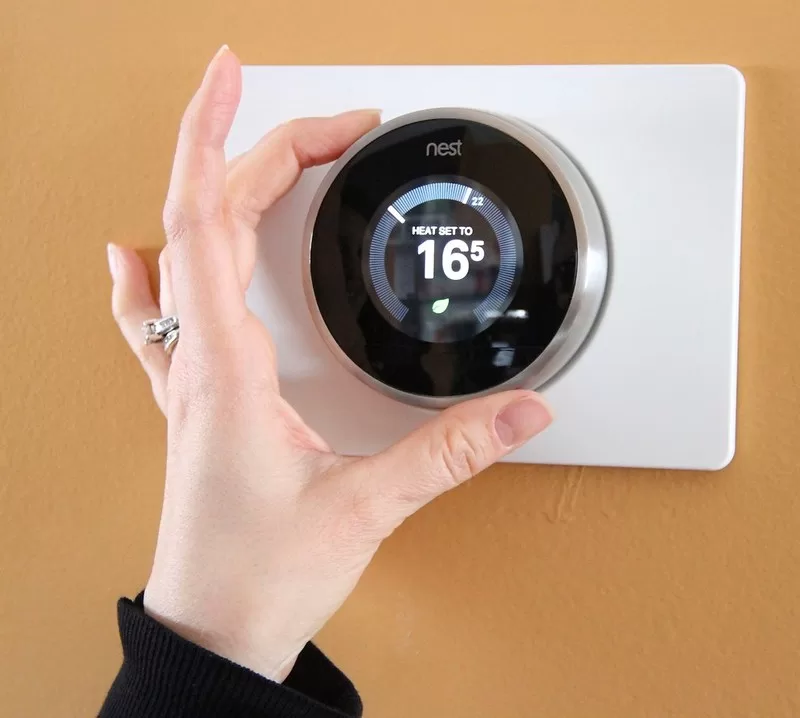
Step 6: Install Your Smart Thermostat
With everything wired up:
- Securely attach your smart thermostat’s faceplate to the mounting plate until it clicks into place.
- Check that everything aligns properly and there are no obstructions.
- If your thermostat operates on batteries, ensure they are installed correctly.
Step 7: Switch On Power Supply
The final step involves restoring power:
- Return to your circuit breaker panel and switch the power back on.
- Your smart thermostat should power up immediately and be ready for setup.
Remember that most smart thermostats require a Wi-Fi connection to access all features. Follow the instructions on your device’s screen to complete this process and enjoy your new smart home upgrade.
Why Should a Professional Install Your Smart Thermostat?

When it comes to implementing smart home upgrades, hiring a professional is often the safest and most efficient route. This is particularly true when installing a smart thermostat, which involves complex electrical work and precise settings for optimal performance. Next, we’ll delve deeper into the reasons why it’s beneficial to entrust this task to trained HVAC professionals.
1. Safety Considerations and Risk of Electrocution
Installing a smart thermostat isn’t as simple as just connecting wires; it involves working directly with your home’s electrical system. As such, there’s always the inherent risk of electrocution for those who aren’t fully versed in handling electrical wiring.
Moreover, incorrect wiring could lead to short circuits or cause a fuse to blow, potentially damaging the smart thermostat itself or other electrical systems within your home. According to an article by NCBI, “Electrical injuries often range from mild to fatal.” Furthermore, exposure to high voltage could shorten the lifespan of delicate components inside the thermostat.
2. Preservation of Warranty
Most smart thermostats come with warranties that protect you from unexpected repair or replacement costs. However, these warranties are typically contingent upon proper installation as per the manufacturer’s requirements.
Installing the device yourself might seem like a good way to save on installation costs, but it could end up being more costly in the long run if it leads to warranty nullification. This means that even if you install your AC correctly, any future issues may not be covered by the warranty simply because you did not use professional installation services.
3. Assurance of Optimal Performance
Professional HVAC technicians don’t just install your smart thermostat; they also carry out thorough inspections post-installation to ensure that everything works perfectly. This includes:
- Checking the placement of the thermostat can affect its ability to accurately read room temperatures.
- Setting up program schedules and adjusting settings according to your specific needs.
- Testing the system comprehensively to ensure it’s working at maximum capacity.
4. Access to Proper Equipment
Trained personnel have access to all the necessary tools and equipment needed for a proper smart thermostat installation. This can range from a simple screwdriver set to more specialized tools like wire strippers and voltage testers. In some cases, they may even use cameras to document wiring arrangements before making changes, ensuring a precise reference point if any issues arise later.
By contrast, attempting a DIY installation without these tools could lead to improper setup, lowering the efficiency of your thermostat or potentially causing damage.
Understanding the Risks and Requirements of Smart Thermostat Installation

Installing a smart thermostat requires dealing with electrical wiring, which, if not handled correctly, can pose a serious risk of electrocution. It’s essential to have a clear understanding of how to safely work around electrical systems before attempting such installation.
Key Considerations:
- Electrical Knowledge: A fundamental understanding of how electrical wiring works is crucial. Without this knowledge, the risks associated with electricity – such as electrocution – are significantly higher.
- Smart Thermostat Placement: Where you place your smart thermostat matters. Optimal positioning will lead to accurate temperature readings and efficient operation. Placing the device near heat sources or drafts can affect its sensing capabilities and overall performance.
Despite these challenges, installing a smart thermostat at home doesn’t have to be overly complicated. With careful planning and attention to detail, it can be a straightforward process.
Steps for Successful Installation:
- Be Intentional about Placement: Be mindful of where you install your smart thermostat. Stay away from areas near windows, doors, air vents, or direct sunlight.
- Enlist Professional Help: Engage the services of HVAC professionals for AC installation. These experts not only ensure that your device is correctly installed but also conduct comprehensive post-installation checks.
Did you know? HVAC professionals use specialized equipment to ensure accurate installation and optimal device performance.
Ultimately, while DIY installation might seem appealing due to potential cost savings, the benefits of professional installation far outweigh any initial savings. The peace of mind knowing that your smart thermostat is installed correctly and safely is invaluable.
FAQs(Frequently Asked Questions)
How to Install a Smart Thermostat at Home?
Installing a smart thermostat involves several steps, including checking compatibility with your HVAC system, turning off the power supply, removing the cover of your old thermostat, attaching the new mounting plate, connecting the wires, and finally installing your smart thermostat. It’s important to follow a detailed guide or seek professional help if you’re not confident in your DIY skills.
When to Install a Smart Thermostat?
The best time to install a smart thermostat is during mild weather when you’re less likely to rely heavily on your heating or cooling systems. This allows you to take your time with the installation process without feeling rushed to get your HVAC system back up and running.
Getting Professional Help
If you’re not confident in your DIY skills or if you’re worried about safety considerations and potential risks of electrocution, it’s advisable to seek professional help for installing a smart thermostat. Professional HVAC technicians have the necessary expertise and equipment to ensure a safe and proper installation.
Why Should a Professional Install Your Smart Thermostat?
When it comes to implementing smart home upgrades, hiring a professional for smart thermostat installation offers several benefits, including safety considerations and risk mitigation, preservation of warranty, assurance of optimal performance, and access to proper equipment.
Understanding the Risks and Requirements of Smart Thermostat Installation
Installing a smart thermostat requires dealing with electrical components and wiring, which can pose safety risks and also demand a fundamental understanding of how electricity works. It’s important to be aware of these risks and requirements before attempting the installation.
Key Considerations
Key considerations for installing a smart thermostat include having electrical knowledge, ensuring compatibility with your HVAC system, turning off the power supply before installation, and being mindful of safety precautions throughout the process.


 9")

 11")

