• DIY
    • Crafts
      • Outdoors & Garden Projects
    • Decorating
      • Exterior Painting & Decorating
      • Painting & Wallpaper
      • Room by Room
    • Furniture
      • Cabinets
      • Tables
    • Woodworking
  • Home Improvement
    • Real Estate
    • Living
    • Entertaining
    • Home Building & Design
      • Home Interior
      • Home Exterior
    • Home Management
      • Home Organization
    • Remodeling
    • Living Areas
    • Bathroom
    • Kitchen
  • Lawn & Garden
    • Lawn Care
    • Vegetable Gardening
    • Landscaping
      • Irrigating
    • Flowers
    • Trees & Shrubs
  • Categories
    • Home Improvement
    • Lawn & Garden
    • Landscaping
    • Real Estate
Housesumo.com
  • DIY
    • Crafts
      • Outdoors & Garden Projects
    • Decorating
      • Exterior Painting & Decorating
      • Painting & Wallpaper
      • Room by Room
    • Furniture
      • Cabinets
      • Tables
    • Woodworking
  • Home Improvement
    • Real Estate
    • Living
    • Entertaining
    • Home Building & Design
      • Home Interior
      • Home Exterior
    • Home Management
      • Home Organization
    • Remodeling
    • Living Areas
    • Bathroom
    • Kitchen
  • Lawn & Garden
    • Lawn Care
    • Vegetable Gardening
    • Landscaping
      • Irrigating
    • Flowers
    • Trees & Shrubs
  • Categories
    • Home Improvement
    • Lawn & Garden
    • Landscaping
    • Real Estate
featured image - Bathroom Makeover Guide How to Put Sink on Countertop
  • Bathroom
  • DIY
  • Home Improvement

Bathroom Makeover Guide: How to Put Sink on Countertop

  • Perla Irish
  • May 20, 2021
Total
2
Shares
2
0
0
0

If you are renovating your bathroom, along with the countertop, you have to focus on the sink and faucets as well.

You do not want your sink to be looking rusty while your countertop shines bright as new.  And you do not necessarily have to hire a professional to get your sink and faucet installed.
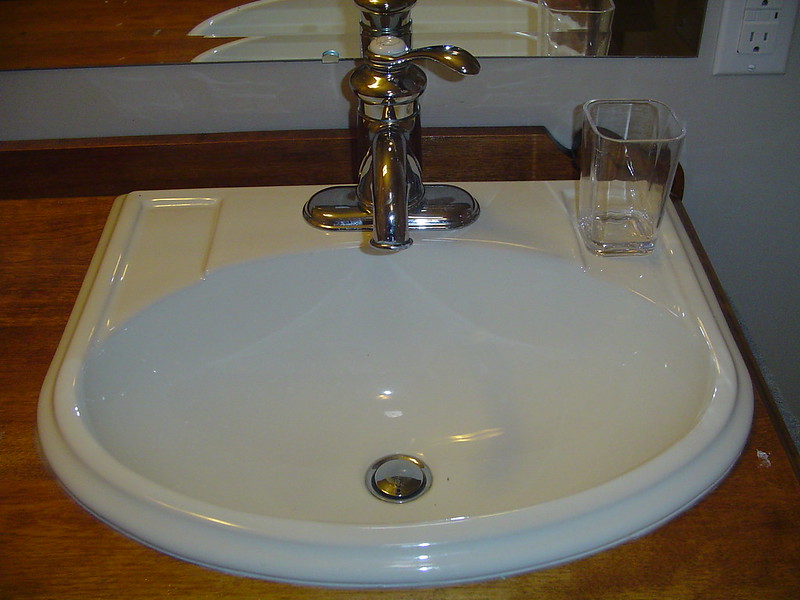
image - Bathroom Makeover Guide How to Put Sink on Countertop
Bathroom Makeover Guide How to Put Sink on Countertop

With a bit of knowledge and skill, you can do it yourself. Check out this comparison to get some inspiration and ideas for countertop options.

This article will help guide you on how to install your sink and faucet into the new kitchen countertop.

Tools You Will Need

Before we get to the process, you need to ensure that you have all the tools you need to get the job done.

  • Tubing cutter
  • Mechanic’s pliers
  • Jigsaw
  • Adjustable wrench
  • Driver or drill
  • Tape measure
  • Screwdriver
  • Hacksaw
  • Spade bit
  • Straight edge
  • Utility knife

Steps to Install Sink and Faucet

1. Getting the Right Start

Start your process by correctly measuring your current sink. If the new sink has different dimensions than the one you already have, you will have to make some adjustments.

You can draw the old sink with all the measurements and use this as a shopping reference. Additionally, take a picture of your current plumbing configuration.

If you have trouble reassembling the plumbing system, you can use this picture as a reference.

Additionally, turn off the water supply, both hot and cold, before you start. You will find the shut-off valve under the sink or basement.


Read Also:

  • What to Do About Quartz Countertop Heat Damage & How to Avoid It
  • Five Different Types of Sink Materials That You Should Consider
  • 5 Inspiring Farmhouse Kitchen Sink Ideas on a Budget
  • What Is the Most Durable Kitchen Countertop?
  • How to Fix a Leaky Bathtub Faucet

2. Locate the Countertop Opening

Place the newly bought sink in the countertop hole to ensure that it fits. If it does not fit properly, use a tile cutter or jigsaw router to make some adjustments.

  If the sink comes with larger dimensions than the existing countertop opening, put the sink upside down.

Using a jigsaw, make the new cutout for fitting. To be more precise, trace an outline first before cutting.

3. Here’s How to Measure the Sink Right

If the sink comes with a template, match it with a mark on the worktop. Place the back edge one and a half inches from the counter while keeping it parallel.

On the back lip, mark the center of your sink. Place the sink upside down and match the mark on the sink with the one on your counter.

Make the necessary adjustment to the sink while leaving 1 ½ inch between the backsplash and back edge.

Make traces around the sink before removing it. After that, measure the width of the lip and subtract it 1/8 inch.

Mark this on the inside of the sink and now connect all the marks before cutting the lines.

4. Install the Faucet

The next step is to attach the clips towards the sink bowl. Next, move the supply tubing and tailpiece from the gasket that seals the sink and faucet together.

Then feed them through a hole in the sink before you screw the nuts and washer under the sink deck.

After doing this, you need to ensure that your faucet is able to swing in an arc shape across the sink. Once you are satisfied with the swing, tighten the mounting nuts.

5. Install the Strainer

Even in this stage, the sink will remain upside down, and you will have to pack a roll of plumber putty under the lip of the strainer.

You can do that through the drain hole of the sink. Subsequently, place the housing, washer, and gasket onto the strainer and against the sink’s underside.

On the exposed thread, put a little pipe-joint compound.  Now you will need to thread the lock nut onto the strainer and then tighten it.

During this step, make sure that the strainer is in the correct position.

6. Install the Sink

Keep your sink upside down while squeezing the blob of silicone caulk across the sink’s lip. After that, you can set the sink upright and into the countertop hole.

Make sure that the front is parallel to the countertop’s front edge. Use an acorn-head supply tube to shut off valves by connecting the faucet.

You can also use braided stainless steel hoses. Now attach the hose to the threaded tailpiece of the faucet.

7. Join the Drain Pipes

In this step, you will have to set up the trap adapter onto the tailpiece of the sink drain. For this, you will have to cut the PVC pipe to connect the trap adapter to the trap.

This will also connect the drain elbow to the sink’s waistline. Twist the trap to adjust the lengths and adjustment of the pipes.

You will need to take the drain pieces out and, using a utility knife, clean the cut ends. After that, coat the piece using a PVC primer.

Once the primer is dried, you can put PVC cement on the end of the pieces and join them immediately. Hold them to ensure they remain intact.

Reassemble all the pieces and tighten the threaded connection.

8. Install Dishwasher Drain

The next step is to install the dishwasher drain line to the tailpiece waste nip and tighten the hose clamp.

Make sure to remove the excess putty from the strainer’s lip. Additionally, you will also need to remove the aerator from your faucet and run the water to its maximum pressure.

It is done to check for any leaks from the connection of the water supply and drain lines. If you find any leaks, together with the nuts until there are no more leaks.

The Bottom Line

The complex part of setting up a new sink and faucet is connecting the drain pieces between the waistline and tailpiece.

Make sure you start with the tailpiece and work your way down. Importantly, make sure you are wearing all protective gear needed to avoid injuries.

Depending on the material you are using, the type and size of the sink. You can install a new sink at around $50 and $300, and it will take you anywhere around 4 to 6 hours to complete the project.

0
0
2
0
Total
2
Shares
Pin it 2
Share 0
Tweet 0
Share 0
Share 0
Perla Irish

Perla Irish, who is more familiarly called Irish, is the Content Manager at Housesumo.com. She loves following trends around home and garden, interior design and digital marketing. Through this blog, Irish wants to share information and help readers solve the problems they are experiencing.

Related Topics
  • bathroom
  • countertops
  • drain
  • faucet
  • installing
  • pipes
  • sink
  • tools
Previous Article
featured image - Moving to Another City — the Choice of a Mover
  • DIY
  • Home Improvement

Moving to Another City — the Choice of a Mover

  • Perla Irish
  • May 20, 2021
View Post
Next Article
featured image - Tips to Protecting Your Home Against Wild Animals
  • DIY
  • Home Improvement

Tips to Protecting Your Home Against Wild Animals

  • Perla Irish
  • May 21, 2021
View Post

You May Also Like

Find out how to stop leaks and replace damaged drywall easily. Take quick action to protect your home and improve your ceiling.
View Post
  • DIY
  • Home Improvement
  • Home Renovation
  • Remodeling

How to Repair Drywall Ceiling Water Damage: A Simple Step-by-Step Guide

  • Perla Irish
  • June 3, 2025
Cozy home with open windows, a box fan blowing air out, gentle breeze flowing through, surrounded by lush green trees under a bright sunny sky.
View Post
  • DIY
  • Home Improvement
  • HVAC

Keeping the House Cool Without Air Conditioning

  • Perla Irish
  • May 31, 2025
Bright modern room with newly installed ceramic and porcelain tile flooring featuring varied patterns and grout colors.
View Post
  • DIY
  • Floor
  • Home Improvement

Everything You Need to Know Before Installing Tile Flooring

  • Perla Irish
  • May 27, 2025
A kitchen with white cabinets, stainless steel appliances, a black countertop, and three black bar stools in a house
View Post
  • DIY
  • Home Building & Design
  • Home Improvement
  • Kitchen
  • Remodeling

How to Open Up the Space Between a Kitchen and Living Room

  • Perla Irish
  • May 21, 2025
Working with a cement mixer in a construction site.
View Post
  • DIY
  • Home Building & Design
  • Home Improvement

How Do I Tell How Many Bags of Concrete I Need for a Project?

  • Perla Irish
  • May 20, 2025
Charming British home with diverse roof tiles—clay, slate, concrete, synthetic—under a cloudy UK sky, showcasing durable and stylish roofing options.
View Post
  • DIY
  • Home Exterior
  • Home Improvement

What Are the Best Roof Tiles for Your UK Home—and When Should You Replace Them?

  • Perla Irish
  • May 17, 2025
A cozy mobile home in a sunny neighborhood with palm trees, hills, and clear blue skies, highlighting affordable modern living.
View Post
  • DIY
  • Finances
  • Home Improvement

How to Qualify for a California Mobile Home Loan in 2025

  • Perla Irish
  • May 8, 2025
Modern interior door with a high-gloss red lacquer finish in a vibrant, eclectic living room during a summer afternoon, colorful artwork on the walls, patterned rug, natural light enhancing the door's bold color, showcasing elegance and durability.
View Post
  • Decorating
  • DIY
  • Home Improvement
  • Painting & Wallpaper

3 of the Best Finishes for Interior Doors

  • Perla Irish
  • April 29, 2025

Join 13,000 folks!

Get instant access to our weekly newsletter where we share the best! 100% Privacy. No Spam.

  • Disclosure
  • Privacy Policy
  • Terms of Use
  • About
  • Sitemap
  • Contact Us

Input your search keywords and press Enter.