• DIY
    • Crafts
      • Outdoors & Garden Projects
    • Decorating
      • Exterior Painting & Decorating
      • Painting & Wallpaper
      • Room by Room
    • Furniture
      • Cabinets
      • Tables
    • Woodworking
  • Home Improvement
    • Real Estate
    • Living
    • Entertaining
    • Home Building & Design
      • Home Interior
      • Home Exterior
    • Home Management
      • Home Organization
    • Remodeling
    • Living Areas
    • Bathroom
    • Kitchen
  • Lawn & Garden
    • Lawn Care
    • Vegetable Gardening
    • Landscaping
      • Irrigating
    • Flowers
    • Trees & Shrubs
  • Categories
    • Home Improvement
    • Lawn & Garden
    • Landscaping
    • Real Estate
Housesumo.com
  • DIY
    • Crafts
      • Outdoors & Garden Projects
    • Decorating
      • Exterior Painting & Decorating
      • Painting & Wallpaper
      • Room by Room
    • Furniture
      • Cabinets
      • Tables
    • Woodworking
  • Home Improvement
    • Real Estate
    • Living
    • Entertaining
    • Home Building & Design
      • Home Interior
      • Home Exterior
    • Home Management
      • Home Organization
    • Remodeling
    • Living Areas
    • Bathroom
    • Kitchen
  • Lawn & Garden
    • Lawn Care
    • Vegetable Gardening
    • Landscaping
      • Irrigating
    • Flowers
    • Trees & Shrubs
  • Categories
    • Home Improvement
    • Lawn & Garden
    • Landscaping
    • Real Estate
Featured of How to Install Crown Molding on Kitchen Cabinets
  • DIY
  • Home Improvement
  • Kitchen

Instructions to Install Crown Molding on Kitchen Cabinets

  • Perla Irish
  • March 2, 2018
Total
167
Shares
167
0
0
0

Crown moldings will add a degree of elegance to kitchen cabinets, and can be accomplished with intermediate carpentry skills. Learn how to install crown molding on your kitchen cabinets. Be advised, however, that a fairly extensive set of tools is necessary for this project.
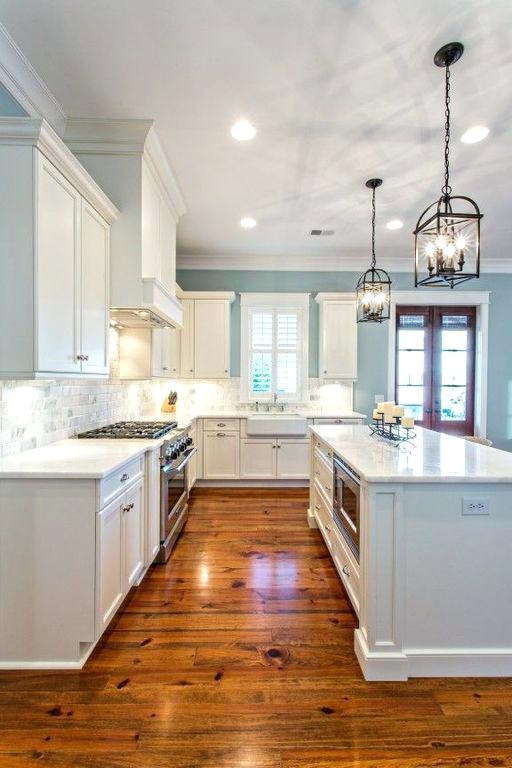
Instructions How to Install Crown Molding on Kitchen Cabinets

A General Guide on How to Install Crown Molding on Kitchen Cabinets

Learn how to install crown molding on kitchen cabinets with this general guide covering the installation from start to finish. The required tools, general techniques, and finishing the installation are discussed.

Tools Required for Crown Molding Installation

To install crown moldings on your kitchen cabinets, you should have the following tools:

  • Table saw
  • Miter saw
  • Finish nailer and compressor
  • Coping saw
  • Carpet knife or other sharp knife
  • Caulking gun
Cabinets with Crown Moulding - How to install crown molding on kitchen cabinets
Cabinets with Crown Moulding (How to Install Crown Molding on Kitchen Cabinets)

Installing Nailer Strips

Start by assessing the cabinets. Unless there is ample room above the doors to attach a crown molding, or if you are using a very wide crown molding, you will need to install a nailer strip to support the installation. You can use 1” x 4” lumber, and rip these into two or three strips.

These should then be nailed to the top of the cabinets (drive nails from the inside of the cabinet) and they should be flush with the face of the cabinets.

If you are using very wide crown molding, you can also use 2” x 4” to support the installation by ripping it in half (into 2” x 2” pieces) and then ripping each piece to the angle of the crown molding installation on one edge (usually 45 degrees).

This will help keep the alignment of the molding constant. It may be necessary to install additional spacers to align these strips to the correct height. Test the application with a small piece of crown molding for clearance over cabinet doors before you attach anything.

Must Read:

  • Kitchen Cabinet Refacing, Give Your Kitchen Cabinets a Makeover
  • How to Raise the Height of Kitchen Counters
  • Guide to Installing Lighted Crown Molding

Installing the Crown Molding on Kitchen Cabinets

Once your supporting nailer strips are installed, the crown molding installation can start. First, if you’ve never cut crown molding before, then you will need to make practice cuts.

Crown molding needs to be cut by setting it against the saw fence and the table of the miter saw at the correct angle and making the cut in the reverse direction of how it would intuitively seem, upside-down. There are several informational sites and videos on this topic, which is unfortunately too in-depth to cover here.

Start the installation from one end, and work your way to the other. Do not work from two directions, as this will unnecessarily complicate the process.

The easiest way to measure the pieces of molding is by making any necessary cuts on one end, fitting the piece in place, and marking the spot for the next cut with a pencil.

You should also have pieces handy that are cut for 45-degree inside and outside angles so that you’ll be able to check each piece that you install as you progress. Do not attach anything without making sure that it has been cut correctly. Apply a bead of caulk to the back of each molding before attaching it with nails, and make sure that the installation stays level.

Use the coping saw and knife to cut the inside edge if pieces aren’t fitting together well at inside angles.

Finishing the Installation

Finish the installation by caulking seams and filling in nail holes. If there are nails that stick out, use a nail punch to drive these in.

Note that if you are planning on staining the molding, do not use caulk or putty until after you’re finished staining. Some types of putty will turn out a completely different color than the wood, and will stick out. Match a putty to the stain afterward for best results.

If you are painting, or using moldings that are a factory match to your cabinets, use the closest matching caulking. You can even mix caulk to a custom color when filling in nail holes.

This is a general guide on how to install crown molding on kitchen cabinets, and not exhaustive of all of the steps and techniques. If you are not sure of your skills or have never worked with crown molding before, then it is advisable to make sure to understand the cutting techniques and the angles involved before attempting this installation.
0
0
167
0
Total
167
Shares
Pin it 167
Share 0
Tweet 0
Share 0
Share 0
Perla Irish

Perla Irish, who is more familiarly called Irish, is the Content Manager at Housesumo.com. She loves following trends around home and garden, interior design and digital marketing. Through this blog, Irish wants to share information and help readers solve the problems they are experiencing.

Previous Article
Featured of R Values to Determine the Best Insulation for a House
  • DIY
  • Home Improvement
  • Remodeling

Determining What is the Best House Insulation: R Values and Types of Insulation

  • Perla Irish
  • March 2, 2018
View Post
Next Article
Featured of What is the Best Home HVAC System
  • DIY
  • Home Exterior
  • Home Improvement

Learning about the Best HVAC Systems

  • Perla Irish
  • March 3, 2018
View Post

You May Also Like

Find out how to stop leaks and replace damaged drywall easily. Take quick action to protect your home and improve your ceiling.
View Post
  • DIY
  • Home Improvement
  • Home Renovation
  • Remodeling

How to Repair Drywall Ceiling Water Damage: A Simple Step-by-Step Guide

  • Perla Irish
  • June 3, 2025
Cozy home with open windows, a box fan blowing air out, gentle breeze flowing through, surrounded by lush green trees under a bright sunny sky.
View Post
  • DIY
  • Home Improvement
  • HVAC

Keeping the House Cool Without Air Conditioning

  • Perla Irish
  • May 31, 2025
Bright modern room with newly installed ceramic and porcelain tile flooring featuring varied patterns and grout colors.
View Post
  • DIY
  • Floor
  • Home Improvement

Everything You Need to Know Before Installing Tile Flooring

  • Perla Irish
  • May 27, 2025
A kitchen with white cabinets, stainless steel appliances, a black countertop, and three black bar stools in a house
View Post
  • DIY
  • Home Building & Design
  • Home Improvement
  • Kitchen
  • Remodeling

How to Open Up the Space Between a Kitchen and Living Room

  • Perla Irish
  • May 21, 2025
Working with a cement mixer in a construction site.
View Post
  • DIY
  • Home Building & Design
  • Home Improvement

How Do I Tell How Many Bags of Concrete I Need for a Project?

  • Perla Irish
  • May 20, 2025
Charming British home with diverse roof tiles—clay, slate, concrete, synthetic—under a cloudy UK sky, showcasing durable and stylish roofing options.
View Post
  • DIY
  • Home Exterior
  • Home Improvement

What Are the Best Roof Tiles for Your UK Home—and When Should You Replace Them?

  • Perla Irish
  • May 17, 2025
A cozy mobile home in a sunny neighborhood with palm trees, hills, and clear blue skies, highlighting affordable modern living.
View Post
  • DIY
  • Finances
  • Home Improvement

How to Qualify for a California Mobile Home Loan in 2025

  • Perla Irish
  • May 8, 2025
Modern interior door with a high-gloss red lacquer finish in a vibrant, eclectic living room during a summer afternoon, colorful artwork on the walls, patterned rug, natural light enhancing the door's bold color, showcasing elegance and durability.
View Post
  • Decorating
  • DIY
  • Home Improvement
  • Painting & Wallpaper

3 of the Best Finishes for Interior Doors

  • Perla Irish
  • April 29, 2025

Leave a Reply Cancel reply

Your email address will not be published. Required fields are marked *

This site uses Akismet to reduce spam. Learn how your comment data is processed.

Join 13,000 folks!

Get instant access to our weekly newsletter where we share the best! 100% Privacy. No Spam.

  • Disclosure
  • Privacy Policy
  • Terms of Use
  • About
  • Sitemap
  • Contact Us

Input your search keywords and press Enter.