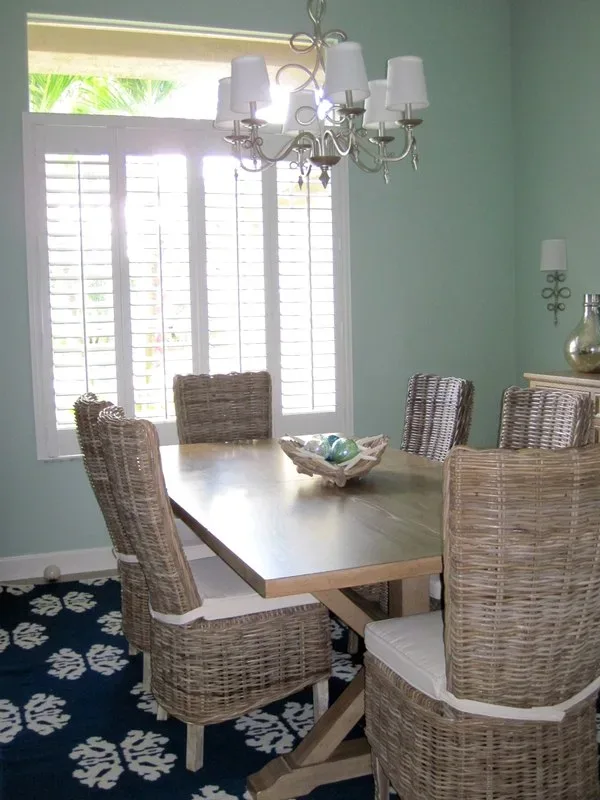
Interior shutters can be used as a window decoration instead of curtains and blinds. They can be fitted to most internal recessed or flush windows, through carrying out the basic manufacturer’s instructions on how to install interior shutters.
Some manufacturers supply the shutters with the hinges attached, which saves a lot of time and effort in fixing them. Inside a lot of older properties, the windows are not plumb, but there is a little adjustment in the shutter hinge that secures them to the wall or casement to obtain the best visual fit.

A Guide on How to Install Interior Shutters on Your Windows
Interior shutters fitted to the inside of recessed or flush windows are normally installed vertically, being designed as a window dressing. However, most of them are also functional with either the whole shutter opening inwards, or with just the louvers within the shutter that open and close.
Read Also:
Open and Shut Them
Interior shutters can be supplied in several types, styles and materials being easily fitted to the internal windows of the house by the average DIY person.
In the old days, the shutters were installed as a deterrent to intruders, also giving a degree of light control and privacy. These were made from solid wood being heavy and cumbersome units, far removed from today’s modern, lightweight versions.
The types, styles, and materials of the shutters will be examined in the following sections, along with instructions on how to install interior shutters on your windows.
Styles and Materials
There are two main types of internal shutters, solid or louver and these can be supplied already manufactured from wood, faux-wood or vinyl.
Types
Solid
Solid shutters can have several styles such as raised panel and are hinged to open inwards. They either block out the light completely or are opened to admit full light. These are not very popular, being used in specialist applications rather than for decorative purposes. An example is shown below.

Louvered
These come in two styles; Traditional and Plantation. These are similar in that they are both hinged to open inwards, as well as having adjustable louvers to admit different degrees of light and heat.
The main difference between them is in the sizes of the louvers. The Plantation louvers can be 11/4″ thick and up to 51/2″ wide; whereas the Traditional louvers are much thinner at 3/4″ thick and 11/8″ wide.
Examples of the Traditional and Plantation styles are shown below.


Materials
Wood
Basswood is recommended because of its close-grained hard wearing properties, the components need to be coated/stained at the manufacturing stage.
Faux-wood
This is kiln dried wood with a covering of vinyl, being less expensive than wood, having a range of self-colors.
Vinyl
Components made from 100% vinyl, are the cheapest alternative to wood or faux-wood; available in a range of self-colors.
Fitting Instructions
Safety
Handling and fitting the shutters may require two people, depending on the size and weight of the shutters. Eye protection should be worn when using hand-tools or drilling holes in the casement wallboard or cement walls.
Fitting Hinges to Shutters (Recessed Windows)
If the hinges are not fitted to the shutters by the manufacturer, (there are normally 3 hinges/shutter) these should be fitted as follows:
- Measure the length of the shutter and leaving a gap of around 2″ from the top and bottom, mark the location of the middle hinge in the center of the shutter edge, then the top and bottom hinge positions also on the edge of the shutter.
- Scribe around the perimeter of each hinge at their relevant locations with a sharp pencil.
- Using a 1” wood chisel, cut around each hinge shape and then form a notch the same depth and width as the hinge. The hinges can then be fitted into this and fixed using the brass chamfered screws. The hinges should finish up being flush to the shutter edge, as shown below:

Fitting Hinges to Shutters (Flush Windows)
- Measure and mark off hinges as before, only this time on the back of the frame.
- Cut around each hinge shape and then fit the hinges using the brass chamfered screws. Again, the hinges should now be flush with the shutter frame as shown below:

Fitting Shutters to Recessed Window
- Lift one shutter into position and slip a strip of 1/16″ plywood between the bottom of shutter frame and windowsill. This will ensure there is an adequate clearance to open and close shutters.
- Open the center hinge fully and hold it against the casement. Mark off the location of the holes onto the casement.
- If the casement is wallboard, drill the holes with a correct-sized drill to suit wall plugs. Insert wall plugs into the holes and lift shutter back into position.
- If the casement is wood, then the hinges can be screwed directly into the wood.
- Repeat the operations for the other two hinges; then fit the other shutter.
- Now, stand back and check if the shutters are level and joining with a very small gap in the center. A slight adjustment can be made by slackening off the casement hinge screws then re-tightening. Remember, some of the older windows may not be perfectly plumb and level, so it may not be possible to get the desired perfection.
- Finally, fit the latch to one shutter and its catch to the other shutter, and screw in the opening/closing knob.
A sketch of this is shown below:

Fitting Shutters to Flush Windows
- The shutter should be held in the open position equidistant above the top and bottom of the window edges and covering the side edge by about 2 inches.
- The hinges are moved to their open position and the screw holes marked through onto the wall.
- The holes are then drilled to suit the wall plugs and the plugs are to be inserted
- The hinges are then screwed onto the wall using brass countersunk screws.
- Stand back and examine the shutter for levelness, then if satisfactory; fit the other one in the same manner.
- Once again check for levelness and alignment; a small amount of adjustment can be made available in the wall hinges’ screws.
- Finally, fit the latch to one shutter and its catch to the other shutter, and screw in the opening/closing knob.

After learning how to install interior shutters, you will be able to impress your guests by adding elegance to your home’s decor. Who knows, they may even ask you to do the same for their home!
References
- General Information on Shutters: http://www.allaboutshutters.com/shutter-history.htm


1 comment
My brother has been thinking of making some upgrades to his beach house before we settle in for vacation. I like how you stated that Louvered shutters can have adjustable settings to have different levels of heat and light because we’ve been keeping things in the house as cool as possible so that we won’t have to put all the strain on our air conditioning system. I’ll be sure to look for any home contractors who can offer us similar blinds and shutter products so we can get them installed before vacation. Thank you!