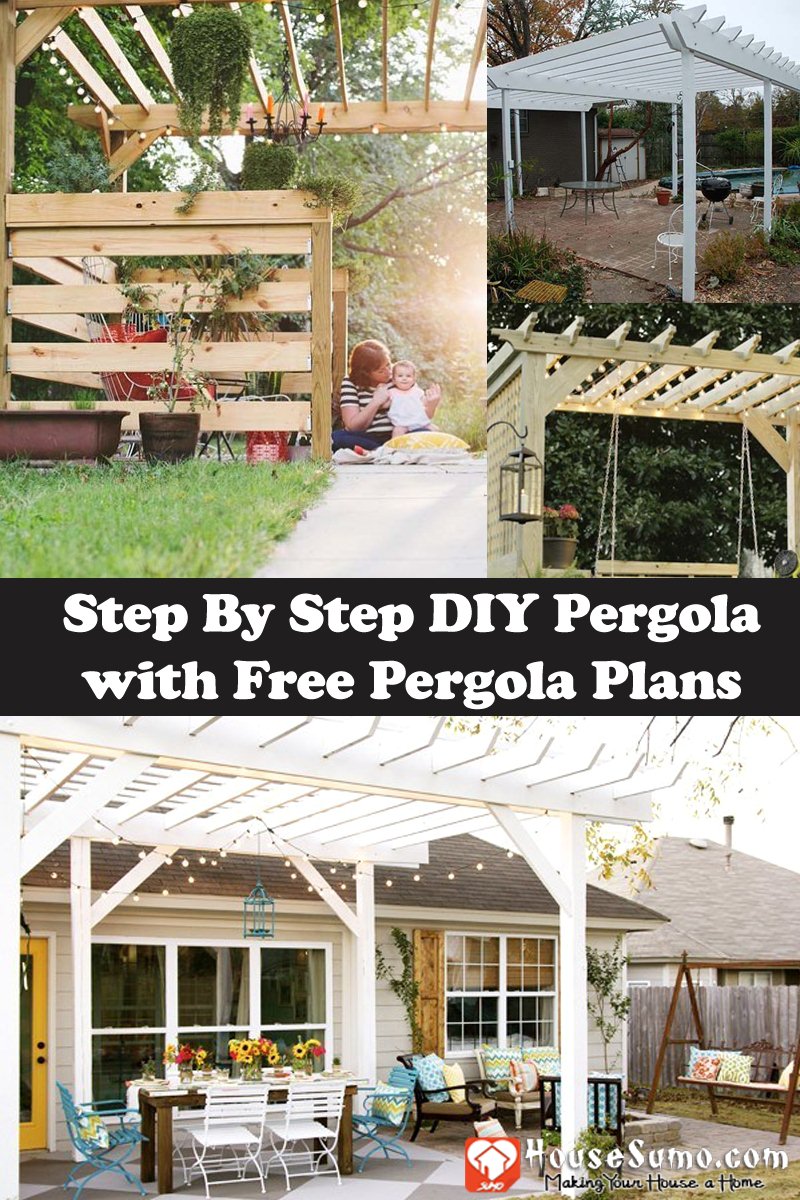
Introduction
Ah, the classic pergola — not to be confused with its enclosed cousin, the gazebo. This open-air structure often acts as a striking centerpiece in gardens and patios, providing a touch of architectural sophistication that’s both functional and alluring. With its sturdy columns and an inviting lattice roof, a pergola is the perfect framework for climbing plants, offering a blend of sun and shade that’s just right for your outdoor lounging needs.
Roll up those sleeves because building your own DIY pergola is not only a budget-friendly venture but also an incredibly satisfying one. Whether you’re looking to create a cozy nook for your morning coffee or an elegant space for evening soirees, this step-by-step guide will escort you through crafting a piece de resistance that could very well become the envy of the neighborhood.
Before we dive into the details, here are a few things you should know:
- Time Commitment: Depending on the complexity and size, this project can take anywhere from a weekend to a full week.
- Budget: Costs can vary widely based on materials and design choices, but anticipate spending between $500 to $4,000.
Remember, with patience and precision, your backyard or patio will soon boast a DIY pergola that’s nothing short of spectacular. Let’s get started!
Also Read: Things to Keep in Mind Before Installing A Pergola
1. Planning and Preparation
Think of this phase as the blueprint for your upcoming pergola masterpiece. It involves landscape assessment, determining the ideal pergola location, compiling a comprehensive material list, and exploring design plans.
Assessing Your Outdoor Space
Begin by assessing your outdoor space. Consider the overall layout, natural elements, and any existing structures. This understanding forms the foundation for deciding where to place your pergola. Remember, local regulations or permits may come into play, so make sure to do some homework here!
Choosing the Perfect Location
Next up is choosing the perfect location for your pergola. Sunshine is a significant factor. You want a spot that catches the right balance of sunlight and shade throughout the day. Consider placing your pergola near established trees for natural shade or adjacent to your house to create a seamless indoor-outdoor living area.
Determining the Size
Once you’ve dotted the i’s on location, it’s time to talk size. The dimensions of your pergola should be dictated by its intended use. Will it host large gatherings or serve as a cozy reading nook? Its purpose should guide its size.
Compiling Your Material List
With location and size locked down, let’s move on to materials. Your list will typically include:
- Lumber: Posts, beams, purlins, and rafters.
- Hardware: Screws, bolts, washers.
- Concrete: For setting posts in the ground.
Exploring Design Options
Now that all these elements are in place, channel your inner architect and explore design options. Many pre-made plans are available online that cater to various styles and sizes. But there’s no rule against creating your own plan if you’re feeling particularly inspired!
This stage sets the groundwork (pun absolutely intended) for building a pergola that not only enhances your backyard aesthetics but also aligns perfectly with functional requirements.
Also Read: Aluminum Pergolas: The Perfect Way to Enjoy the Outdoors in Style
2. Gathering Materials and Tools
Choosing the Right Wood
When starting your pergola project, it’s important to select the best wood for the job. Here are two popular options:
- Cedar: This type of wood is known for its natural resistance to decay, making it highly durable. It also has a classic look that can enhance any outdoor space.
- Pressure-Treated Pine: If you’re on a budget, this is a cost-effective choice. It’s treated with chemicals to protect against rot and insects, ensuring it stands up well to the elements.
Consider both your budget and desired aesthetic when making your decision.
Handling the Wood
To ensure your lumber stays in good condition and is ready for use, keep these tips in mind:
- Measure Twice, Cut Once: Before cutting any wood, always double-check your measurements. This helps avoid mistakes and wasted materials.
- Proper Storage: Store your lumber off the ground and cover it with a tarp or plastic sheeting. This prevents warping or rotting caused by moisture.
- Safety First: Whenever you’re handling tools or cutting wood, wear protective gear like goggles and gloves to protect yourself from accidents.
Preparing for Concrete Work (If Needed)
If your pergola will be built on a new foundation, you’ll also need to plan for concrete work. Here’s what you need to know:
- Calculating Concrete: Measure the correct amount of concrete mix needed for each post hole. Typically, an 80-pound bag of pre-mix concrete is enough.
- Mixing and Pouring: Follow the instructions on the concrete mix bag to create a solid base. Pour it into the post holes evenly and let it dry according to the recommended time.
Essential Tools for Pergola Construction
Having the right tools makes any project easier. Here are the must-have tools for building a pergola:
- Power Drill & Bits: Used for drilling holes and driving screws into the wood.
- Circular Saw or Hand Saw: For cutting lumber to the correct lengths.
- Level: Ensures that your posts and beams are perfectly straight and aligned.
- Measuring Tape: Provides precise measurements during every stage of construction.
Preparing the Installation Area
Before you start building, make sure the area is ready:
- If you’re installing your pergola on an existing concrete patio, check that it’s level and clean.
- For ground installations, use stakes and string to mark out the area accurately.
By carefully choosing materials, handling them correctly, and gathering the necessary tools, you’ll be well-prepared for building your pergola. Let’s move on to the next step: laying down solid foundations!
Also Read: Top 10 Potted Plants for Your Pergola Shade
3. Setting Up the Foundation
Before your pergola can stand tall and proud, it needs a solid foundation. Just like the roots of a mighty oak tree, your pergola’s stability starts underground.
Digging Post Holes
Assess the Terrain
Before you start digging, check for underground utilities. You wouldn’t want to disrupt any lines or pipes.
Mark Your Spots
Use stakes and string to mark where your post holes will go, ensuring they’re spaced evenly according to your design plans.
Get the Right Depth
The depth of your post holes should be about 1/3 the height of your posts for optimal support. In frost-prone areas, dig down below the frost line to prevent heaving during freeze-thaw cycles.
Pouring Concrete Footings
Setting up Forms
If required, set up cylindrical forms to shape your concrete footings.
Mixing Concrete
Mix concrete to a firm, workable consistency—think peanut butter—and pour it into the holes around your posts, leaving about 3-4 inches from the ground level.
Securing Posts
Place your posts in the center of the wet concrete. Use a level to make sure they’re plumb and brace them with temporary supports while the concrete sets.
Anchoring Posts
For those installing on an existing patio or firm ground:
- Select anchors suitable for your surface. Metal post bases with anchor bolts work well for concrete surfaces.
- Drill into your patio or surface according to anchor specifications and attach the anchors securely.
Remember that patience is key throughout this process – concrete takes time to cure, so don’t rush it. Allowing adequate time here ensures a sturdy base that will support your pergola for years.
Armed with a robust foundation, you’re now ready to bring the structure above ground and witness your pergola take shape in the forthcoming steps.
4. Building the Pergola Frame
Now that you have laid the foundation, it’s time to construct the main structure of your pergola. This involves installing headers and setting up the support posts that will form the frame of your pergola.
Creating the Basic Frame Structure
Positioning Support Posts
Start by placing the 4×4 or 6×6 support posts into the post holes or anchors that you prepared earlier. Make sure they are perfectly vertical by using a spirit level.
Securing with Braces
To keep the support posts stable while you work, temporarily brace them in position.
Measuring and Cutting Headers
Measure the length needed for your headers, which are sturdy beams that will connect the tops of your support posts.
Attaching Headers to Posts
Secure the headers to the top of each pair of support posts, making sure they are level. You can use carriage bolts or lag screws for a strong connection.
Adding Purlins and Top Stringer Boards
Once you have set up the headers, it’s time to add horizontal pieces called purlins and top stringer boards to reinforce the structure.
Attaching Purlins for Support
- Lay out where your purlins will be placed on top of the headers. These horizontal pieces provide additional support for your pergola and can also be used to hang plants or curtains.
- Space the purlins evenly across the headers for a balanced look and effective shade coverage.
- Attach each purlin securely with exterior-grade screws or nails, checking their alignment as you go along.
Installing Top Stringer Boards for Style
The final touch in framing is to install top stringer boards on top of the purlins. These boards not only add a decorative element but also provide extra strength to your pergola.
- Determine the spacing between each stringerboard based on your desired shade and visual effect. Usually, they are placed closer together compared to the purlins.
- Attach the stringer boards on top of the purlins along the length of your pergola, creating a finished look for the structure.
Remember, this step requires careful attention to detail. All the components should fit together neatly to ensure both an appealing appearance and a sturdy construction. Once every beam, post, and board is securely in place, your pergola’s frame will take shape and provide a cozy outdoor space for relaxation and entertainment.
Also Read: A Perfect Harmony: the Relationship Between Pergolas and Garden Furniture
5. Adding Decorative Elements and Finishing Touches
As the sturdy framework of your pergola stands proud, it’s time to give it personality and longevity. Here’s how you can add those creative flourishes that make it uniquely yours:
Accentuate with Design Elements
- Lattice Panels: Attach wooden lattice panels between the posts for a classic look that also supports climbing plants. If you’re feeling fancy, why not trim the lattice edges to mirror the contours of your pergola?
- Carved Post Caps: Crown each post with carved caps, which can range from simple geometric shapes to intricate designs, adding instant elegance.
- Trim Details: Consider adding trim around the beams and rafters for a more finished appearance. Trims can be cut to any shape, providing endless possibilities for customization.
Protecting Your Work with Painting/Staining
Applying a finish isn’t just about looking pretty—it’s about practicality and protecting your investment against the elements.
- Choosing Your Finish: Decide between paint or stain. The stain will enhance the natural beauty of the wood, while the paint provides a uniform color and perhaps a bolder statement.
- Preparation Is Key: Before you start, ensure that every wooden surface is sanded smooth and free from debris.
- Weather-Resistant Products: Opt for products specifically designed for outdoor use. They’ll have UV blockers to reduce fading and compounds to ward off mold and rot.
- Consistent Application: Use brushes or rollers for even coverage. If staining, consider a sprayer for larger areas, which can provide a more consistent application without brush marks.
- Regular Maintenance: Remember, painted surfaces might need more frequent touch-ups than stained ones due to chipping over time.
By incorporating design elements and applying a weather-resistant finish, your pergola won’t just stand out; it will stand up—to rain, wind, and sun—year after year. With these decorative details complete, your pergola is not just a structure but a testament to craftsmanship and style.
6. Finalizing the Pergola Structure
When your pergola starts to resemble the vision you had in your head, it’s time to cement that relationship between its parts with some serious securing tactics. Securing joints and checking stability are the twin pillars of ensuring a long-lasting and safe structure.
Reinforcing Joints and Connections
- Choose Screws over Nails: Always opt for screws when you want to hold something together. Screws are the steadfast friends of woodwork; they grip tighter and last longer than nails.
- Utilize Metal Brackets and Plates: Metal brackets and plates can be a pergola’s best allies. The right angle brackets, T-plates, or post bases will fortify those crucial connections, making them more resistant to stress and weather forces.
- Ensure Everything is Tight: Periodically check all hardware during construction to ensure everything is snug as a bug. Loose connections now could mean a wobbly pergola later.
Checking Stability
- Use a Level: Whip out that level! Your pergola should not only look symmetrical but also be perfectly horizontal and vertical where intended. Make any necessary adjustments before the final tightening.
- Employ Temporary Supports: These are like training wheels for your pergola. Use them to keep things steady while you secure every part of the structure. Once everything is locked in place, you can bid these supports farewell.
- Perform the Shake Test: Give your structure a gentle but firm shake to test its rigidity. The less movement, the better. If your pergola sways like it’s dancing in the wind, revisit those joints and supports.
With each screw turned and every bracket checked, your DIY masterpiece inches closer to completion. It stands proudly — or it will as soon as you’ve made sure every piece is exactly where it should be, solidly connected, level, and ready to face the elements (and the envious glances of neighbors). Now, take a step back; admire your handiwork before moving on to give it those final flourishes that make it uniquely yours.
7. Extended Guide: Enhancing Your Pergola with Additional Features
Crafting a pergola that not only stands out but also caters to your specific needs might call for a few extra touches – especially when it comes to beating the heat with some additional shade or creating a harmonious look with surrounding structures.
Extending with Beams/Rafters
Extra Shade Coverage
To make your pergola even more comfortable, you can extend it with beams or rafters to provide extra shade. Here’s how:
- Measure Precisely: Start by calculating the distance you want to extend. Consistency is key for a balanced look.
- Choose Matching Materials: Opt for beams or rafters that complement the existing structure. If your pergola has a rustic charm, pick timber that matches this style.
- Install with Care: Secure each new beam or rafter at uniform intervals. This precision will not only look professional but also ensure an even distribution of shade.
Integrating with Patio/Deck
A Cohesive Outdoor Space
Integrating your pergola with your patio or deck can turn it from a standalone feature into the focal point of your outdoor living area.
Stone Patio
A pergola on a stone patio has a timeless elegance. Here are some ways to achieve an integrated look:
- Use stone cladding on the posts of your pergola.
- Match the color tone of your patio stones with your pergola for a seamless blend.
Wood Deck
When integrating your pergola with a wood deck, it’s important to create continuity in design. Here’s how:
- Stain or paint the pergola in a color that complements the decking material.
- This creates an inviting and unified space.
Whether you’re extending your pergola with beams for more shade or integrating it with your patio or deck, these enhancements are not just about looks but also functionality. They’re about creating spaces where special moments happen – from sunny afternoons to starry nights.

Maintaining Your DIY Pergola
Building a pergola is just the beginning; keeping it in top-notch condition is where the real work begins. Here are some maintenance tips to ensure that your handiwork stands the test of time and the elements:
1. Regular Cleaning
- Sweep or blow off leaves and debris: These can accumulate over time, leading to moisture retention and potential wood decay.
- Use a mild soap solution: Annually, give your pergola a gentle scrub with a soft brush and soapy water to remove dirt and grime.
- Rinse thoroughly: After scrubbing, rinse your pergola with a hose to prevent soap residue from attracting more dirt.
2. Inspection of Hardware
- Check bolts and screws: Tighten any that have become loose due to weather changes or wood movement.
- Look for rust or corrosion: Replace any hardware showing significant wear to prevent structural weakness.
- Inspect for wood damage: Keep an eye out for rot, insect infestations, or splintering, especially around connections.
3. Protective Measures
- Reapply finishes as needed: Whether you’ve chosen paint or stain for your pergola, it will need refreshing every few years to protect the wood from UV rays and moisture.
- Trim surrounding plants: Overgrown vegetation can trap moisture and encourage rot, so keep nearby plants trimmed back.
By sticking to these care practices, you’ll extend the life of your pergola and keep it looking beautiful. Remember, consistent upkeep is easier than dealing with major repairs down the line.
Conclusion
Roll up those sleeves and get ready to bask in the glow of accomplishment; you’re about to build a pergola that’s as unique as your thumbprint. This isn’t just any backyard project, it’s a ticket to creating an outdoor sanctuary that whispers your name. Imagine the string lights twinkling above on a warm summer evening or the rustle of vines you’ve trained to waltz up the posts.
Here’s the cherry on top: each beam you secure, every cut you make, is a step closer to crafting not just a structure, but an experience. A DIY pergola isn’t merely wood and hardware—it’s a backdrop for birthdays, barbecues, and the best parts of being outdoors.
Don’t wait for someday—seize today! The benefits of this versatile beauty are many:
- Aesthetic Appeal: Elevate your garden’s charm quotient.
- Functional Flair: Hello, a new favorite spot for relaxation!
- Bragging Rights: Yes, you built it yourself—and it shows.
Armed with this guide and a dash of DIY spirit, transform that patch of grass into a conversation starter, an eye-catcher, and a little slice of heaven. Your future self will thank you as you lounge under your hand-built haven, sipping something cold and thinking, “Yes, I did that.”
External Links with Free Pergola Plans
- Ana White: Weatherly Pergola Plan
- DIY Pergola from PopularMechanics: How to Build a Pergola Right in Your Backyard
- DIY Network: Basic Pergola Plan
- A Beautiful Mess: Free Pergola Plan
- DIY Pergola from Home Stratosphere: Free Deck With Pergola Plan
- Free Pergola Plan with a Canopy by Lowe’s
- How To Specialist’s Free Pergola Plan
- Free Standing Pergola Plan by Ron Hazelton
- Free Pergola Plan to Go Over a Patio by Ron Hazelton
- Box Type Free Pergola Plan from BuildEazy
- Free Pergola Plan with Planters from Better Home and Garden
Citation
- frazeeg. “How to Build a Pergola on a Concrete Patio in Two Days : 18 Steps (with Pictures) – Instructables.” Instructables, n.d., https://www.instructables.com/How-to-Build-a-Pergola-on-a-Concrete-Patio-in-Two/. Accessed 25 Feb. 2024.
- “14 Free Pergola Plans You Can DIY Today.” The Spruce, n.d., https://www.thespruce.com/free-pergola-plans-1357132. Accessed 25 Feb. 2024.
- Better Homes & Gardens. “How to Build a Pergola for a Dreamy Outdoor Getaway.” Better Homes & Gardens, n.d., https://www.bhg.com/home-improvement/outdoor/pergola-arbor-trellis/build-a-pergola/. Accessed 25 Feb. 2024.
- Family Handyman. “How to Build a Pergola: Pergola Plans (DIY).” Family Handyman, 10 Apr. 2023, https://www.familyhandyman.com/project/how-to-build-a-pergola/. Accessed 25 Feb. 2024.
- oldworldgardenfarms. “How To Build A Pergola With Ease – The Simple Secrets To Success!” Old World Garden Farms, 27 Feb. 2020, https://oldworldgardenfarms.com/2020/02/27/build-a-pergola-plans/. Accessed 25 Feb. 2024.
FAQs (Frequently Asked Questions)
The first phase of building a pergola is planning and preparation. This involves assessing your outdoor space, choosing the perfect location, determining the size, and compiling your material list.
When assessing your outdoor space for a pergola, consider the overall layout, sun exposure, and any potential obstacles or obstructions.
To choose the perfect location for your pergola, consider factors such as sun exposure, proximity to the house, and the overall layout of your outdoor space.
When choosing the right wood for a pergola project, it’s important to select durable, weather-resistant lumber that can withstand outdoor conditions.
The recommended depth for post holes when setting up the foundation for a pergola is about 1/3 the height of the posts.
You can add decorative elements to a pergola by incorporating features such as lattice panels and applying painting or staining finishes to protect and enhance its appearance.