You can create your own stone pillar at the end of your driveway, near a fence corner or gate, or even as a stylish mailbox post.
Stone pillars not only enhance the beauty of your landscape but also serve as a lasting statement piece. With the use of cement blocks and stone veneer, you have the opportunity to craft your very own decorative column.
Whether it’s to add flair to your driveway entrance, serve as a distinctive mailbox post, or accentuate the corner of a wrought iron fence, a stone column or pillar is an excellent choice for making a bold impression.
Concrete blocks, commonly known as cinder blocks, provide a sturdy foundation for covering with fieldstone or cultured stone. Follow these steps to build your own stone pillar.
Stone Columns
A stone column on the end of your driveway or at a fence corner not only looks great, but it also offers a place to put your house number, light, and maybe even a mailbox.
Even if you’re not a stonemason, you can probably build your own using a concrete base, cement blocks for a column and stone veneer to cover the outside.
The project takes three to four days depending on how large you decide to build the column and the type of veneer you want to put on it. Let’s take a look at how to build a decorative stone column.
The Base
Planning the Footing
Before you start digging, it’s important to plan the footing. Decide whether you want the pad to be visible at ground level or hidden 4 inches below the surface with grass growing over it.

Laying the Crushed Stone Base
- Lay a 6-inch deep crushed stone base that is a foot wider in all directions than the concrete pad for the column.
- On top of the crushed stone, add four inches of sand.
Placing the Concrete Footing
- In the center of the stone and sand base, place a 3 1/2-inch deep concrete footing that is 6 inches wider than the column in all directions.
- Tamp down the crushed stone, then add and tamp down the sand.
- Build a concrete form using 2-by-4 lumber and ensure it is level on top of the sand.
Pouring and Finishing the Concrete
- Mix enough concrete to fill the form and pour it in.
- Use a shovel to poke at the concrete to help settle it.
- Take a scrap 2-by-4 and use it to level the concrete with the top of the form.
- Trowel the surface to make it smooth and use an edger to separate the concrete from the forms as it sets.
Preparing for Block Installation
- Mix mortar and spread it on the concrete base where you will be placing the blocks.
- Aim for a layer about 1 inch thick with no gaps in the mortar where the block will sit.
Setting and Leveling Blocks
- Place a block on top of the mortar and gently push it down until it is about 3/8 of an inch above the slab.
- Use a level to ensure it is straight.
- As you continue laying blocks, apply a 3/8-inch bead of mortar along the vertical joints between them.
Continuing Block Installation
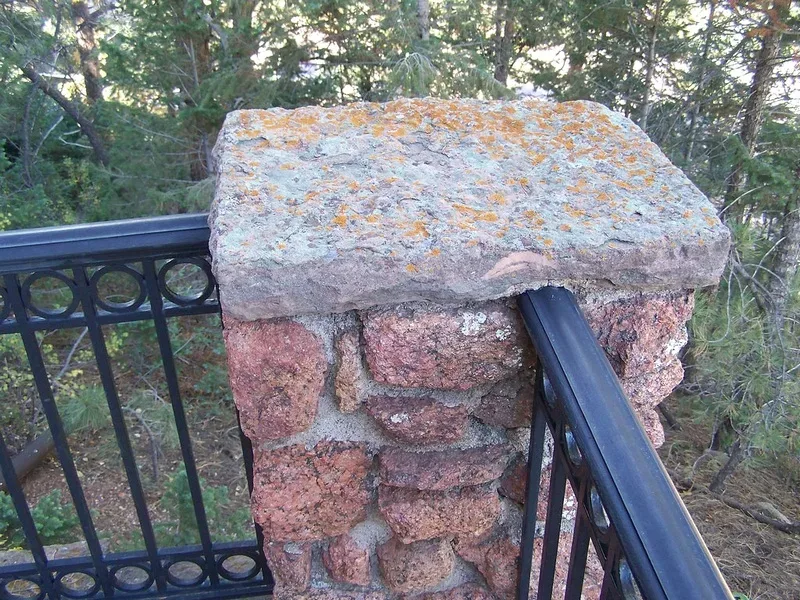
Refer to the image below for information on troweling mortar for cement blocks as you lay additional courses until you reach your desired column height.
Make sure to stagger (offset) the joints between blocks from layer to layer and clean any excess mortar off the blocks to keep their sides smooth.

Add the Stone Veneer Covering
Once again you’re mixing mortar and troweling it on, but this time it’s all vertical. Applying it to the flat surface of the blocks with a notched trowel is much easier than striking a bead on the narrow edge of a block.
Some stone veneers are installed from the top down, others from the bottom up. Check to be sure you’re doing it the right way. Press the flat edges of the stone veneer into the mortar.

Working on a Column
One way of working on a column is to install two corner pieces on the right and two on the left. Fill in the space between side pieces.
Then move to the next side, install two more corner pieces, and fill in the space between. Continue working around the column until you reach the top.
Achieving a Rustic Look
For a more rustic look, fill in the joints between stones with mortar as you work and smooth it with a joint trowel. You can also buy colored mortars to use as grout in the joints.
Options
- Use a piece of block the thickness of the stone veneer with your house number etched in it as an address marker.
- Run a metal or PVC conduit from the bottom of the slab up through the center to install a light on the top. Be sure to run your wiring before you pour the slab.
- If you’ve got the stone and the patience, build the column out of natural stone. It’s more work, but the result is more natural-looking and you can try for pyramids or tapered columns if you like.
- A stone column is a good place for a mailbox if it’s allowed where you live.
Credits
- Photo by iThinkMedia at Flickr.com
FAQ:
What materials do I need to build a stone pillar for my driveway entrance or fence corner?
You will need cement blocks (also known as cinder blocks), stone veneer, crushed stone, sand, mortar, and concrete. Additionally, you will need tools such as a shovel, level, trowel, and 2-by-4 lumber for concrete forms.
How long does it take to build a stone pillar?
The project typically takes three to four days to complete, depending on the size of the column and the type of stone veneer you choose to use.
Can I use natural stone instead of stone veneer for my pillar?
Yes, you can build the column out of natural stone if you prefer a more rustic and natural look. However, this approach may require more effort and skill, especially if you want to create pyramids or tapered columns.
How do I ensure the stone pillar is stable and well-constructed?
To ensure stability, start with a solid footing by laying a crushed stone base and pouring a concrete slab that is level and properly sized. When setting the cement blocks, use mortar to secure them and ensure they are level. Stagger the joints between layers for added strength.
Is it possible to incorporate a mailbox into my stone pillar design?
Yes, a stone column can serve as a stylish mailbox post. Make sure to check local regulations regarding mailbox placement and ensure you have a conduit for wiring if you plan to install a light on top of the pillar.


 9")

 11")


4 comments
THANKS FOR THE HELPFUL HINTS REGARDING ADDING A NEW PILLAR. HAVE A QUESTION ON HOW TO FEED AN ELECTRICAL WIRE THROUGH AN EXISTING PILLAR (THE OTHER SIDE OF DRIVE) AND AROUND A BUILT IN METAL MAIL BOX? TELL ME I DON’T HAVE TO DESTROY THE EXISTING COLUMN.
THANKS.
Just want to say your article is as astounding. The clarity in your submit is simply excellent
and that i could think you are a professional on this subject.
Well together with your permission let me to snatch your feed
to stay updated with impending post. Thank you
a million and please keep up the enjoyable work..
My upshot – best corded electric lawn mowers Agreenhand
I’m not a stone or brick mason. The instructions were easy to understand and to the point. Thank you.
Building a 36 x 36 pillar what size should the pillars be before we install the
veneers?