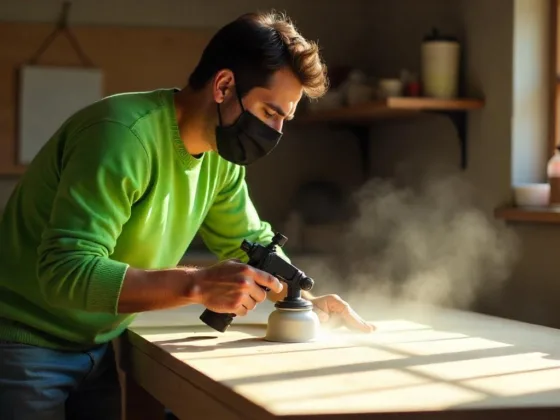
When it comes to home improvement projects, the bathroom is often a top priority. It’s a space that we use every day and one that can greatly impact our overall sense of well-being. If you’re looking to give your bathroom a fresh, new look without breaking the bank, DIY tiling is an excellent option.

With a little creativity and the right techniques, you can transform your bathroom with stunning bathroom tiles at Cheapestiles. In this article, we’ll explore the top five DIY tiling techniques to help you revitalize your bathroom.
Planning and Preparation: The Foundation of Success
Before diving into any DIY project, proper planning and preparation are essential. Start by assessing your bathroom and determining the scope of the tiling project. Consider the size of the area you want to tile, the type of tiles you prefer, and the overall design theme you want to achieve.
Once you have a clear vision in mind, it’s time to gather the necessary tools and materials. Make sure you have all the essential items such as tile adhesive, grout, tile spacers, a trowel, a tile cutter, and safety equipment like gloves and goggles. It’s also crucial to measure the space accurately and purchase enough tiles, allowing for any cuts or breakages that may occur during the installation process.
Read Also:
Choose the Right Tiles for Your Bathroom
Selecting the right tiles is vital to achieving the desired aesthetic for your bathroom. When browsing for bathroom tiles at Cheapestiles, consider the color, size, material, and texture that will complement your existing décor or the new design you envision.
For a modern and sleek look, consider large-format tiles with a glossy finish. These tiles can create an illusion of a bigger space and are relatively easier to clean. If you prefer a more traditional or rustic vibe, opt for smaller tiles with textured surfaces or patterned designs. Remember to choose tiles that are suitable for wet areas and have a good slip resistance rating to ensure safety.
Classic Straight Lay: Timeless Elegance
The classic straight lay is the most common tiling pattern and offers a timeless, elegant appeal. It involves laying the tiles in a grid-like pattern, with each tile aligned parallel to its neighboring tiles. This technique works well for both wall and floor tiling.
To achieve a professional finish, start by marking the center point of the wall or floor and establish a guideline using a chalk line. Apply tile adhesive using a trowel and press each tile firmly into place, ensuring they are level and evenly spaced. Use tile spacers to maintain consistent gaps between the tiles. Once the adhesive has dried, apply grout to fill the gaps, and wipe away any excess with a damp sponge.
Herringbone Pattern: A Stylish Twist
If you’re looking to add a touch of sophistication and visual interest to your bathroom, the herringbone pattern is an excellent choice. This pattern involves arranging rectangular tiles at a 45-degree angle to create a distinctive V-shaped pattern.
To achieve this pattern, start by establishing two intersecting guidelines using a chalk line. Apply the tile adhesive diagonally and press each tile into place, following the guidelines. Use tile spacers to maintain consistent spacing, and make any necessary cuts using a tile cutter. After the adhesive has cured, apply grout and wipe away any excess.
Mosaic Magic: Creative Freedom
Mosaic tiling allows for creative expression and can add a burst of color and texture to your bathroom. With an array of small tiles available in various materials, colors, and finishes, you can create intricate patterns, images, or even personalized designs.
To install mosaic tiles, start by creating a design or pattern on a piece of backer board or mesh sheet. This will serve as a guide during the installation process. Apply tile adhesive directly to the backer board or mesh sheet using a trowel, and carefully press each mosaic tile into place, following your design.
Take your time to ensure that each tile is properly aligned and spaced. Use a tile cutter or tile nippers to make any necessary cuts for edges or corners. Once the adhesive has cured, apply the grout to fill the gaps between the mosaic tiles, making sure to remove any excess grout with a damp sponge.
Diagonal Lay: Bold and Eye-Catching
For a bold and visually striking effect, consider the diagonal lay technique. Instead of the traditional straight lay, this technique involves laying the tiles diagonally across the surface, creating a dynamic and unique look.
To achieve the diagonal lay, mark the center point of the wall or floor and establish diagonal guidelines using a chalk line. Apply tile adhesive at a 45-degree angle and press each tile into place, following the guidelines. Use tile spacers to maintain consistent spacing, and make necessary cuts using a tile cutter. Once the adhesive has dried, apply grout and clean any excess grout with a damp sponge.
Proper Maintenance for Long-Lasting Results
After completing your DIY tiling project, it’s essential to maintain your bathroom tiles to ensure they remain in excellent condition for years to come. Regular cleaning is key to preserving the beauty of your tiles. Use mild cleaners and avoid harsh abrasives that can damage the tile’s surface. Additionally, promptly address any cracks or loose tiles to prevent further damage.
It’s also worth considering applying a sealant to protect the grout lines from moisture and staining. A quality grout sealer can help extend the lifespan of your grout and keep it looking fresh and clean.
Conclusion
Transforming your bathroom with DIY tiling techniques is an exciting and cost-effective way to revitalize your space. By carefully planning your project, selecting the right tiles, and employing the appropriate tiling techniques, you can achieve stunning results that will breathe new life into your bathroom.
Whether you opt for the classic straight lay, the stylish herringbone pattern, the creative freedom of mosaic tiling, or the bold diagonal lay, bathroom tiles at Cheapestiles offer a wide range of options to suit your preferences and budget.
Remember to follow proper installation procedures, including preparing the surface, using the correct adhesive and grout, and maintaining the tiles regularly. With a little patience and attention to detail, you can create a bathroom that showcases your personal style while providing a functional and beautiful space for relaxation and rejuvenation.