Crawl spaces play vital roles in many homes; however, people tend to overlook them to their detriment. The neglect of crawl spaces can result in a lot of issues, such as water damage, mold growth, and pest infestation. With these problems, you are bound to not have the best modern living experience.
The good thing is that with the help of encapsulation, you can amend these issues and turn things around for the best. Trust is our foundation repair experts to provide you with the best information possible about crawl space repair, Indianapolis.

Encapsulation of crawl space is the best and straightforward way to deal with many of these problems. It is a technique that involves sealing and lining the foundation walls and floor with overlapping sheets of thick polyethylene plastic.
The whole process of encapsulation can take days, but when it’s done, you can be sure of a clean, sealed crawl space with a high-performance moisture barrier that helps eliminate odors by improving the quality of indoor air and impeding mold growth.
With encapsulation of your crawl space, you will also be able to block the entry of insects and rodents and ease the latent load on your HVAC system. A dehumidifier can also be installed to control the moisture level, thereby guaranteeing yourself a more enjoyable living experience. The space can also be used to serve as a storage room.
Steps to Prepare Crawl Space Encapsulation
Crawl space encapsulation should never be a DIY project. It’s hard work and would consume a lot of time, which is why it’s best to have a professional foundation repair expert complete the job, to make it a lot easier. Here are steps a foundation repair specialist would follow:
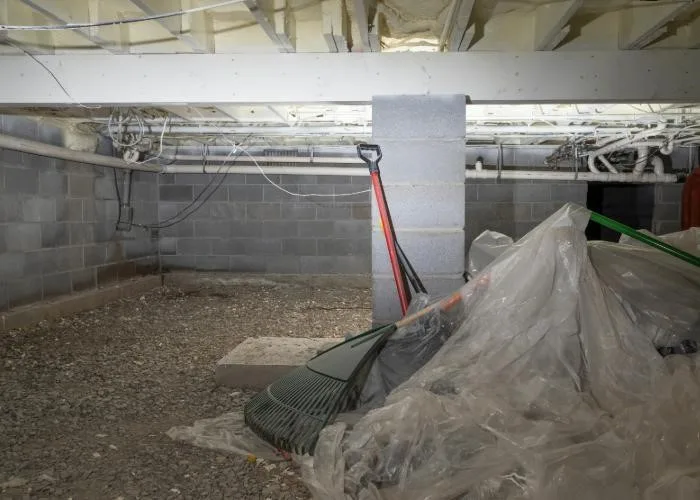
Step 1: Inspect and Examine the Property
The first thing to do when you want to encapsulate is to assess and inspect the crawl space of your home’s layout. A critical assessment of the condition of the crawl space must be done before beginning the actual encapsulation.
In examining the property, you are to ensure that your home is graded correctly, if you suspect any grading issue, it is best that you immediately contact a professional to address the problem.
You are also to check for mold and clean it up before encapsulation can be done, that way the encapsulation doesn’t trap the mold in place. After you are certain that there is no mold, you also inspect for any form of gas leaks from your furnace or water heater. Lastly, you check the moisture levels.
Read Also:
- Ways Your Crawl Space Can Affect Your Health- Find Out Here
- Are You Taking Crawl Space Maintenance Seriously?
- How to Transform a Basement into a Living Space
Step 2: Repair the Crawl Space
The second step in encapsulation is to repair the crawl space. After you must have examined the crawl space and cleared it of mold, then you can start to repair the structural element on your crawl space. Primarily you are to remove and replace any rotten wood in your crawl space.
With this step you are getting to the hard part of the process, make sure you get the band joist, floor joist, and girders and if there is any rotten wood on your subfloor, you replace that also.
In replacing the woods, you should remember that you must compensate for any support when you remove the woods in the crawl space that support the floor. Here, you can get ready to start the actual work, just after you clear the debris.
Step 3: Seal Open Spaces, Install A Vapor Barrier and Insulate Crawl Space Access Doors
After you must have made all the necessary fixes in the crawl space, the next thing to do is to completely seal the vents. This is key if you want your crawl space encapsulation to come out good, you must close any gaps on the floor. To do this you can use sealed doors, vent covers, and hydraulic cement.
You need to make sure that the crawl space door is airtight and insulated. Foam boards are highly recommended for insulating the walls of the crawl space. To insulate the floors, you can make use of fiberglass batts.
Step 4: Replace the Current Moisture Barrier with A New One
This next step is a little technical; you would need to remove the current moisture barrier to make room for the new one. You must make sure you level the area after removing the old one, that way it’s easier to install the new one.
It is also important that you immediately install the new one to prevent any moisture from getting into your crawl space. Moisture is what causes the unpleasant musty odor coming from the floor.
Installation of the new moisture barrier has to be done correctly, here are the steps to follow in installing it
- Ensure the vapor barrier is tight to the ground. To do this, wrap the piers with pieces of the vapor barrier.
- Cut tight around any obstacles including piers, wires, and plumbing.
- Use waterproof tape too tightly tape around the pipes and piers
- Tape the crawl space to the wall after covering it with poly. Make it lay flat on the ground by folding the corners.
To prevent any outdoor air from entering the space you can install a thermal barrier. A perfect recommendation for a thermal barrier is foam insulation since it also prevents air from getting in.
Step 5: Dry Your Crawl Space and Install Dehumidifiers
You are almost done with your crawl space encapsulation. Close to the last step is that you dry your crawl space and keep it dry, the best way to do this is to install a dehumidifier. Dehumidifiers are the best way to keep the moisture level low.
However, to monitor it properly you can also get a humidity monitor, that way you can gauge the effectiveness of your crawl space encapsulation.
Step 6: Regular Inspection of Your Crawl Space
Your crawl space is done and set to guarantee a dryer living environment with less chance of foundation issues arising. What is left is that you regularly inspect it, read the moisture level, and ensure your dehumidifier is working fine.
With these steps, you can successfully know what to expect for crawl space repair and encapsulation. Make sure you always seek professional help when it comes to your foundation and reach out to our team for crawl space repair!


 6")

 8")
