Building a treehouse can be a wonderful project for you and your children. It’s not just a fun activity; it creates lasting memories and a special space for play. This guide outlines four simple ways to build a treehouse that will last for years, based on an experienced builder’s insights.
You’ll discover budget-friendly options that minimize damage to the tree and even designs that don’t require large branches or multiple trees. Get ready to transform your backyard with a treehouse that your kids will love.
The Tree House
The Tree House was started in 1970. Using some “borrowed” lumber salvaged during a remodeling project, the first platform was built in a 113-year-old elm tree seven feet off the ground.
A rope for a tire swing was placed over a branch at the heart-pounding height of 30 feet, put there by an 11-year-old kid who was sure he was going to fall. Over the next few years, the tree house grew.
First sides were added, then a roof into which a trapdoor was cut. More sides and another roof made it bigger and better. Another trap door was added and railings turned the roof into a lookout tower platform.
Eventually, the lookout tower gained its roof and the bottom half of the sides were closed in. Standing on the top floor, you looked down on the peaks of single-story houses.
That tree house became “the” goto place for fun in the neighborhood and at times more than 10 kids were up there. Along came Dutch Elm Disease and trees died all over the neighborhood–but not the tree house tree.
Over the years, the tree grew around the boards that framed the platforms, completely encompassing the lumber. Sadly, by 1988 the tree house was showing its age and was no longer safe. I climbed up one last time and cut it down piece by piece.
As if it no longer had a reason for living, the tree died suddenly four years later and was cut down the following winter. There were 135 rings on the stump, one for each year the tree had lived.
DIY Treehouse Considerations

Choosing Materials
- Use pressure-treated lumber for all framing materials.
- Enclose platforms with sides a minimum of 36 inches high.
Selecting Trees
- Pick good trees.
- Never use a branch less than 8-inches in diameter and don’t use branches that sway a lot in the wind.
- Branches that extend straight out from the trunk are weak. Use branches that angle up at a 45-degree angle or less.
Attaching Framing
Attach framing to the tree using galvanized or coated 1/2-inch thick threaded rods, carriage bolts, or lag bolts that will extend at least 8-inches into the middle of the branch. Use joist hangers for joists and rafters.
Building Ladders
Make ladders out of 2-by-6 lumber and add hand railings for a good grip on both sides. Attach the ladder to the DIY treehouse and the ground below so it can’t be moved.
Creating Access
Unless you’re willing to build regular stairs, make access to the treehouse through a trapdoor that won’t open past 90 degrees. The kids will go in the trapdoor which will then close by itself.
Determining Height
There’s no need to be up 30 feet. Put the platform six to ten feet off the ground, but not much higher.
A Simple Platform: How to Build a Treehouse
Choosing the Right Tree
To start building a treehouse, choose a suitable tree. Look for one with three or four strong branches that split from the trunk at a central point, known as a crotch. This feature provides a stable support for the platform.

Building the Platform
Materials Needed
- 2-by-6 lumber
- Lag bolts
- 2-by-8 lumber (if span exceeds 6 feet)
- Joists made from same lumber
- 3/4-inch plywood
Steps to Build the Platform
- Once you have your tree, take the 2-by-6 lumber and create a rough square shape.
- Use lag bolts to securely attach the lumber together.
- If the span between the branches will exceed 6 feet, it is important to use sturdier 2-by-8 lumber instead.
- Next, add joists made from the same lumber between the frame.
- Place these joists about every 16 inches apart to ensure even support.
- Once the joists are in place, cover the entire frame with 3/4-inch plywood to create a solid platform.
Adding Safety Features
Materials Needed
- 2-by-4 rails
- Vertical 2-by-4 posts
Steps to Add Safety Features
- After the platform is constructed, it’s time to add safety features.
- Install 2-by-4 rails around the edges of the platform.
- These rails should be at least 3 feet above the platform to prevent falls.
- To strengthen the rails, place vertical 2-by-4 posts every 2 feet along the perimeter.
Enclosing the Sides of the Treehouse
Materials Needed
- 1/2-inch plywood
Steps to Enclose the Sides
- Next, enclose the sides of the treehouse using 1/2-inch plywood.
- This will add further safety and create a more secure environment.
Adding Height or a Better View
If you want to increase height or improve visibility, consider adding another frame above the platform. This frame can serve as the base for a roof or a lookout tower.
Designing an Effective Roof
When designing the roof, it is essential to include a slope. This slope allows rainwater to run off easily, preventing water damage.
Ensuring Safety on Second Story (if applicable)
If you opt for a second story as a lookout, ensure that it also has rails and enclosed sides for safety.
Following these guidelines will help create a sturdy and enjoyable structure.
A Tree House Between Two Trees
Building a treehouse can be a rewarding project, especially when using two trees to create a sturdy platform. This design is ideal if you lack a single large tree with thick branches that can adequately support the structure.
Selecting the right trees is crucial; they should each have a minimum diameter of 10 inches at the height where the platform will sit. This ensures that the trees can handle the weight and stress of the treehouse.

Materials Needed
- Two 2-by-8 ledger boards
- Long carriage bolts
- 2-by-6 lumber
- 2-by-8 joists
- Deck boards or 3/4-inch plywood
- Galvanized carriage bolts, nuts, and washers
Step 1: Attach Ledger Boards to Trees
To start constructing your treehouse, take two 2-by-8 ledger boards and attach them to each tree. Use long carriage bolts to secure the boards to the trees. For spans that exceed 10 feet, make sure to add extra bracing for added support and stability.
Step 2: Secure Ledgers Using Bolts
The process involves drilling holes through each ledger board into the tree trunk and then out the other side of the board. Secure the ledgers using 1/2-inch galvanized carriage bolts, along with nuts and washers to keep everything tight and secure.
Step 3: Brace Ends of Ledgers
For additional strength, brace the ends of the ledgers with 2-by-6 lumber, which will help prevent any sagging or instability.
Step 4: Install Joists Between Ledgers
Next, you need to install the 2-by-8 joists between the ledgers. Place these joists every 16 inches apart to create a solid surface for the platform.
Step 5: Cover Platform with Deck Boards or Plywood
Once the joists are in place, cover the entire platform with deck boards or use 3/4-inch plywood for a strong and durable finish.
Optional Step: Add Support Beam for Swings
There is also an option to enhance your treehouse by using a doubled 2-by-8 beam between the ledgers. This beam can serve as a perfect support for swings, adding an extra layer of fun and functionality to your treehouse.
With careful planning and execution, you can create a safe and enjoyable treehouse that will provide hours of entertainment.
A Tree and a Post
Building a DIY treehouse is possible even with just one tree. If your tree does not have strong branches at a good height, you can still make it work.
Materials Needed
- Auger
- 24-foot, 8-by-8 pressure-treated post
- Quick-set concrete (4 bags)
- Water
- Long stick for mixing
- Dirt for filling the hole
Steps to Build a Treehouse with One Tree
- Find the Right Spot: Start by finding a spot about ten feet away from the trunk of the tree.
- Dig the Hole: Use an auger to dig a hole that is twelve inches wide and six feet deep.
- Prepare the Post: Take a 24-foot, 8-by-8 pressure-treated post and carefully place it upright in the hole.
- Level the Post: Ensure the post is level before you secure it in place with temporary braces. This will help keep it steady while you work on the next steps.
- Mix the Concrete: Pour two bags of quick-set concrete into the hole. Add water according to the instructions on the bag. Use a long stick to mix the concrete until it becomes a thick, even consistency. Then, add two more bags of concrete and more water. Mix again thoroughly to ensure that all of the concrete is properly combined.
- Let it Set: After you finish mixing, allow the concrete to set for about an hour.
- Fill with Dirt: Once the hour has passed, you can fill the rest of the hole with dirt. Compact the dirt as you go to make sure it is stable.
- Build Your Treehouse: Now you can build your DIY treehouse as you would if it were between two trees. Follow similar steps for constructing the platform, walls, and roof.
The single post will provide the necessary support for your treehouse, giving you a sturdy structure where you can enjoy your time above the ground.
A Tree House Around the Trunk
You might have a strong tree with a wide crown that provides plenty of shade, but if the branches are too high, you may feel stuck. Instead of the usual method of digging a hole for a post, consider a different approach that keeps the tree as the main support.

1. Install Ledger Boards
Begin by installing two 8-foot long ledger boards on opposite sides of the tree. It is important to ensure that the tree trunk is at least 12 inches in diameter. This thickness will provide the necessary strength and stability for the structure.
2. Create the Frame
These two ledger boards will act as crucial support beams for the treehouse. Once they are securely in place, create a square or rectangular frame using 2-by-8 lumber that rests on top of the ledger boards.
To add extra support to the corners of your frame, use 2-by-6 lumber for bracing. This framework is essential for holding up the rest of the treehouse.
3. Add Floor Joists
Next, add floor joists spaced 16 inches apart across the frame. This spacing is ideal for both strength and stability. To build the floor, you can choose either deck boards or use 3/4-inch plywood. Both options will provide a solid surface to walk on.
4. Construct Rails and Sides
With the floor complete, you can begin constructing the rails and sides of the treehouse. These will add safety and support.
5. Finish with a Roof
Finally, finish the structure with a roof to protect against the weather. This entire method allows you to create a safe and fun space around the tree trunk without needing to dig into the ground.
Minimizing Tree Damage for DIY Treehouse
When planning to build a DIY treehouse, choosing the right time is essential. The best period to start construction is mid-summer.
By this time, the sap flow from the tree has significantly decreased, reducing the risk of excessive sap running. This timing also allows the tree adequate opportunity to heal any minor injuries caused during the construction before winter arrives.

Limit Holes in the Tree
During the building process, it is crucial to limit the number of holes you bore into the tree. Each hole can create a potential entry point for insects, which can harm the tree.
If you accidentally bore a hole in an unsuitable location, you can easily remedy this. Fill the unwanted hole with exterior latex caulk to create a barrier against insects. This simple solution helps protect the tree and ensures its health.
Build with Care
Begin your treehouse project with a solid but minimal frame that securely attaches to the tree. This will provide a strong foundation. After establishing the frame, you can add more features and components as needed.
While it is important to secure the treehouse to the tree for stability, be mindful not to overdo the attachments. Excessive fastening can harm the tree.
Protect the Bark
Avoid cutting away the bark of the tree during the building process. The bark serves as the protective layer of the tree, and when you cut it, you risk damaging the tree’s health.
Instead, allow the tree to grow around the structure. The tree will integrate the wood into its natural growth, creating a strong bond that enhances the overall stability of the treehouse.
Swing Safely
If you want to add a swing to your treehouse experience, using a rope over a strong branch is an excellent option. To do this safely, you can take a piece of an old tire and attach it to the branch using nails.
After securing the tire, you can connect your rope to it. This method ensures that the rope experiences wear against the tire rather than the tree branch, preserving the tree’s health and allowing for a more enjoyable swinging experience.
Bottom Line
Treehouses have a unique charm that you can’t find in a manufactured playset. Kids don’t really care how much you spent on that expensive playset.
If you have trees, some free time, and are willing to put in some effort, why not create a simple “DIY treehouse” project with your kids? You’ll be amazed at how much fun you’ll have building it, and every moment the kids spend playing in it will make it all worth it.
Credits and Resources
- Tree lightning – How to Wrap Trees With Outdoor Lights
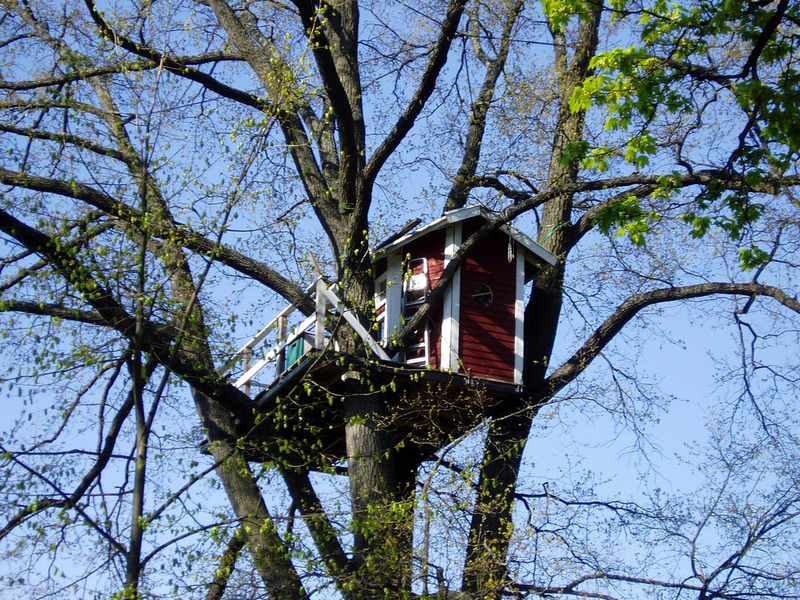
- Red Treehouse Photo by Udo Schröter at Flickr.com
- Platform Tree House Photo by M. Litty at Flickr.com
- The DIY treehouse described at the beginning of this article was built by the author.


 12")

 14")
