Building a Purple Martin house can be a rewarding project. With the right plans and directions, you can create a safe and inviting space for these beautiful birds. This guide provides detailed instructions on constructing multi-level Purple Martin apartment houses. Each apartment house contains eight individual apartments, and you have the option to stack up to four levels, allowing for a total of 32 apartments.
What You’ll Find in This Guide
In this guide, you’ll find:
- Detailed Plans: Downloadable plans that illustrate the construction process.
- Materials List: A comprehensive list of materials needed for each step of the build.
- Expansion Options: Information on how to accommodate more birds by expanding from the initial eight apartments to 16, 24, or even 32 apartments after the house is built.
- Bird Characteristics: An overview of Purple Martin characteristics to help you understand their nesting habits and preferences.
- Attraction Tips: Tips on attracting Purple Martins to your yard through design and location choices.
Understanding Purple Martins
Before you begin building, it’s important to understand the characteristics of Purple Martins:
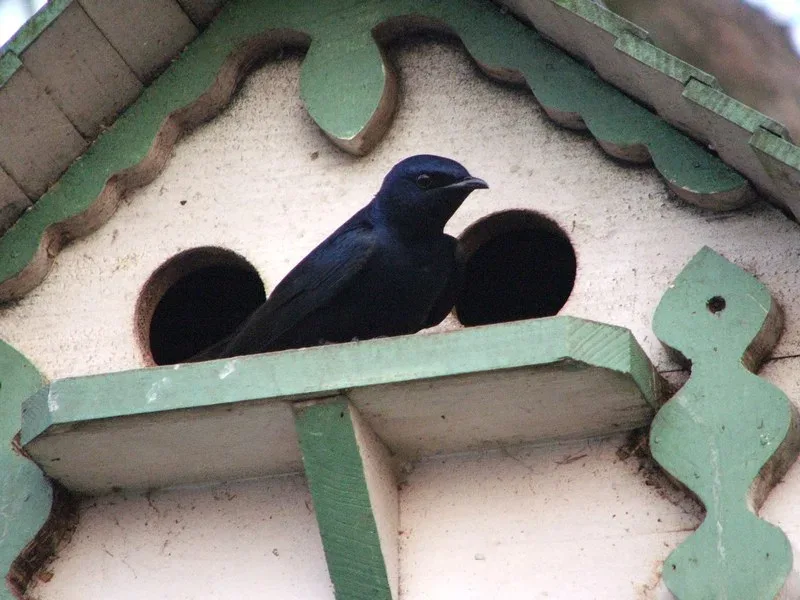
- They are the largest type of swallow, usually measuring about eight inches in length and boasting a wingspan of around 12 inches.
- Purple Martins prefer to perch at high points and thrive in communal living, making apartment-style houses ideal for their nesting habits.
- They are known to consume large quantities of insects, which makes them beneficial for controlling pest populations. While they do eat mosquitoes, they favor larger insects such as dragonflies.
Attracting Purple Martins
To attract these birds to your yard, follow the provided plans and instructions closely. The right design and location of the house will help ensure that Purple Martins find your home appealing.
With some effort and the right materials, you can successfully build a Purple Martin house that not only meets the needs of these birds but also enhances your garden or backyard.

Basic Considerations
- A table saw works best for cutting the pieces, but a circular saw can be used as well. Cut the birdhouse pieces from exterior grade plywood.
- A 30-degree bevel cut on the top edges of the roof pieces where they come together helps make the roof watertight.
- Use a 2-1/2-inch hole saw for cutting the entrance holes and the ventilation shaft holes in the floors and the ceiling. A 1/2-inch hole saw does the job for the ventilation holes in the partitions and the gable ends.
- Use an exterior grade wood glue on all joints before screwing or nailing the joints together.
- Drill countersunk pilot holes for each screw.
- Build the apartment house at individual levels and fasten the levels together with galvanized angle brackets and screws.
Pole Mounting System

- Make a pair of 3/4-inch thick plywood standoffs, 1-inch wide and 6-inches long.
- Glue and screw these to the bottom of the floor 6-inches apart on opposite sides of the ventilation hole and add the 6-by-6 inch piece of 3/4-inch plywood across them.
- Screw a 2-inch threaded galvanized pipe flange to the bottom of the 6-by-6 inch piece for a pole mount.
- Staple window screen over the ventilation hole on the inside of the floor.
Assembly
Download the plans and follow these directions on how to build a Purple Martin house. Purple Martin House Plans Parts, Purple Martin House Assembly, Purple Martin House Materials, Bird Feeder Poles, and Pole Mount.


Step 1: Assemble the Walls
Stand the front and back on edge and place the two sides between them with the faces of the sides flush with the ends of the front and back pieces.
Place a bead of glue inside each of the four joints and nail each joint together with three, 1-inch nails.

Step 2: Attach the Floor
On the house floor, make two marks, 2 inches from each corner, and draw a line from each mark to the one on the opposite side of the board.
This marks the front, back, and sides. Place a bead of glue on the floor just inside the lines and set the assembled walls on top of the glue using the lines as guides.
- Hold the walls in place with a pair of clamps, turn the entire assembly over and fasten the walls to the floor with four, 1-inch galvanized screws for each wall.
- Remove the clamps and turn the assembly right side up.

Step 3: Install Partitions
Place two partitions parallel to the slots facing up inside the walls. Two more partitions perpendicular to the first two partitions fit over the slots.
Get the partitions reasonably square and place lines on the floor and walls to mark their locations. Remove the partitions, place glue on the lines, and replace the partitions.
Step 4: Add Ceiling
- On the top-level assembly, run a bead of glue along the top of each interior and exterior wall.
- Place the ceiling on top, align it with the edges, and add screws to hold it on.
- Before installing the gable ends, staple a piece of window screen over the ventilation holes.
- Install the gable ends on opposite sides of the house.
- Run a bead of glue along the bottom edge of the board, drill pilot holes, and fasten the ends to the ceiling with two screws at both corners of each gable end.
- Place glue on the top edges of the gable ends and screwthe roof to thgale ends.
- Stack up to four levels and screw them together using three galvanized angle brackets on each side.

Conclusion
Building a Purple Martin house is a rewarding project that benefits both you and these fascinating birds. With easy-to-follow plans and helpful instructions, you can create a multi-level apartment that offers up to 32 homes.
As you attract Purple Martins to your yard, you’ll enjoy their presence while they help keep insect populations in check. Download the plans today and start constructing a welcoming space for these amazing birds. Bring nature closer to your home and enjoy the rewards of your hard work.
Credits and Resources
- Photo by Ronnie Bergeron at Morguefile.com
- Purple Martin Fledgling Photos by OakleyOriginals @ Flickr.com
- Purple Martin Male Photos by Susan Young @ Flickr.com
- Female Purple Martin by Shanthanu Bhardwaj @ Flickr.com
- Information on the Purple Martin and attracting them to your yard.
- Purple martin house plans based on a family design passed down through several generations and modified by the author for modern materials and ease of building.
FAQ:
What materials do I need to build a Purple Martin house?
You will need exterior grade plywood, wood glue, screws, nails, a 2-1/2 inch hole saw, a 1/2 inch hole saw, clamps, galvanized angle brackets, and a 2-inch threaded galvanized pipe flange for the pole mount. Additionally, having a table saw or circular saw will be beneficial for cutting the pieces.
How many apartments can I create in a Purple Martin house?
You can build a Purple Martin house with a base of 8 apartments and stack up to four levels, allowing for a total of 32 apartments.
What is the best way to cut the pieces for the Purple Martin house?
A table saw works best for cutting the pieces, but a circular saw can be used as well. Ensure you cut the pieces from exterior grade plywood for durability.
How do I ensure the roof is watertight when building the Purple Martin house?
To make the roof watertight, apply a 30-degree bevel cut on the top edges of the roof pieces where they come together. This will help prevent water from seeping into the house.
How do I attract Purple Martins to my yard?
To attract Purple Martins, construct their houses using the provided plans and instructions, ensuring they are mounted high and in a suitable environment, as these birds prefer high perches and live in apartment-style homes.


 15")

 17")

6 comments
This guide is fantastic! I’ve always wanted to attract Purple Martins to my yard but didn’t know where to start. The detailed plans and tips make it seem so achievable. Can’t wait to get started on my own house! Thank you for sharing such valuable information!
This guide is amazing! I love the detailed plans and tips for building a Purple Martin house. Can’t wait to start my project and hopefully attract some of these beautiful birds to my yard! Thank you for sharing!
This guide is fantastic! I’ve been wanting to attract purple martins to my yard, and the detailed plans and tips make it feel doable. Can’t wait to start building! Thank you for sharing these helpful insights!
This guide is fantastic! I’ve always wanted to attract Purple Martins to my yard, and your detailed plans make it seem so achievable. I appreciate the step-by-step instructions and tips on location and maintenance. Can’t wait to get started! Thank you for sharing!
I loved this DIY guide on building a Purple Martin house! The step-by-step instructions were clear and easy to follow, and I appreciate the tips on location and maintenance. I can’t wait to attract these beautiful birds to my yard this spring! Thank you for sharing such helpful plans!
I absolutely loved the detailed instructions in your guide! I’m excited to get started on building a purple martin house for my backyard. The tips on placement and maintenance are incredibly helpful. Can’t wait to see these beautiful birds come to visit! Thank you for sharing such a comprehensive resource!