• DIY
    • Crafts
      • Outdoors & Garden Projects
    • Decorating
      • Exterior Painting & Decorating
      • Painting & Wallpaper
      • Room by Room
    • Furniture
      • Cabinets
      • Tables
    • Woodworking
  • Home Improvement
    • Real Estate
    • Living
    • Entertaining
    • Home Building & Design
      • Home Interior
      • Home Exterior
    • Home Management
      • Home Organization
    • Remodeling
    • Living Areas
    • Bathroom
    • Kitchen
  • Lawn & Garden
    • Lawn Care
    • Vegetable Gardening
    • Landscaping
      • Irrigating
    • Flowers
    • Trees & Shrubs
  • Categories
    • Home Improvement
    • Lawn & Garden
    • Landscaping
    • Real Estate
Housesumo.com
  • DIY
    • Crafts
      • Outdoors & Garden Projects
    • Decorating
      • Exterior Painting & Decorating
      • Painting & Wallpaper
      • Room by Room
    • Furniture
      • Cabinets
      • Tables
    • Woodworking
  • Home Improvement
    • Real Estate
    • Living
    • Entertaining
    • Home Building & Design
      • Home Interior
      • Home Exterior
    • Home Management
      • Home Organization
    • Remodeling
    • Living Areas
    • Bathroom
    • Kitchen
  • Lawn & Garden
    • Lawn Care
    • Vegetable Gardening
    • Landscaping
      • Irrigating
    • Flowers
    • Trees & Shrubs
  • Categories
    • Home Improvement
    • Lawn & Garden
    • Landscaping
    • Real Estate
Featured of Step-by-step instructions: How to Install Hardie Board Lap Siding
  • DIY
  • Home Exterior
  • Home Improvement

How to Install Fiber Cement Lap Siding

  • Perla Irish
  • July 20, 2018
Total
8
Shares
8
0
0
0

Step-by-step instructions: How to install Hardie Board lap siding, HardiePlank lap siding, and siding products, trim, and more. Follow these instructions for a long-lasting installation.

HardiePlank or Hardie board lap siding products carry a 30-year warranty and installation is not much different than installing regular wood lap siding.

Step-by-step instructions How to install Hardie Board lap siding
Step-by-step instructions: How to Install Hardie Board Lap Siding

DIY Step-by-Step Instructions for Hardie Board Lap Siding Installation

Fiber cement lap siding is a long-lasting durable product that installs in much the same way as regular lap siding.

Hardie Board is a lap siding product manufactured by the James Hardie Corporation. Installing your own Hardie Board siding won’t break your back or your budget.


Read Also:

  • Easy to Follow Instructions for Making Cornices Yourself
  • How to Make an Adjustable Shelf Bookcase

Introduction: How to Install Hardie Board Lap Siding

HardiePlank lap siding is a fiber cement siding product that doesn’t rot and carries a 30-year warranty.

It comes in a variety of colors and two surface finishes–smooth and a texture the company calls Cedarmill. The Cedarmill texture looks very much like real wood.

DIY Step-by-Step Instructions for Hardie Board Lap Siding Installation

After installation, you can paint the product with 100 percent acrylic paint to change the color if desired.

Doing your own Hardie board lap siding installation takes about the same amount of labor as installing real wood lap siding and saves you a considerable amount of money on labor costs.

Preparation

After removal of the old siding, new house wrap should be installed to provide a water barrier between the new siding and the home’s plywood or OSB sheathing. Trim corners first so that the correct gap between the trim and siding is maintained.

How to Install Fiber Cement Lap Siding

The James Hardie company offers fiber cement trim boards in various widths for use as corner trim, fascia, soffits, rakes, and batten boards to complete your Hardie board installation.

Installing HardiPlank Lap Siding

Measure up from the ground 6 inches plus the width of one plank at a corner and make a mark on both sides of the corner.

You must maintain a 6-inch clearance between the ground and the planks and a 2-inch clearance between finished surfaces like deck boards, concrete, steps or sidewalks and roofing materials, or flashing.

Place a laser level on the mark pointing at the next corner. Use the laser to mark the next corner and snap a chalk line between the marks. Extend the chalk line around the house using the laser to mark the subsequent corner.

Place a corner trim piece against the corner and make it flush with the edge of the corner. Nail it in place with two siding nails every 16 inches.

Place the second piece of corner trim on the opposite side of the corner flush with the outside edge of the first piece. Nail it to the house framing with two siding nails every 16 inches. Do all the corners before continuing.

Hold a HardiePlank siding board with the top edge against the chalk line and 1/8 inch away from the corner trim. Nail the board to the house every 16 to 24 inches with a roofing nail along the nail line printed on the top of the siding board.

Measure down from the top of the installed board 1 1/4 inches every four feet and make a mark. Hold the next board on these marks and nail with siding nails along the nail line.

You can also buy clips that hold the siding planks in place with the 1 1/4-inch overlap and break off after the planks are nailed.

Hardie Board Lap Siding Installation

Cutting HardiePlank Siding

The planks may be scored and snapped similar to cutting drywall by using a carbide scoring knife.

Another method uses a special James Hardie supplied saw blade on a circular saw equipped with a vacuum to gather the fiber cement dust which is hazardous to your health.

Always wear a dust mask when cutting fiber cement products. Of course, if your saw is battery-powered, you will also need to prepare the best battery.

Making Siding Joints

Hardie board installation will require joints between planks. Join factory edges and place the cut edges against the corner trim boards.

Caulking joints are unnecessary, but flashing behind the joints is required. Cut a piece of 6-inch wide steel coil trim about 1 inch longer than the width of a siding board and place it behind the joint.

Nail it to the house sheathing with a roofing nail.

Finishing the Installation

Caulk the corners where the siding meets the corner trim. Use an exterior grade, paintable latex caulk. Run a 1/4 inch bead of caulk to cover the gap left between the trim boards and the lap siding.

To complete your Hardie board lap siding installation, paint primed HardiePlank within 180 days of installation and unprimed HardiePlank within 90 days of installation. ColorPlus products are coated at the factory and don’t require painting.


Credits and Resources

  • James Hardie Corporation: https://www.jameshardie.com/products/hardieplank-lap-siding
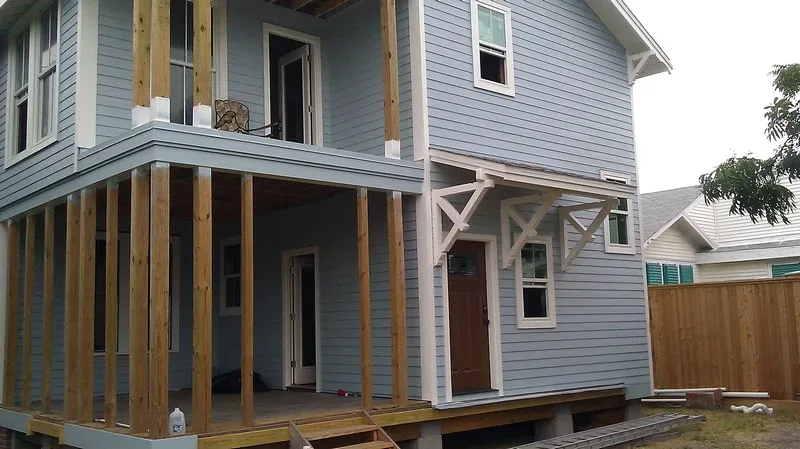
  • Hardie siding By M&M Roofing @Flickr

0
0
8
0
Total
8
Shares
Pin it 8
Share 0
Tweet 0
Share 0
Share 0
Related Topics
  • boards
  • installation
Previous Article
Featured of All You Need To Know About Grass Seeding
  • DIY
  • Lawn & Garden
  • Lawn Care

All You Need To Know About Grass Seeding

  • Perla Irish
  • July 18, 2018
View Post
Next Article
Featured of How to Install Baseboard Heaters, DIY Electric Baseboard Heaters
  • DIY
  • Home Improvement
  • Living Areas

How to Install Baseboard Heaters for Heating

  • Perla Irish
  • July 21, 2018
View Post

You May Also Like

Close-up of a pro plasterer applying Venetian plaster with a steel trowel while a homeowner watches in a modern living room
View Post
  • Decorating
  • DIY
  • Home Improvement
  • Home Interior
  • Painting & Wallpaper

Venetian Plaster Technique: Step-by-Step Guide to Luxurious, Marble-Look Walls

  • Perla Irish
  • December 9, 2025
Stamped decorative concrete patio with warm stone pattern, outdoor dining set, lounge chairs, and planting beds in a cosy backyard at golden hour.
View Post
  • DIY
  • Home Exterior
  • Home Improvement
  • Landscaping
  • Lawn & Garden

Reasons to Use Decorative Concrete for Your Patio

  • Perla Irish
  • December 9, 2025
Modern beige bathroom with floating wooden vanity, LED mirror, heated towel rail, built-in shelving and a freestanding tub
View Post
  • Bathroom
  • Decorating
  • DIY
  • Home Improvement
  • Room by Room

Functional Bathroom Décor: Pieces That Look Good and Work Hard

  • Perla Irish
  • December 4, 2025
Couple reviewing kitchen remodel plans on a tablet in a newly renovated soft-modern kitchen with light oak island, quartz countertops, creamy cabinets, and pendant lighting.
View Post
  • DIY
  • Home Improvement
  • Kitchen
  • Remodeling

The Complete 2026 Kitchen Remodeling Guide: New Trends, Updated Costs, Layout Innovations & Smart Design Strategies

  • Perla Irish
  • December 4, 2025
Suburban two-story home with a backyard in-ground pool and patio dining area on a clear summer day
View Post
  • DIY
  • Home Improvement
  • Real Estate

Is a Pool in a Cold Climate a Smart Move When You’re Buying a House?

  • Perla Irish
  • December 3, 2025
Detached backyard ADU under construction with concrete foundation and exposed wood framing behind a single-family home.
View Post
  • DIY
  • Home Improvement
  • Real Estate

ADU Structural Requirements: Foundations, Framing, and Permits Explained

  • Perla Irish
  • November 15, 2025
Open-concept kitchen and living room after kitchen wall removal, with structural beam, island seating, and continuous wood flooring
View Post
  • DIY
  • Home Building & Design
  • Home Improvement
  • Kitchen
  • Remodeling

How to Open Up the Space Between a Kitchen and Living Room

  • Perla Irish
  • November 14, 2025
Bright neutral living room in a simple home transformed into a luxurious abode, with a large area rug, modern sofa, layered lighting, linen curtains and brass accents.
View Post
  • Decorating
  • DIY
  • Home Improvement
  • Home Renovation
  • Remodeling
  • Room by Room

Transform Simple Homes Into Luxurious Abodes (2025 & Beyond)

  • Perla Irish
  • November 13, 2025

5 comments

  1. Ted Robinson says:
    February 18, 2019 at 8:52 am

    Article seems to be ok for installation however a question> is lap siding primed from factory? Is the board placed against the trim for nailing?

    Reply
  2. Freya says:
    April 13, 2019 at 1:44 am

    You can definitely see your skills in the article you
    write. The arena hopes for more passionate writers such as you who aren’t
    afraid to say how they believe. All the time follow your heart.

    Reply
  3. David W Rogers says:
    May 23, 2019 at 6:43 pm

    What about fixtures – lighting, cables, plumbing, house numbers, …

    Reply
  4. CJ says:
    September 23, 2019 at 7:38 am

    The article says,
    “Caulking joints are unnecessary, but flashing behind the joints is required. Cut a piece of 6-inch wide steel coil trim about 1 inch longer than the width of a siding board and place it behind the joint. Nail it to the house sheathing with a roofing nail.”
    The Hardie Board installations from Hardie Board Co. say to caulk the 1/8″ gap left between planks. Neither caulk nor flashing was done on our house by builder. Do we have recourse?

    Reply
  5. James Mills says:
    January 19, 2020 at 10:09 am

    I have been advised by a man with more than 30 yrs. experience, that he prefers installing Hardie Plank over the old wooden siding (after new wrap is installed). According to this individual, whom I have known for years, that is a better option than tearing off the old wood. It saves time, saves money and increases the insulation.

    What are the pros and cons of doing that?

    Reply

Leave a Reply Cancel reply

Your email address will not be published. Required fields are marked *

This site uses Akismet to reduce spam. Learn how your comment data is processed.

Join 13,000 folks!

Get instant access to our weekly newsletter where we share the best! 100% Privacy. No Spam.

  • Disclosure & Affiliate Policy
  • Privacy Policy
  • Terms of Use
  • About
  • Sitemap
  • Contact Us

Input your search keywords and press Enter.