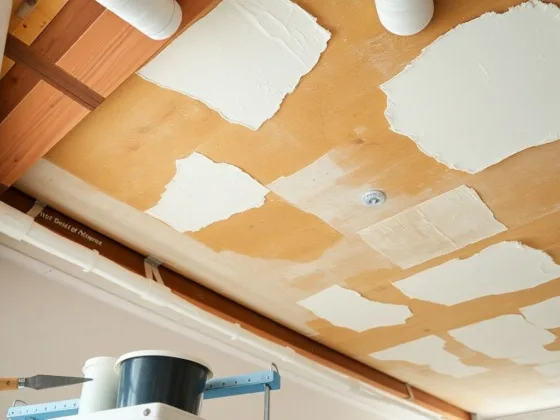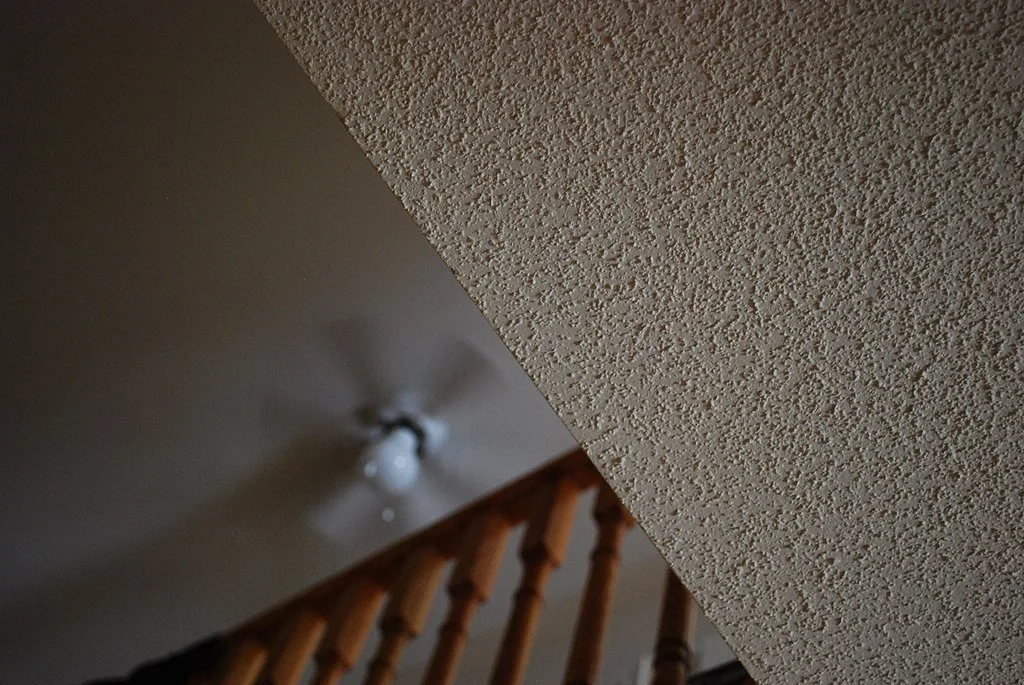
With so much in trend and now there is another term commonly used by the folks to make the interior of their houses as pretty as possible. Folks are using popcorn ceiling to make their inside ceiling look remarkably outstanding and apple to the eye.
Popcorn ceiling not only enhances the area but also makes the room soundproof. But despite the beauty of the popcorn ceiling if it gets damaged due to any unknown reasons it becomes tricky to get this repair. This is because sometimes the texture of the popcorn ceiling fails to match with the surrounding area.

To get this work done you can seek help from popcorn ceiling removal Denver who can guide you properly. We have also listed down some steps that you all can follow to repair the popcorn ceiling.
Identify and Fix the Root Cause of The Damage
This is a very important step to consider. You first need to determine the real cause behind the damage because if you don’t fix the issue, you might have it occur over and over again and you can end up spending a fortune in repairing the popcorn ceiling.
For instance, if there is any sort of leakage in the roof you better get it done fixed before you repair the popcorn ceiling. On the other hand, if you encounter any type of crack in the ceiling it is best to get it fixed first. There are chances that sometimes we scrape off the ceiling while shifting the ladder.
Thus, we must be careful and figure out the real underlying cause that might disrupt your popcorn ceiling even more. So, whenever you jump to fix the popcorn ceiling look for the factors that cause the damage in the real place
Prepare The Damaged Area
Once you are done sorting out the real cause that led to the damage the next important thing is to take notice of the ceiling as well. If you have encountered any water leakage in your roof it is ideal to let the roof dry before you start applying the paint over the roof and start the process of texturing.
The first step is always to remove the damaged portion off the roof, then it is best to apply sandpaper, later scrape the roof with sandpaper and wipe the remaining debris with a damp cloth piece. After you have done this part it is ideal to paint the area but before you apply paint don’t forget to add primer on the roof surface.
Choose The Right Popcorn Ceiling Product Patch
There are three types of popcorn textures. One is fine, medium and the third one is uneven ground. The part to apply and select the perfect matching texture always turns out to be critical and confusing.
To make sure you choose the right one it is best to hand mix the texture and then apply it evenly with a hand roller. If you are inexperienced then use spray texture over the area.
Apply The Product by Following the Instructions
Following instructions is always very important because it helps you in applying the same and right amount over the damaged area. In case you are using spray texture it is instructed that you shake the can before you apply it over the damaged area of the roof.
People often get confused with the selection of the same and exact texture as the initial popcorn ceiling. It is always important to try different application techniques to avoid the hassle. And not to forget that every time you start painting it is best to add on a single coat of paint right over the roof as well. For more information request a quote.
Also when you aren’t sure how to evenly add over the spray the best thing is to add a single coat over the roof area to avoid any further problems related to the spray paint and the texturing process as well.