Introduction
DIY backyard decorations are becoming more popular as homeowners discover the joy and satisfaction of creating their own projects. It’s incredibly rewarding to add a personal touch to your outdoor space and make it reflect your creativity and hard work.
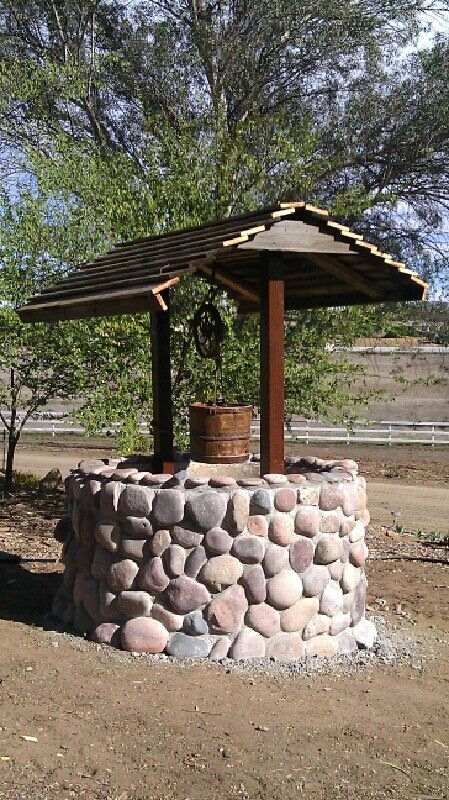
Imagine walking into your garden and seeing a beautiful stone wishing well that you built yourself.
Learn how you can bring a touch of whimsy to your garden with a handmade stone wishing well. This project not only improves the look of your outdoor area but also creates a unique focal point for conversations and wishes. Whether you’re an experienced DIY enthusiast or just starting out, building a stone wishing well is something you can do and feel proud of.
For those interested in the practical side of having a private well at home, you may find this article on the distinct advantages of having a private well at home helpful.
Ready to get started? Let’s see how to build your own stone wishing well!
Step 1: Understanding Stone Wishing Wells
A stone wishing well is a beautiful and functional element in garden design. It is a small decorative well made from stones, resembling historic water wells. Its main purpose is to add visual interest to your backyard and create a magical focal point in any garden space.
History and Symbolism
Stone wishing wells have a fascinating history rooted in legends and customs. They originated in ancient Europe and were believed to have the power to grant wishes when coins were tossed into them. People thought that the water inside the well had magical properties that could make their dreams come true. This mystical symbolism continues to this day, making stone wishing wells a popular choice for those who want to infuse their gardens with a sense of enchantment.
Why Stone?
There are several reasons why stone is an excellent choice for building a wishing well:
- Durability: Stone is incredibly sturdy and can withstand various weather conditions without getting damaged.
- Natural Beauty: Stones have an inherent elegance and blend harmoniously with the natural environment.
- Easy to Maintain: Unlike wood or other materials, stone requires minimal upkeep, ensuring that your wishing well remains stunning for years to come.
Incorporating a stone wishing well into your garden not only adds historical charm but also creates a lasting structure that will continue to delight visitors season after season.
Stone wishing wells remain popular today because they offer both practical benefits and timeless beauty. If you’re curious about other related structures or need more information on maintaining water features in your backyard, you might find this article insightful. Additionally, if you’re considering having your own water well at home, this resource provides amazing benefits that homeowners can enjoy from such a setup.
Step 2: Planning and Gathering Materials
Planning is essential for any successful DIY project, especially when building something as intricate as a stone wishing well. A well-thought-out plan ensures that you have all the necessary materials and tools at hand, making the construction process smoother and more enjoyable.
High-Quality Woodworking Plans
Before you start, having a detailed woodworking plan can be incredibly beneficial. These plans typically provide:
- Accurate measurements for each part of your wishing well.
- Step-by-step instructions to guide you through the building process.
- Materials list detailing everything you’ll need.
Websites like Ana White, Wood Magazine, and Instructables offer a ton of choices for downloadable plans, many of which are free or available at a minimal cost.
Selecting Upcycled Materials
Incorporating upcycled materials not only adds a unique touch to your wishing well but also promotes sustainability. Consider using:
- Reclaimed wood from old furniture or pallets for the structure.
- Vintage metal handles or pulleys for added character.
- Stone remnants from previous projects or local construction sites.
Using upcycled materials can create an eclectic look while reducing waste.
Essential Gardening Tools
Having the right tools is crucial to ensure your project goes off without a hitch. Here’s a comprehensive list of what you’ll need:
- Shovel and Spade: For digging the base and handling soil.
- Wheelbarrow: Useful for transporting stones and mixing cement.
- Cement Mixer: To ensure a consistent mix for your base.
- Level: To check that your structure is even at every stage.
- Trowel: For applying mortar between stones.
- Chisel and Hammer: For shaping stones as needed.
- Tape Measure: Essential for accurate measurements.
- Safety Gear: Gloves, goggles, and dust masks to keep you safe during construction.
These tools will help you from start to finish, ensuring that each step is completed efficiently and safely.
A well-planned project with carefully selected materials and the right tools sets the stage for creating a stunning stone wishing well that will be a focal point in your garden for years to come.
Step 3: Building the Stone Base and Adding the Stones

Subsection 3.1: Constructing a Solid Cement Base
Creating a sturdy foundation for your DIY stone well construction is crucial. A solid cement base ensures your wishing well stands firm and lasts for years.
Step-by-Step Guide
1. Choose the Site:
- Select a level area in your garden.
- Ensure it’s free from roots, rocks, or debris.
2. Mark the Area:
- Use stakes and string to outline the desired diameter of your wishing well.
- Common sizes range from 2 to 4 feet in diameter.
- Double-check the measurements to ensure accuracy.
3. Dig the Foundation:
- Excavate the marked area to a depth of about 6 inches.
- This depth will provide stability for your cement base.
- Remove any loose soil or debris from the site.
4. Prepare the Formwork:
- Construct a circular wooden form that matches your chosen diameter.
- Secure it in place using additional stakes if necessary.
- Make sure the formwork is level and properly aligned.
5. Add Gravel Base:
- Spread a 2-inch layer of gravel within the excavated area.
- Compact it well to provide drainage and stability.
- Use a hand tamper or plate compactor for best results.
6. Mixing and Pouring Cement:
- Follow the instructions on your cement mix package.
- A standard ratio is 1 part cement, 2 parts sand, and 4 parts gravel.
- Gradually add water until you achieve a thick, workable consistency.
- Mix thoroughly to avoid lumps and ensure even distribution of materials.
7. Pour the Cement:
- Pour the mixed cement into the formwork.
- Use a trowel to spread out and smooth the surface evenly.
- Tap the sides of the form gently to remove air bubbles.
8. Curing Time:
- Allow the cement to cure for at least 24-48 hours.
- Cover it with plastic sheeting if rain is expected to prevent water damage.
- Keep an eye on temperature; curing time can vary based on weather conditions.
By following these steps meticulously, you’ll lay a strong foundation for your stone wishing well, ensuring its durability and aesthetic appeal for years to come.
Subsection 3.2: Arranging the Stones for Your Stone Wishing Well
Once your cement base is ready, it’s time to build up your stone wishing well by arranging stones with mortar for both aesthetics and structural integrity.
Selecting the Right Stones
- Stone Type: Choose stones that match your garden’s aesthetic—natural stone or river rocks are excellent choices.
- Size and Shape: Opt for stones that vary slightly in size but fit together snugly.
Flat stones are ideal for creating stable layers.
Creating a Sturdy Foundation with Mortar
Mixing Mortar
- Use a pre-mixed mortar bag or mix your own using one part cement, three parts sand, and water until you reach a paste-like consistency.
Laying the First Layer of Stones
- Apply a generous layer of mortar around the edge of your cured cement base.
- Place the largest, flattest stones first to establish a solid foundation ring.
Building Up Layers
- Continue applying mortar between each layer of stones.
- Stagger joints as you go by overlapping gaps between stones from one layer to another—this technique increases stability.
Checking Levels
- Regularly use a spirit level to ensure each layer remains horizontal and uniform in height.
Finishing Touches
- Fill any gaps with smaller stones or additional mortar to enhance structural integrity and appearance.
- Smooth out excess mortar with a trowel for a polished look.
Maintaining Consistency
Maintaining consistent measurements during both mixing and building ensures durability:
- Regularly check mortar consistency; it should be sticky enough to hold stones together without sliding off.
- Adjust water content as needed during mixing phases.
By following these detailed steps, you’re well on your way toward crafting an enchanting stone wishing well that adds both function and beauty to your garden space.
Step 4: Roof Construction Techniques
Creating a roof for your stone wishing well is an exciting part of the project, adding both functionality and charm. A well-designed roof not only enhances the aesthetic appeal but also provides protection to the structure.
Exploring Roof Designs
Several roof designs can complement your stone wishing well:
- A-Frame Roof: This classic design resembles a small house roof and is simple to construct.
- Hexagonal Roof: Offers a more intricate look, ideal if you want to add a touch of elegance.
- Cone-Shaped Roof: Gives your wishing well a fairy-tale appearance, perfect for whimsical garden themes.
Building a Durable and Visually Appealing Roof
Here’s a step-by-step guide to constructing an A-frame roof, which is both sturdy and attractive:
Materials Needed:
- Wooden planks for the frame
- Plywood sheets
- Roofing tiles or shingles
- Nails or screws
- Waterproof sealant
- Measuring tape
- Saw (for cutting wood and plywood)
- Hammer or screwdriver
Constructing the Frame:
1. Measure the Diameter:
- Measure the diameter of the well’s opening to determine the base size of your frame.
- Ensure accurate measurements to avoid misalignment issues later.
2. Cut Wooden Planks:
- Cut four wooden planks to form two triangular A-frames.
- Use a saw for precise cuts matching your measurements.
3. Assemble A-Frames:
- Connect these triangles with horizontal planks at the base and apex for stability.
- Secure all joints tightly using nails or screws to ensure sturdiness.
Adding Plywood Sheets:
1. Cut Plywood Sheets:
- Cut plywood sheets to fit each side of the A-frame.
- Make sure the cuts are clean and the edges are smooth.
2. Attach Plywood Sheets:
- Secure them using nails or screws, ensuring they are flush with the frame edges.
- Double-check alignment before finalizing attachments for a professional finish.
Installing Shingles or Tiles:
1. Prepare Roofing Materials:
- Start from the bottom edge and work upwards, overlapping each row.
- Ensure you have enough roofing tiles or shingles to cover the entire roof area.
2. Install Shingles/Tiles:
- Use roofing nails to secure each shingle or tile in place.
- Follow a consistent pattern for an even, polished look.
3. Apply Waterproof Sealant:
- Apply waterproof sealant along all seams for added protection.
- This step is crucial to prevent water damage and extend the lifespan of your roof.
By following these detailed steps, you ensure that your A-frame roof is both durable and visually appealing, adding charm and functionality to your stone wishing well.
Decorative Elements and Functional Features
To enhance your stone wishing well further:
1. Decorative Touches:
- Add ornamental trims along the edges.
- Paint or stain the wood to match your garden’s color scheme.
2. Bucket and Pulley System:
- Attach a small pulley at the apex of the roof.
- Hang a rustic bucket using rope, allowing it to be lowered into the well—this adds an interactive element that children will love.
Incorporating these elements ensures your wishing well serves as both an enchanting decoration and a functional outdoor water feature.
Step 5: Creative Garden Feature Enhancements
Enhancing your stone wishing well with unique and creative touches can transform it from a simple garden feature into a captivating focal point. Here are some innovative ideas to elevate the appearance of your stone wishing well using upcycled materials and other techniques.
Upcycled Materials
Recycled Tires

Repurposing old tires is an eco-friendly way to add character to your garden. You can paint the tires in vibrant colors and stack them around the base of the wishing well for a playful look. Alternatively, cut and shape the tires to create decorative edging or planters around the structure.
Wooden Pallets

Wooden pallets can be dismantled and used to craft rustic signs or flower boxes that you can attach to the sides of the wishing well. These additions will not only enhance its appearance but also provide functionality by incorporating planters for seasonal flowers.
Metal Buckets and Cans
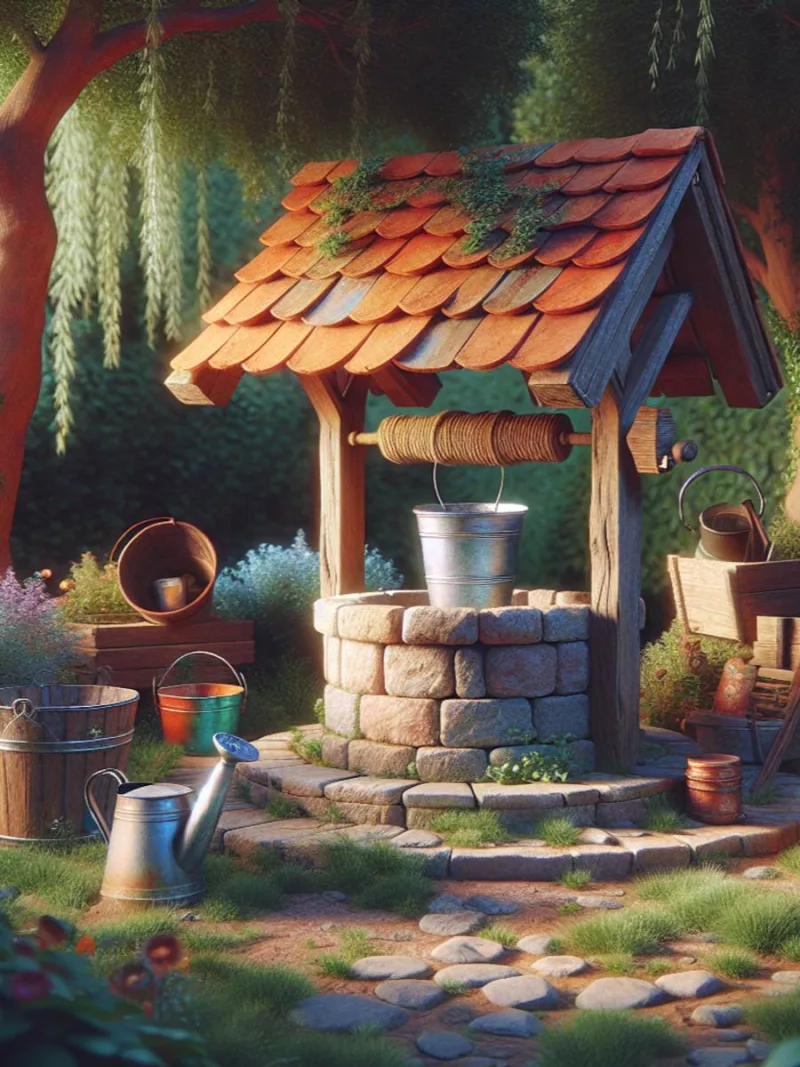
Old metal containers can be cleaned, painted, and hung around the wishing well as decorative elements. They can be used to hold small plants or even as lanterns with LED candles inside, creating a charming nighttime ambiance.
Innovative Techniques
Mosaic Accents
Incorporate mosaic tiles into the stonework of your wishing well for an artistic touch. Use colorful ceramic pieces to create patterns or images on the exterior surface, adding visual interest and a personal touch to your project.
Climbing Plants
Plant climbing vines such as ivy or clematis at the base of your wishing well. Over time, these plants will grow up and around the structure, blending it seamlessly with your garden’s natural landscape.
Water Features
If you’re looking to add a dynamic element, consider integrating a small water feature like a fountain or a trickling stream into your wishing well design. This not only enhances the aesthetic appeal but also creates soothing sounds that contribute to a relaxing garden atmosphere.
Decorative Elements
- Wishing Tokens: Scatter small tokens or coins around the base of your wishing well for an added whimsical touch.
- Fairy Lights: String fairy lights along the roof and around the structure to illuminate it at night, creating a magical effect.
- Seasonal Decor: Change out decorations seasonally, such as adding pumpkins in autumn or flowers in spring, keeping your garden feature fresh and engaging throughout the year.
By incorporating these creative enhancements, you can ensure that your stone wishing well stands out as a unique and charming addition to any garden space.
Step 6: Maintenance and Care Tips
Ensuring the longevity of your stone wishing well is essential to keep it looking beautiful and functioning properly. Regular maintenance practices can significantly extend the life of this outdoor garden feature construction.
Regular Inspection and Cleaning
- Monthly Inspections: Check for any visible cracks or damages. Addressing minor issues early can prevent them from becoming major problems.
- Cleaning: Remove dirt, moss, and algae build-up using a soft brush and mild soap. Avoid harsh chemicals that could damage the stone or mortar.
Protecting the Cement Base
The cement base for stone well stability is crucial. It acts as the foundation and supports the entire structure.
- Sealant Application: Apply a high-quality sealant to protect against moisture penetration. This helps prevent cracks caused by water freezing and thawing.
Tip: Choose a sealant specifically designed for outdoor use on cement.
- Drainage Solutions: Ensure proper drainage around the base to avoid water pooling, which could weaken the cement over time. Consider installing a gravel bed or French drain system nearby.
Weatherproofing Techniques
Stone wishing wells are exposed to various weather conditions throughout the year. Implementing weatherproofing techniques can help mitigate potential damage.
- Cover During Harsh Weather: Use a tarp or custom cover during severe weather conditions like heavy snow or storms.
Example: A waterproof, UV-resistant cover can protect your wishing well from both sun damage and rain.
- Reapply Sealant Annually: Regularly reapplying sealant helps maintain its effectiveness in protecting against weather-related wear and tear.
Seasonal Maintenance Tips
Different seasons bring different challenges. Here’s how to maintain your wishing well throughout the year:
- Spring: Inspect for any winter damage, clean thoroughly, and reapply a sealant if necessary.
- Summer: Regular cleaning to manage algae growth due to increased humidity and sun exposure.
- Autumn: Clear fallen leaves and debris that could trap moisture against the stone.
- Winter: Ensure no water is left inside that could freeze, expand, and potentially crack the structure.
Implementing these practices ensures your stone wishing well remains a charming focal point in your garden for years to come.
Conclusion
A stone wishing well adds undeniable beauty and charm to any outdoor space. Its rustic elegance effortlessly enhances your garden, making it a focal point that invites admiration and curiosity.
Starting your own DIY project is incredibly rewarding. Using the comprehensive guide you’ve just followed, you can create a sophisticated and modern look tailored to your backyard. Imagine the satisfaction of knowing you built this enchanting structure from start to finish.
Explore more backyard decoration ideas and unique garden decor features to elevate your outdoor aesthetic. Whether it’s incorporating upcycled materials or experimenting with different design elements, let your creativity flow. Your garden deserves a touch of whimsy—why not begin with a stone wishing well?
FAQs (Frequently Asked Questions)
What is a stone wishing well and its history?
A stone wishing well is a beautiful and functional element with a fascinating history rooted in legends and symbolism.
Why is stone an excellent choice for building a wishing well?
Stone is an excellent choice for building a wishing well due to its durability, natural aesthetic, and timeless appeal.
Why is planning essential for building a stone wishing well?
Planning is essential for any successful DIY project, especially when it comes to gathering materials, ensuring proper construction, and achieving the desired outcome.
How can upcycled materials be incorporated into the construction of a stone wishing well?
Upcycled materials can be incorporated into the construction of a stone wishing well to add a unique touch and contribute to sustainability efforts.
What are some roof construction techniques for a stone wishing well?
Some roof construction techniques for a stone wishing well include exploring different roof designs, using high-quality materials, and following step-by-step guides for constructing the frame and adding decorative elements.
How can the longevity of a stone wishing well be ensured through maintenance and care?
The longevity of a stone wishing well can be ensured through regular inspection, cleaning, protecting the cement base, implementing weatherproofing techniques, and following seasonal maintenance tips.

