When starting to build a 10″ x 12″ shed, sketch it out on paper to help estimate the materials that will need to be purchased.
Then start by measuring out the area for the shed, and dig nine holes 18 inches deep in which to put upright posts in.
Mix up concrete (a wheelbarrow can be used) one bag at a time. This will require about four bags. Place nine 4″ x 4″ treated posts in the ground 18 inches, with lengths varied to obtain a level floor.
Step-by-step instructions on how to build a ten-by-twelve-foot garden shed.
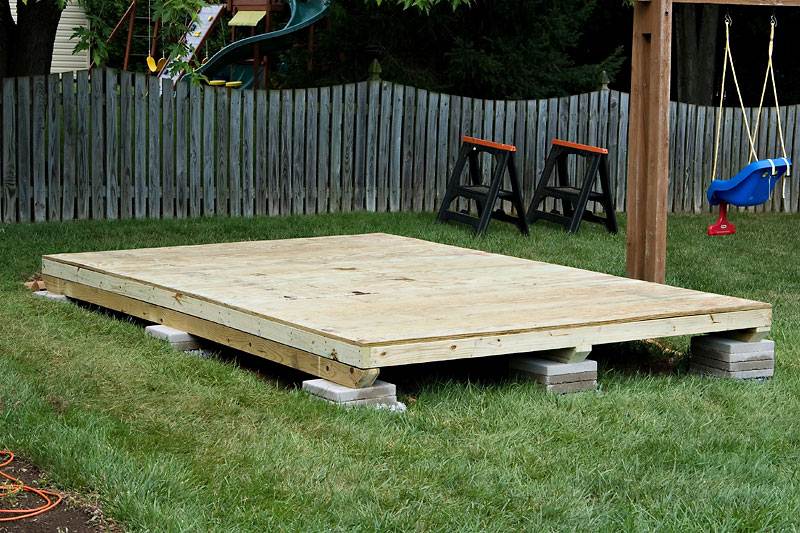
Build a floor that measures 10 x 12-foot out of nine 2″ x 6″ x 10-foot and out of four 2″ x 6″ x 12-foot treated lumber. Make floor joists at 16-inch centers (width apart), and use 14-2″ x 6″ metal joist hangers.
Lay down four sheets of three-quarters or a five-eighth-inch thick 4″ x 8″ plywood. Then paint the top surface first with an oil-based primer and then deck paint. Let it dry for at least a few days, and preferably for a week.
Read Also:
- Whatever Storage Shed Design Your Choose Consider Using the Appropriate Storage Shed Plans
- Things to Consider Before Taking Up Your First DIY Shed Building Project
- Instructions to Build a PVC Hoop House for Your Garden
- Instructions to Make Your Own Deck Storage Bench
- Building Your Own DIY Garden Retaining Wall
- How to Easily Build a Stone Raised Garden Bed
- The Rundown on Building Your Own DIY Shed
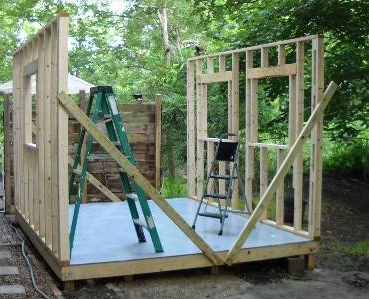
Lay out walls with the 16-inch center 2″ x 4″s to the desired height (this one was nearly 10 feet tall). Put 2″ x 6″ headers at the top of the doors and windows.
The walls are stood up and supported with a 2″ x 4″ until all four walls were installed. The walls are then sheeted with 3/8 inch plywood.
Build a center beam with 2″ x 6″ and 2″ x 4″ boards sandwiched to make a center support beam, so the rafters can be “free span” as opposed to a truss design, giving more ceiling height.
The rafters for this shed were built with 2″ x 6″ x seven-foot boards, angled at the top, and fastened by hangers and three-inch nails at the top and bottom.
Put up a 2″ x 6″ fascia board on each (non-peak) side, and lay down half-inch plywood on the roof.
Install the windows. Use a level to be sure they are both level and plumb. Put thirty-pound tar paper on the roof and wrap the walls with the same, using tar paper disk nails.
The outside corner edges can be reinforced with 1.5 x 1.5-inch metal corner strips.
Install a drip edge on the roof, using 1.5-inch roofing nails. Starting at the bottom line, nails in asphalt composition shingles use six nails per shingle.
(Some think four nails per shingle is sufficient, but six will be much stronger.) Stagger and “staircase” your shingles so the seams are overlapped.
Other roofing material choices are metal and asphalt corrugated roofing, depending on the look that is being sought. When buying asphalt shingles, this project required six bundles or two squares.
Choices include 20, 25, and 30-year shingles.
Use 1″ x 4″ lumber to trim the windows inside and outside, and the outside corner edges.
Starting at the bottom, put up Hardie plank siding with a one-inch overlap using 2.5-inch nails. An air nailer helps make this job much easier. NailersNow.com can help you find this tool easily. Then caulk any cracks.
Finally, paint a primer coat and a finish coat on the shed with the color of your choice. Latex paint can be used. Build an inside bench using 2″ x 4″s and top it with plywood, then paint it with durable paint.
Doors can be either purchased or built. In this case, the back door was a standard 32-inch steel door with a nine-light glass window. The front door is made up of two 30-inch doors, wide enough to drive a riding lawn mower through.
It is built with an outer frame of 1″ x 6″, and an inner frame of 1″ x 4″s that were glued and screwed together. The inserts were made out of T 111 plywood.
The dimensions for this shed were based on the site. Other choices might be 8′ x 10′, or 12′ x 16′. This project took two people six weekends to complete, and cost just under $3,000.
View Comments
Just want to say your article is as amazing.
The clarity in your post is simply great and that i could assume you're knowledgeable on this subject.
Fine along with your permission let me to seize your RSS feed
to stay up to date with impending post. Thank you one million and please
continue the gratifying work.. Feel free to visit my commodity best cord electric lawnmower Agreenhand
Great article. It may also be a good idea to build a ramp close to the shed door to make it easy for moving heavy equipment in and out of the building. Also for a shed this size, some counties may require a building permit so it is good to check with the local building council beforehand.