How to Install Drip Edge — Drip edge installation may seem self-explanatory, but there are definitely right and wrong ways to install drip edge when preparing to roof a house.

How to Install Drip Edge Properly
Drip edge is the first of all roofing materials installed on a house once the tear-off is complete and any rotted sheathing is replaced. Getting the drip installation right is an important first step towards ensuring a successful roof job.
Drip edge comes in 10-foot sections and is available in a variety of different profiles. Its main functional purpose is to protect fascia boards from the water rolling off a roof. For this reason, a wider face drip edge (at least 1 1/2″) is recommended.
Directions for Installing Drip Edge
To install drip edge properly, start on the eaves. Begin at the corner of an eave where it meets the next eave or a gable rake. Measure how far the top of the drip extends past the front face (usually 3/4″ or somewhere thereabouts), and allow the first piece to extend that far past the corner of the eave.
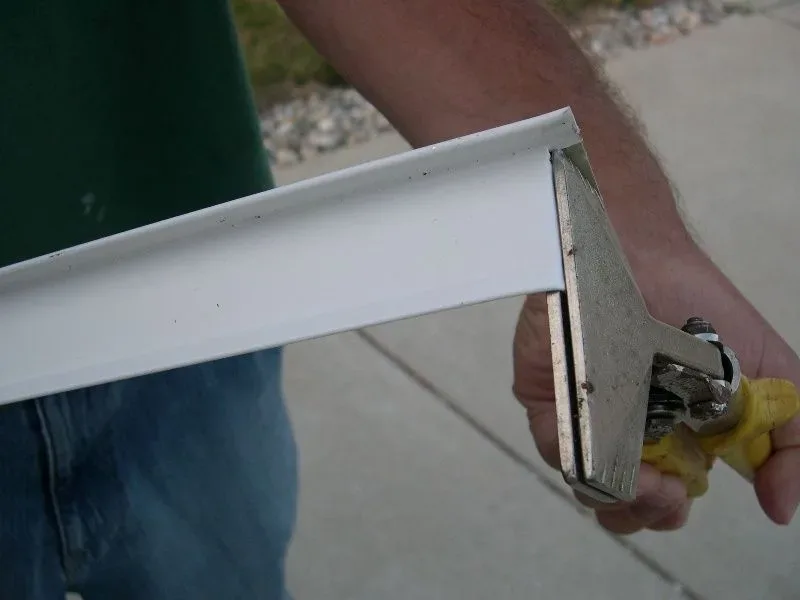
Cut the front face back as shown in the photo and wrap it around the corner. The flap created will end up sitting underneath the first piece installed on the next face of the roof, giving total fascia coverage.
Work across the eave, overlapping each succeeding piece of drip edge by at least an inch. Open the hemmed edge at the end to allow each piece to slide into place over the previous one. Be sure to pay attention to the front face, ensuring that it lays flat on the fascia.
Attach each piece of drip edge from the top, not through the front face, using galvanized roofing nails. Try to make sure nails go through roof sheathing and not just through the top of the fascia boards. Too many nails through the fascia boards can make them split, especially if they are 1X boards.
On gable roofs, install ice and water shield and felt paper all the way up the gable to the ridge, then work up the ridge with drip edge, laying it on top of the ice and water and the felt. This is so that if water were to happen to get underneath the shingles at the gable end, it would not get past the underlayment.
Must Read:
On hip roofs, work around all sides and install all drip edge prior to installing ice and water shield.
On the gable rake, install drip edge starting at the bottom and working up. Align the leading (bottom) edge of the first piece on the gable rake with the front edge of the drip edge installed on the eave. Slightly open the hemmed edge to slide this piece over top of the installed piece on the eave. No cutting is needed for this piece.
Overlap pieces up gables the same as across eaves, with the proper overlap and paying attention to make sure the pieces lay flat on the fascia.
At the ridge, try to work across the peak with one piece by folding it rather than having a complete seam at the top to discourage leaks. To do this, work all the way up both gables opposite a ridge until ready for the last piece, then install top piece for proper overlap on both sides.
Just cut the front face and fold the rest at the angle needed. Remember the way water flows, from top to bottom, and always install everything in the proper order to prevent leaks.
While working, make sure that all overlaps look right and stay tight on the fascia. Do not overdo the opening up of the hem to slide each piece in. Only a tiny adjustment is needed.
Try to avoid using very small pieces on any particular face. Plan ahead to minimize waste by pre-measuring each section to determine linear footage needs.


 4")


1 comment
It has to be mentioned that the drip edge has to go over the back of the gutter and not behind it, of the drip edge eis behind the gutter water will flow behind gutter and leak at foundation.