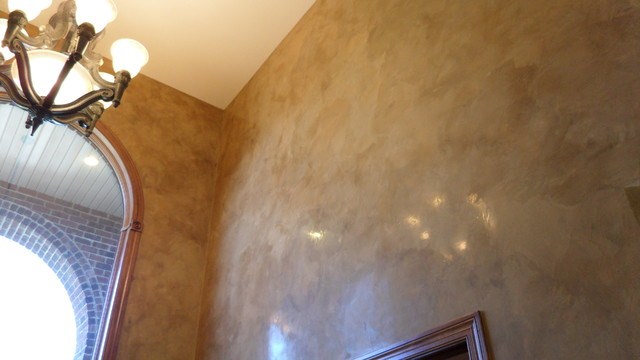
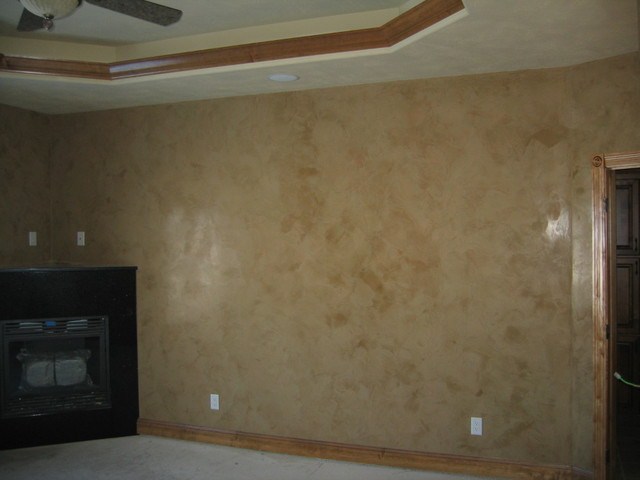
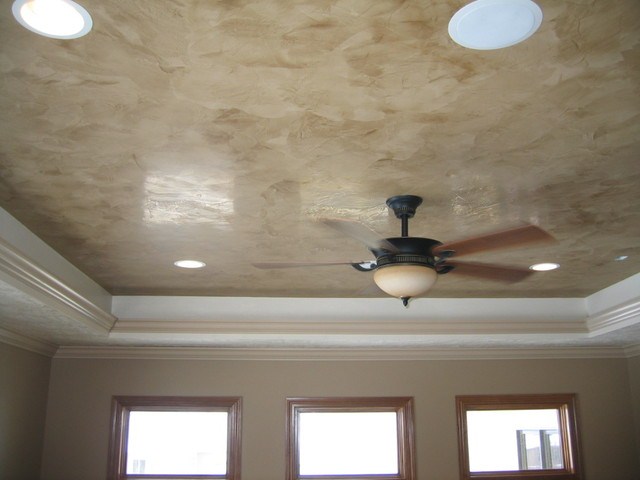
Faux Italian Plaster, Mottled Wall Technique — The Faux Italian Plaster Technique is a staple decorative finish. This technique is fast, works great with latex paint, and requires no glazing liquid or thinning of the latex paint. This technique does not create an actual texture, which is ideal for future repainting concerns
Unlike Faux Venetian plaster or real Venetian plaster, the Faux Italian Plaster Technique can be done in one layer, using standard latex paint.
Unless you have a badly damaged surface and you want to hide defects in the underlying substrate, I would use an eggshell or satin latex paint.
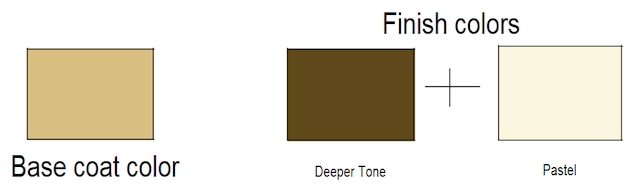
The best and most predictable color system to use is a two-color system, which typically consists of one deeper-tone color and one light, pastel color. If you add another color to this mix, you may get a muddy brown color. If you keep it to just two colors (one deeper and one light/pastel or off-white/white), you will get lighter to darker variations of the two colors you picked without creating a third “muddy” color.
Pick a color that goes with the overall look of your sample. Any color-blend mixed from the two colors that you have chosen will work. Use the same sheen for your base coat that you are going to be using for your final finish.
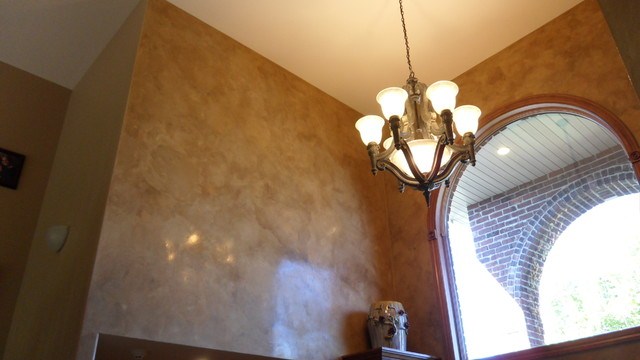
Image below to view color sample.
You will apply the paint to the wall, working on 4′ X 4′ sections of wall at a time, gradually working your way around the room.
Apply patches of each color to the wall with arching sweeps of the roller, alternating each color. Then begin to blend these colors randomly by rolling over the patches of color with a dry roller, leaving some spots slightly blended and other spots highly blended. Be careful not to over-blend with the roller. More spot-specific blending will be done with the lamb’s wool pad later. Work one 4′ X 4′ section at a time, then move on to the next.
A word about the 4′ x 4′ sections: The edges of these sections should be jagged rather than square. This will give them a randomness that will help hide where each section joins together.
After a couple of sections have been blended as described above, use the lamb’s wool pad to do some more specific and refined blending as desired. Soften the work by patting the surface here and there (both randomly and where needed) with the lamb’s wool pad. Take a minute to look over your work, blending the joined sections together as needed to help camouflage the joints between each section. When done well, you will not see any joints from these sections. Again, be careful not to over-blend.
Tape off the adjacent wall with either three-inch paper tape or two-inch easy release blue tape. Continue your faux finish right into the corner of the wall, bumping the adjacent wall as necessary. Use a small paint brush to stipple-blend the colors as needed in the inside corner-joint. Use the alternate wall sequencing (this will allow you to tape off the adjacent walls as you go). Tape and treat the ceiling/wall inside corner the same way.
Areas that are too small to get the four-inch roller into need to be stipple-blended with small paint brushes. Apply the paint in random streaks and patches in both colors, then, with a dry brush in a random fashion, blend the patches by stippling the colors together.
You can stipple-blend the louver vents of cold air return vents on the wall in the same way that you would blend small areas. Roller-mottle and blend the face of the vents as you would the rest of the wall.
Must Read:
Use one-gallon pails with one-gallon grids to hold your paint. Secure the pails to your ladder by either using paint hooks (ladder hooks) or by setting them on the tray on a step ladder. Using pails allows you to have your paint with you when you are on a ladder.
I have done this technique on 16-foot-high walls where it would be virtually impossible for me to continuously dip my roller into a roller tray on the ground then climb the ladder. However, this method makes the job go a lot faster on eight-foot walls, too.
Don’t wait for the paint to dry before you remove masking tape. Removing the tape while the paint is wet will ensure that you don’t pull the paint off the wall along with the tape.