Faux Venetian plaster is an imitation of real lime-based plasters and the specific techniques used by the practitioners of the craft of “Scagliola“—an Italian plaster technique that originated hundreds of years ago.
This technique produced plasterwork that looked and felt like real marble.
Faux Venetian plaster is made from a tintable acrylic plaster. It’s important to note that faux Venetian plaster is not a painted finish, as are most faux finishes, but rather a trowel finish.
The mottling effect of faux Venetian plaster comes from toweling on the material. It is best to use the special spatulas made for application of this material. These spatulas have rounded edges and are non-marking or graying.
The old world method of applying Venetian plaster is with a trowel. Most faux-finishers use Spackle knives for application—as do I. (Use stainless steel Spackle knives.)
If you decide to burnish the plaster, you should use the special spatulas (standard Spackle knives including stainless steel, can cause graying of the plaster).
However, if you clear-coat the plaster rather than burnish the plaster, there will be no problem with graying.
Read Also:
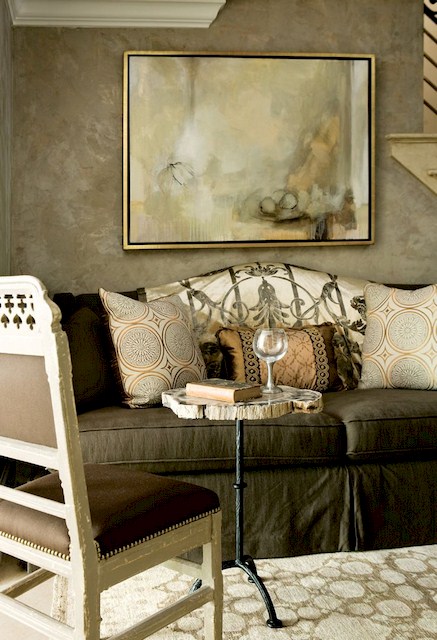
The following are generic instructions for doing faux Venetian plaster. These are intended to give Apart from being beauty & fashion conscious with those stunning designed French tip toes, you also need to think about sprucing up your home interiors with some great Faux Venetian plaster finish on the walls & ceiling, the reader a general understanding of the process.
You should follow the manufacturer’s labeled directions for their specific product when applying a particular brand of Faux Venetian Plaster.
For those who are familiar with the faux Italian plaster technique and the color blending done with that technique, this is essentially a toweled on the version of the painted faux Italian plaster technique with a few modifications.
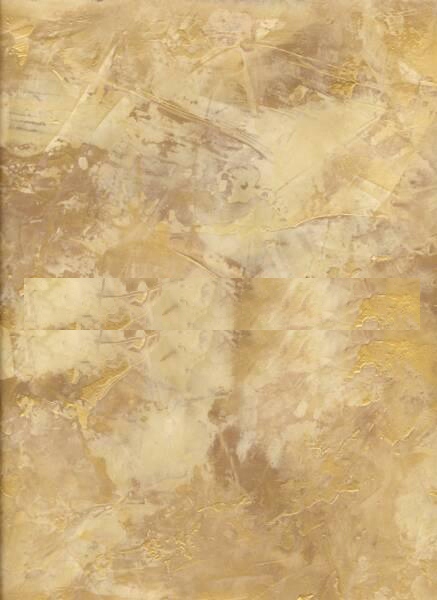
The two-color method uses two tones of a color to help create depth and a variety of color blends.
(Note: You can use more than two tones if you’d like. The image below is a three-tone sample.)
Have the paint store tint your plaster to match to the paint color(s) of your choice.
With Modern Masters Venetian plaster, there are two bases: a standard tint base for off-white, pastels and mid-tones and an ultra-deep base for deep-tone colors.
Each base can be tinted with up to ten ounces of universal colorants.
Prime the surface with a quick-dry oil primer such as Coverstain or latex primer such as 123 Bullseye.
You should tint the primer to match one of the finish colors or at least tint the primer to a similar color if you can’t match.
On the first coat, also known as the “float coat”, trowel on the plaster, keeping the trowel or Spackle knife almost flat to the surface. This coat should be “floated” on with light pressure, applying the material at 1/16” or so.
This is kind of a skip trowel type of application. Try to apply the plaster smoothly, avoiding leaving ridges and scratches behind.
Keep your Spackle knives or trowel clean to avoid dry grit from forming on them, which will scratch the plaster.
One to dip into the can and hold the material (such as the “hawk” used by drywallers and plasterers), the other to apply the material.
If you are working out of a gallon can use a four-inch Spackle knife to scoop and hold the material and a six-inch knife to apply the material.
You will need a four-inch knife for application to narrow areas on the wall (and maybe even a one-inch knife for the same).
Trowel on the plaster in a cross-hatched manner of arcs and wavy “s” types of patterns. Apply the first color, leaving space between arcs.
Do five or ten arcs, then switch to the other color and fill in and overlap the previous color arcs. Try for a random mottled look.
You don’t need to hide 100 percent of the primer or get total coverage on the first coat, but most (90 percent) of it should be covered.
Work in four by four-foot sections, keeping the edges of the sections ragged and random—this will help in blending the sections together invisibly.
This first coat will need to dry for about four hours (check label for manufacturer’s recommendation), after which you may apply the second coat.
The second coat is called a “skim coat” and should be applied tighter to the wall, very thinly, using a little bit of pressure (don’t overdo the pressure).
The Spackle knife should be at about an 80-degree angle to the surface of this coat.
Repeat the two-tone technique, as in the first coat. Be sure to cover all bare areas where the primer is still showing that were left from the first coat.
Allow the second coat to dry for a couple of hours (minimum—overnight drying is best), then proceed to sand and finishing the plaster.
Prime the surface with a quick-dry oil primer, such as Coverstain, or Latex primer, such as 123 Bullseye.
You should tint the primer to match one of the finish colors, or at least tint the primer to a similar color if you can’t match.
Using a heavy-nap roller, roll the plaster on the wall. After you roll out a four by four-foot section, you need to lightly knock down the roller stipple.
Repeat this procedure on the rest of the wall until the whole wall is completed.
Apply the plaster in the same way as explained above under method one, except using only one color.
Apply five or ten arcs and wavy “s” patterns, then backtrack and fill in an overlap.
Continue down the wall in this manner until complete.
Allow the second coat to dry for a couple of hours (minimum—overnight drying is best), then proceed to sand and finishing the plaster.
Allow the faux Venetian plaster to dry before sanding, as per the manufacturer’s label instructions.
Sand the wall with 220 grit sandpaper in a circular pattern. Follow this up with 400 grit sandpaper in the same manner if you will be burnishing the plaster.
If you will be clear-coating, sand with the 220 only. Sanding brings out and adds detail to the plaster.
You can use a random orbital sander and attach it to a HEPA filtered vacuum for dust-free sanding, or you can hand-sand. If hand-sanding, use a circular sanding motion.
Once the sanding is done, vacuum the dust off the wall with a properly filtered (HEPA) shop vacuum.
Follow this up with a micro-fiber tack cloth and a damp, soft cotton rag or sponge. Allow this to dry before either burnishing or clear coating.
You may follow up the sanding with Spackle knife blade-burnishing for a higher sheen.
Press the knife against the wall’s surface, rubbing it in a circular motion with the flat edge of the Spackle knife while applying pressure. Do not burnish the surface if you are going to clear-coat.
Most of the faux Venetian plaster manufacturers make a clear top-coat for special protection.
This clear top-coat is designed for faux Venetian plaster in high traffic areas or in high moisture areas such as bathrooms. The top coat usually has a satin sheen.
Apply the clear coat with a trowel or Spackle knife in a crosshatch manner, covering the wall completely with the clear coat.
The top coat is used in lieu of burnishing. If you are going to top-coat, do not burnish the plaster either before or after top coating.
To add a little more pizzazz, you can use a metallic clear coat, which adds a sophisticated metallic shimmer to the plaster.
Two-tone application of faux Venetian plaster including waxing and burnishing are demonstrated.