Learn how to remove and replace steel casement windows with full frame replacement windows.
This article includes removing the interior and exterior trim, getting the old window out and installing the new window so it is plumb and square, caulking it and installing the trim to finish.
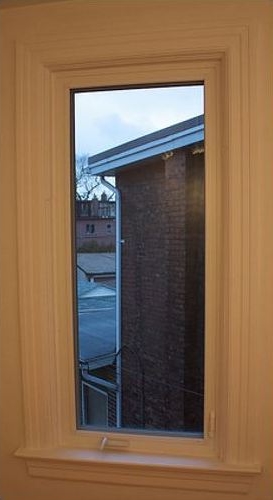
Steel casement windows provided functionality, good looks, and if maintained properly, a durability unmatched by any other window. However, old steel casement windows tend to leak air and moisture as they grow older. In historic buildings, they can be restored or replaced. For most homes, replacement with aluminum, vinyl or wood is the most practical solution. Here’s how to remove and replace steel casement windows.
Read Also:
Remove the interior trim. Some old molding styles are difficult to replace and if keeping the same look is your plan, you’ll want to remove it carefully to cause as little damage as possible. First, cut the seal made between the molding and the paint with a utility knife. Push a stiff putty knife between the molding and the wall near a corner of the trim and pry it loose. Work all the way around a window, then switch to a small, flat pry bar. Remove the nails from the molding by pulling them out through the back with large pliers.
Measure the rough frame to determine what size window to order. Place your order and wait for the new windows to arrive. Measure the new windows to make sure they will fit before you remove the old windows.
Remove the exterior trim to expose the window nailing fin. If there is no nailing fin, the steel window frame is screwed directly into the rough frame. You’ll either need to locate these screws and remove them or cut through them with a reciprocating saw. Remove the nails from the nailing fin. Be sure not to remove or damage the thin, metal flashing at the top of the window. At this point, you should be able to lift the window out of the opening. Get a helper—steel windows are heavy.
First, set the window into the opening and center it. Place a level on the bottom frame and use shims to level it. Add shims to the sides to take up the space between the rough frame and the window frame.
Check the sides for plumb (vertically level) by placing a level against the face of the frame, and the front of the frame. The window must be level in all three dimensions—horizontally, vertically on the sides, vertically on the front. Screw the window to the rough frame in the manner specified by the window manufacturer.
Check the window for plumb and level after it is fastened in place. Measure between the inside opposing diagonal corners of the frame to check for square; top left to bottom right and top right to bottom left. The two measurements should be equal or very close, within 1/16 inch or less. If not, loosen the screws holding the window in place and use shims to nudge the window into a square.
Reinstall the exterior molding and caulk between the molding and siding, and between the molding and window frame to seal the window. Inside, use non-expanding foam to fill the gap between the window frame and the rough frame. Be cautious not to overfill and wait to install the trim until the foam is set and hard to the touch. Install the interior trim to finish how to remove and replace steel casement windows.
View Comments
Building is brick veneer with plaster walls ten in. thick. Steel casement windows have been replaced with metal clad thermapane ones. Now have rot at the base of window. Cause? Solution?