How to Paint Kitchen Cabinets — Learn how to re-paint over enamel or varnished kitchen cabinets. Surface preparation and priming recommendations. There are three ways to refinish your kitchen cabinets:
Of the three listed above the last – paint them, is the easiest solution and probably the most common refinish method.
Let’s look at how to go about painting the kitchen cabinets. There are two scenarios to consider here:
Background reading and related articles which will be helpful are: Painting Over Varnished Trim, How to Paint Paneling and Painting Latex Over Oil Enamel.
As usual I need to sound the caution on pre-1978 painted substrates which may contain lead paint. The step by step directions for painting kitchen cabinets are for cabinets made after Jan. 1, 1978 where lead paint issues are not a concern.
Most of the time that I am called on to paint cabinets I am painting the doors (both sides) and the outer cabinet only. You will see that painting cabinets takes a bit of time to do and doing the inside of the cabinets significantly adds to the time necessary to paint them. It is a decision you will need to make.
Must Read:
Most likely if you are painting your cabinets they have been up for a while and have collected their share of dirt and grime. My favorite cleaner for greasy/dirty surfaces is a product called “Krud Kutter”. I use the spray bottle version for most situations: spray it on , let it dwell on the surface for a few minutes, then respray again. This time you will scour the cabinets with a scotch brite scouring pad before wiping off the dirty solution with paper towel. Clean the cabinets thoroughly this way – twice.
If you used a scouring pad and scoured your cleaning solution before wiping it off and if you cleaned the surface this way twice, the cabinets should be dulled or deglossed as well as clean at this point.
If you did not scour the cabinet you will need to sand the cabinet at this point. Use 220 sandpaper and be thorough. Once sanded vacuum the dust off and follow up with a micro mesh tack rag.
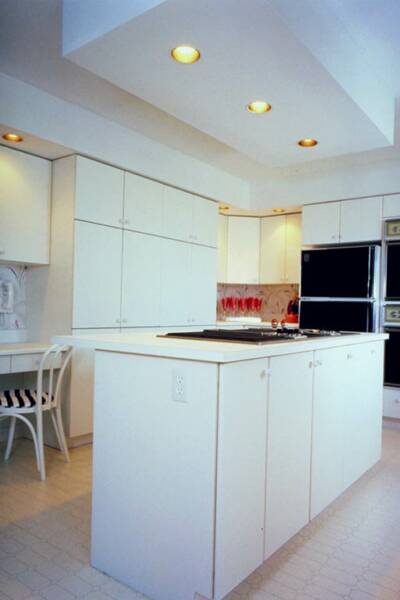
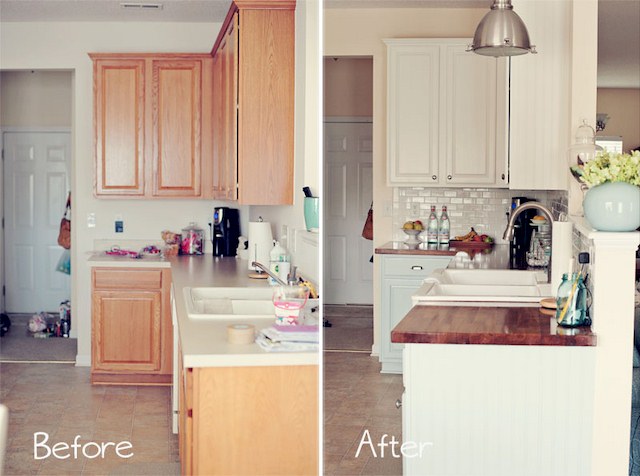
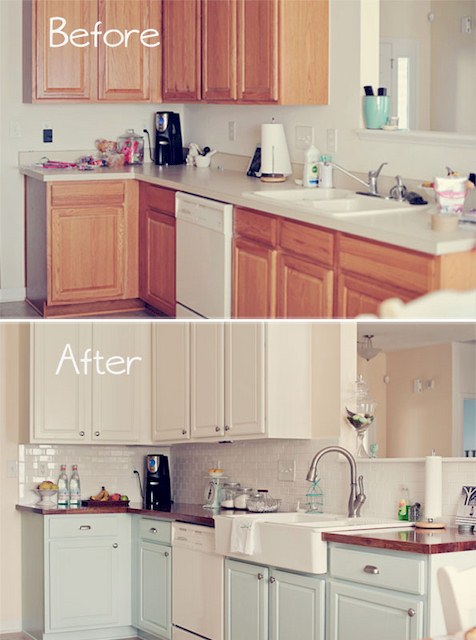
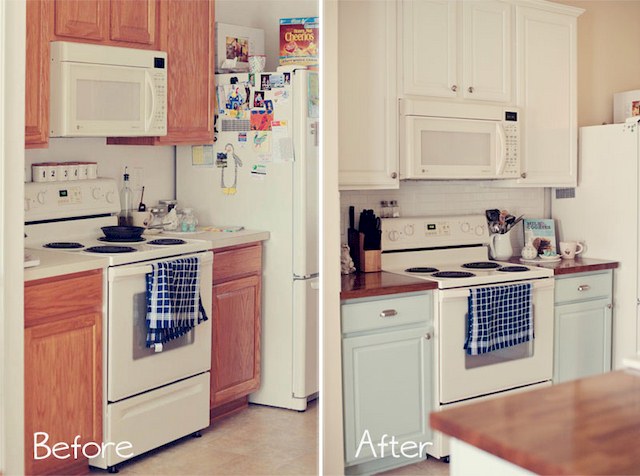
Most of the cabinets that I paint are in white. Why white? White is neutral and will not need to be repainted every time you change color on the kitchen walls. If you match your cabinets to the walls – what happens when you repaint the walls down the road? Use a neutral color because you don’t want to paint your cabinets every time you paint the kitchen. White is kind of the universal neutral color and is the most common painted cabinet color.
My preference for the type of paint is oil enamel. You don’ t have to use oil, it just flows out better and allows longer working time than latex. In exchange for the better leveling and smoothness you trade off color retention a bit. Oil enamels will yellow a bit with age particularly in dark areas without much sunlight. If you do use a latex, I recommend the newer waterborne finishes. ProClassic (Sherwin Williams) is my favorite of these. The new generation of enamels are called waterborne enamels, these are much harder finishes than a conventional latex semi gloss, and have better leveling characteristics.
You can do a very good job with a short nap roller and brush using the good leveling enamels – either the waterborne or oil ProClassic versions will come out fine using good technique.
Roll the paint on using a 1/4″ or foam roller cover. I like the mini rollers for cabinets. The 4″ length mini roller works well for me. Roll the paint on and them “lay it off” with the tips of a good quality paint brush. Use china bristle if you are using oil enamel, use a good quality synthetic bristle brush if you are using the waterborne enamel.
If you want to spray, you will find that a HVLP sprayer is more controllable and gives a finer finish than an airless. Oil will spray better with the HVLP sprayer. Latex enamels will actually spray better with the airless sprayer than a HVLP. Airless sprayers handle the thicker viscosity materials better than HVLP but they are production sprayers so be careful not to lay on too much paint at a time with these or you will have sags all over.
Be prepared to really cover up everything in the room and block off the air vent (furnace and air conditioner) because atomized paint is lighter than air and floats for a while before dropping to the ground. It can be sucked into the furnace and you also need to be careful if spraying oil in terms of combustibility in a kitchen.
Turn off any flames or pilots in the stove/oven etc… if using oil. I am not a big fan of spraying in a occupied home. Too easy to get overspray where you don’t want it, and with oil you really have to be cautious of combustibility of the fumes. You even need to be careful with latex / waterborne paints as they contain some solvent also.
No matter what type of finish paint you decide on, I would prime with only a oil or shellac primer. Oil is my first choice because it will be a little more forgiving than shellac or a latex primer.
A word about latex primers (and paints): Latex primers take a couple of weeks at a minimum to harden and cure. They remain soft and can be scratched off the substrate during the early film life. You don’t want to deal with this on your cabinets. You want a primer that will stick and be hard enough to withstand a knock or two. If you are painting with a color other than white, you can tint the primer to match the paint color.
Apply the primer as you would the paint: Roll it on and lay it off with a brush. After your primer is dry, sand the surface lightly with 220 paper to knock off any debris. Follow up with the micro mesh tack rag.
You may be able to cover in one coat depending on you skill level if you tinted you primer to match you finish paint color ( white or otherwise). Follow the application method outlined above: Roll the paint on and lay it off.
View Comments
Awesome job.