Adding an attached two-car garage to your home will run you around $27,000. A large chunk of that will go towards labor for carpentry and roofing.
But if you’re handy and have the time, you can build your own garage for a fraction of the cost.
“Adding a garage to your home might actually increase its value significantly. If done properly, an addition of a garage to your home can make it appeal to a whole new set of buyers, adding increased competition”, according to The Property Buying Company.
Read on to learn the steps for building a garage yourself.
Read Also:
The first step in how to build a garage is the planning stage. You need to plan the size, layout, shape, materials, permits, inspections, helpers, timetable, and so on. And you’ll need to factor in the weather, too!
The first thing you should do is figure out the building code requirements in your municipality. Your city ordinances can limit the size of your garage. Especially if you live in an urban area.
Also, plan how many windows and doors you want. Think about the type of roof you’ll get. And also think about how much of the work you will hire contractors to do. Then book those subcontractors now to avoid long delays on your DIY garage.
Unless you’re an architect, you’re probably going to need some help with the design of your garage.
You can find many free plans for building a garage online. Just look for one that is the same size as the one you plan to build.
Once you find a plan that works for you, look over it carefully. You don’t want to rush into this project.
Take the time to carefully plan your materials, time, and most importantly design.
This step can be daunting. There’s no going back once you’ve paid for your supplies.
Most building supply stores (like Home Depot) have a small kiosk to help you figure out how much you need to order. You enter in your design and it will print out a list of materials you need.
Best of all, building supplies stores will deliver your order to the construction site. Ask for your materials to be delivered after the foundation for your garage has been poured and is cured.
This will eliminate extra carrying materials from your driveway or yard needlessly.
It’s wise to subcontract the foundation to a concrete company. This may cost you around $5000 but it will ensure you have a strong, sturdy garage for years to come.
Remember, you need to have the site inspected by the city before you can pour concrete. The inspector will come and see that you are following the code.
Once your foundation is poured, it will take about 4 days for it to cure. Then you can start building on top of it.
You should consider painting your concrete flooring to give your garage floor some color.
The next step is framing your DIY garage. You will need a few people to help with this part of the project.
If you can’t pay them, make sure you have plenty of drinks and pizza to keep them happy.
It’s important to assign the right person to each task. Those who have expert lumber experience should be the ones doing the layouts, straightening walls and assembling window and door openings.
Your friends with some experience can help by cutting lumber, sheathing, nailing studs and helping with trusses.
The friends without any prior experience can carry lumbar, lift walls, clean the job site, crown studs and put in hurricane clips.
Once one of your walls is up, make sure to nail your permit on full display.
When the four walls are framed you can sheath the outside of your walls.
The simplest way is to sheathe over your windows and access door. Then once it’s nailed, one of the inside workers can drill holes at the corners. Then from the outside, he or she can use a jigsaw to open up the windows and door.
When you sheath, you will put nails in every 6-8″ on the edges plus on the interior studs. It’s also smart to have a spotter inside to tell you if you are missing the studs.
When you finish sheathing the bottom 8′ of the garage you can begin to work on the roof trusses.
Pre-built trusses make roughing a rough simple. Use your ladder to go along the top plate and mark the 24″ on center points. This is where you’ll install the trusses on.
The trusses will sit right above the studs. When all the trusses are properly spaced out and tied to the top plate you can start closing up the roof.
This is another aspect of building a garage that you should consider subcontracting. Roofing is labor-intensive and back-bending work.
And it needs to be done just right. Plus, a roofing contractor will be able to work at a faster pace than you can.
If you decide to do it yourself, you’ll first start by installing an ice and water barrier. Then, roll out the black roofing felt parallel to the water barrier.
Avoid making vertical seams.
Then it’s time to add shingles. This is the hardest part of roofing. Especially in the middle of summer.
Start by sticking down your starter strip over the roofing felt and ice barrier. This starter strip is like a shingle in roll form without tabs. It keeps water from reaching the roof deck.
Nail it down every foot as you go. The starter strip should extend about 5/8″ beyond your drip edge. Overhang helps rainwater flow into the gutters.
Now it’s time to start shingling. The simplest way is to snap a line up the middle, equal distance from the gable ends. Make sure to keep a straight line of shingles.
Follow the manufacturer’s instructions for installing windows and doors. Different types have different installation methods.
Now is the time to have the inspector come back for a second look. Then you can start putting on siding and working on the interior.
Well done, your garage now looks like a garage! It is sturdy and can withstand rain.
Now you can work on putting up siding, fascia, and soffits. Then you can turn your attention to the inside of the garage.
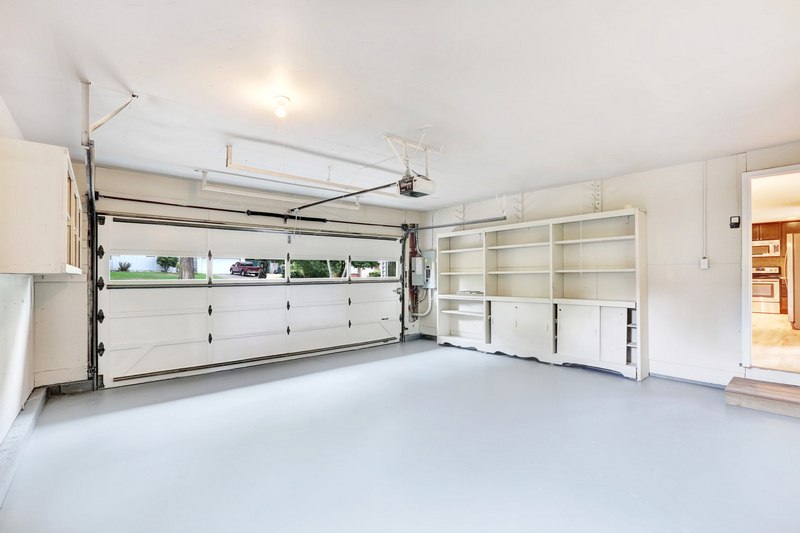
Make sure you know which walls are load-bearing before you start installing shelves and so on. Learn more about load-bearing walls here.
Congratulations! You now know how to build your own garage. Though it’s by no means easy, you can save yourself thousands of dollars by building a DIY garage.
Next, learn how to build garage shelves to keep your garage organized.