Field Adhesion Testing of Paint — Smart painters will always test adhesion first before proceeding when there might be a problem with adhesion. When in doubt – test before proceeding with full scale painting, this will save you a lot of grief in the long run. When should you test for adhesion?
The best way to address this question is to touch on the situations in which paint has a hard time adhering to an underlying surface.
This is standard for surface preparation. House paints have a hard time adhering to:
The problem with glossy surfaces is that there is very little for a new coating to mechanically grip to, the substrate is simply too smooth. Another problem with glossy surfaces is that they repel a paint coating and don’t allow the paint to “wet out” the surface – somewhat like water on a waxed car will bead up and will not “spread out’ onto the surface of the waxed car.
Dusty surfaces are also “dirty” surfaces (waxy, greasy surfaces are also “dirty” surfaces too and must be cleaned) and this violates the “clean” rule of surface prep. The problem with dusty surfaces is also that the paint has a hard time wetting this type of surface too and cannot bind the loose material together to the underlying substrate.
Oil paints and primers are better than latex paints for wetting and binding surfaces that are a bit dusty, but never paint over dusty surfaces without first removing the dust.
Sometimes it is close to impossible to totally remove every spec of dust from a surface, in these cases I will (after doing my very best to remove the dust or paint chalk by either vacuuming, dusting, water blasting, wet mopping, wiping etc… ) choose the best oil primer for the surface to be painted knowing that oil has a better chance of wetting any residual dust that might still be clinging to the surface.
I will spot prime in several random locations and then perform an adhesion test on these spots before proceeding with full scale priming and painting to be sure that I will have proper adhesion.
Under the general “dirty” heading we will include waxy and greasy and otherwise “contaminated” surfaces.
Contamination would include things like silicon and other repelling type of materials. Waxy and greasy surfaces will repel paint and not allow it to grip to the surface under the wax and grease. Any kind of repelling contamination as well as other forms of dirt need to be removed prior to painting.
Wet surfaces will repel oil paints and primers (oil and water don’t mix and if put in a container will separate from each other) and neither latex or oil primers or paints will not be able to penetrate into a surface that is wet which will greatly reduce mechanical adhesion.
When it comes to adhesion always remember the “clean , dull, dry” rule of surface preparation.
Now, lets look at the field test for checking adhesion so we can avoid problems before that can occur.
Must Read:
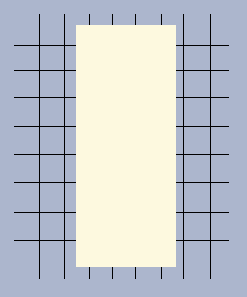
There are two variations of the cross cut test, one is to simply cut an “x” into the paint film with a knife or razor and the other is more through and it calls for the cutting of a “tic tac toe” type of cross hatch grid into the paint film.
I believe the “official” cross cut test uses ten vertical and ten horizontal cuts Both tests call then for a piece of tape (there is a ASTM standard for the tape but I use masking tape which has good tack or adhesiveness -not the blue easy release tape, or duct tape…..
Use good tape with strong tack for this test or you will only be fooling yourself. The way the test is performed is after the cuts are made, the tape is rubbed down onto the paint and then is abruptly pulled off with a hard pull. The paint should not pull off if the adhesion is good. The cuts provide the tape the ability to lift off the coating and thus the multiple cut cross hatch which has more cuts is a better test than the quick “x” cut test.
I usually will rub down and pull off a few times per spot just to be sure I’ve done a good test and have real results. If after doing multiple pulls in multiple sites on the surface passes – then I know I can proceed with the rest of the priming and then paint. If it fails then I have to continue to clean further, which will then be followed by another round of adhesion tests., and so on…