7 Ways to Install a Soaking Tub with Ease (Step-By-Step Guide)
Soaking tubs are a luxurious addition to any bathroom, providing a relaxing and rejuvenating escape from the daily stresses of life.
However, installing a soaking tub can seem like a daunting task. With so many different styles and installation methods, it can take time to figure out where to start.
7 Ways to Install a Soaking Tub with Ease (Step-By-Step Guide)
This article will provide a comprehensive overview of the seven ways to install a soaking tub easily. By the end of this guide, you’ll have a clear understanding of the best installation method for your bathroom and the knowledge and confidence to tackle the project yourself.
Ways to Install Soaking Tubs
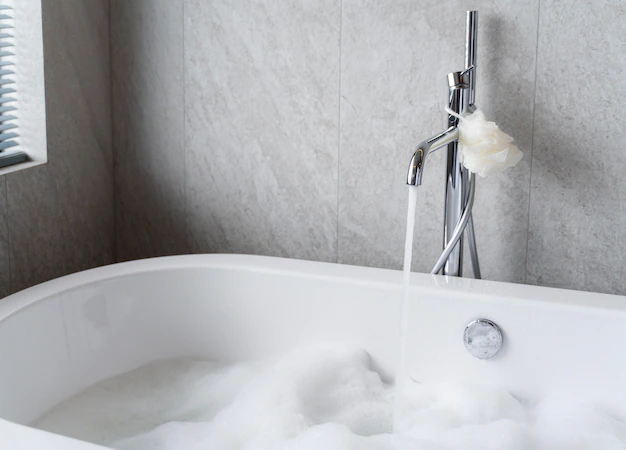
A soaking tub is a bathtub that offers a deep and comfortable immersion in water. It is unlike traditional bathtubs that just provide a shallow soaking experience. A soaking tub allows users to submerge themselves fully in water. It is usually equipped with built-in jets that can provide a therapeutic and relaxing massage effect.
Installing a soaking tub can present several challenges to the individual responsible for the task. These include the size and weight of the tub combined with the requirements for proper plumbing and electrical connections.
These can make the installation process difficult. The guide to installing a soaking tub can provide comprehensive and detailed instructions, including tips and best practices, to ensure a successful installation.
This is particularly important as improper installation can lead to leaks, damage to the tub, and even costly repairs. The guide also helps to save time and minimize the risk of mistakes, ensuring a hassle-free installation process.
A drop-in soaking tub is one of the most popular and straightforward installation methods. As its name suggests, the tub is dropped into a pre-existing opening on the bathroom floor, with the rim resting on the top of the surrounding deck or platform. Check the following step-by-step guide to smoothen the process.
Measure the opening in your bathroom floor to ensure that the drop-in soaking tub you have chosen will fit.
Prepare the opening by removing old fixtures and making necessary repairs or modifications to the surrounding deck or platform.
Place the drop-in soaking tub into the opening, ensuring that it is level and properly supported.
Connect the plumbing and electrical supply lines to the tub, following the manufacturer’s instructions and local codes.
Install the overflow drain and drain assembly, ensuring they are properly secured and sealed.
Install the overflow cover plate and other trim pieces, ensuring they are correctly aligned and secured.
Test the tub for leaks and proper operation, making any necessary adjustments.
Install the faucet and any other accessories, following the manufacturer’s instructions.
Caulk around the tub’s edge to seal gaps and prevent water damage.
Enjoy your new drop-in soaking tub!
2. Freestanding Installation
A freestanding soaking tub is a standalone tub not attached to any wall or floor. This installation offers the most design flexibility and can be placed anywhere in the bathroom. Let’s check out below how you can do it with ease.
Measure the area where you want to install the freestanding soaking tub to ensure that there is enough space and that the tub will fit.
Prepare the floor by installing a reinforced subfloor and leveling the area.
Place the freestanding soaking tub in the desired location, ensuring that it is level and properly supported.
Link the tub’s plumbing and electricity supplies.
Assemble the drain system and overflow valve.
Attach any additional trim components and the overflow cover plate.
Check the tub for spills and functionality.
3. Deck-Mount Installation
A deck-mount soaking tub is a bathtub on a platform or deck usually built around the tub. This installation is perfect for those who want a modern and sleek look in their bathroom. Let’s go through the simple steps for installation.
Determine the size and space requirements for the deck-mount soaking tub installation.
Ensure that the platform or deck is firm and level before installation.
Carefully place the tub on the forum or deck, ensuring it is level and properly supported.
Connect the necessary plumbing and electrical supply lines following the manufacturer’s instructions and local codes.
Securely install the overflow drain and drain assembly, checking for proper sealing.
Attach the overflow cover plate and additional trim pieces, ensuring they are aligned and properly fastened.
Test the tub for leaks and proper operation, making any necessary adjustments.
Use caulk to seal any gaps around the base of the tub to prevent water damage.
4. Clawfoot Installation
A clawfoot installation is a type of bathtub installation that involves mounting the tub on four feet. This type of installation creates a unique and classic look in any bathroom. Here’s a comprehensive guide on how to install a clawfoot tub:
Measure the length, width, and height of the area where the tub will be installed.
Make sure that the tub will fit in the space and that there is enough room for installation and movement around the tub.
Check that the tub and legs are stable and in proper alignment.
Use a level to ensure that the tub is level and stable.
If necessary, adjust the legs to ensure that the tub is level and stable.
Use Teflon tape on threaded connections to prevent leaks.
Ensure proper sealing between the drain and the tub.
Use a plumber’s putty or silicone caulk to seal the connection between the drain and the tub.
Fill the tub with water and let it sit for several hours to check for leaks.
Check the tub for proper operation including the drain, overflow, and faucet.
5. Corner Installation
The corner installation of a soaking tub is an excellent option for those who want to maximize space in their bathroom while still enjoying the relaxing benefits of a soaking tub. Here is a step-by-step guide to help you install your corner soaking tub with ease:
Measure the space: Measure the area where you want to install the corner soaking tub and make sure it will fit comfortably.
Prepare the space: Remove existing fixtures and ensure that the area is clean and level. If necessary, reinforce the floor to support the weight of the soaking tub.
Install the wall brackets: Secure the brackets to the studs and ensure that they are level.
Place the soaking tub: Carefully place it into the corner, ensuring it is level and securely supported by the wall brackets.
Seal the joints: Seal any joints between the soaking tub and the wall to prevent water from seeping behind the tub.
Test the soaking tub: Fill the soaking tub with water and ensure no leaks.
It’s important to note that if you are not comfortable with plumbing or electrical work, it’s best to hire a professional to help with the installation. A professional will ensure that the installation is done safely and correctly.
6. Alcove Installation
The most common and conventional tub installed in most houses is an alcove bathtub. This tub is enclosed in a three-walled structure explicitly designed for this type of tub. The tub’s three sides are open, and each confronts a wall.
The alcove bathtub is highly efficient and provides all of the benefits of a standard bathtub. Because of its space-saving structure, you can quickly achieve all of its sides for more straightforward servicing and thorough cleaning. This bathtub is ideal for people who have difficulty getting into and out of a tub.
To fix an alcove soaking bathtub, initially determine the amount of space where you wish to put your bathtub.
After you’ve positioned the bathtub, roll it into the area to start measuring for your foundation panel.
With a marker, draw the top of the flange on the studs. With your studs and bolts indicated, determine the height of your bathtub and the space underneath the line segment on each stud.
After you’ve fitted your foundation panel, install the shoe fitting that sits between your bathtub and waste pipe according to the manufacturer’s instructions.
Attach the overflow valve and place it behind the bathtub, then secure the cover plate.
Connect the water supply to the soaking tub and ensure no leaks.
Install any remaining fixtures and finish the surround with tiles, drywall, or other materials to match your bathroom design.
7. Undermount Installation
An under-mount bathtub is an excellent alternative for individuals seeking a non-intrusive and stylish option, as it is simple to install and does not detract from the magnificence of your bathroom.
Clean the place where you intend to put your bathtub. Remove impediments and dust away rough edges to ensure the area is structurally solid.
Measure the area to determine the proper size bathtub for the space. To designate the wall sections, build the tub frame.
Place the two pieces of timber apart and center the boards between the plates. Secure the parts and connect the frame to the wall using construction glue.
Install the drain assembly according to the manufacturer’s instructions.
Attach the tub’s legs and put them in the enclosure. Ascertain that the load of the tub falls on the ground.
Make sure the level is correct. If required, use board shims to level the tub. Add plaster to the floor around the legs and bare bottom to assist balance and secure the tub. Attach the tailpipe to the catch.
Before putting silicone caulk along the connections, check the connections for leaks.
Conclusion
Finally, adding a soaking tub to your bathroom can turn it into a beautiful, spa-like hideaway. Various configuration models cater to every bathroom design and personal preference.
Whether you choose a drop-in or freestanding installation, this step-by-step guide will give you the knowledge and assurance you need to get started. So, what are you holding out for? Begin working on your soaking tub installation right away!