Steps for Tiling around a Tub: Measurement to Installation
Tiling around a tub can seem like a daunting process, but not if you break it down into steps. Tiling begins with the layout process, the tools required, and the installation process. We also need to consider grouting, caulking, and sealer application.
Tiling around Tub: Easy Steps from Measurement to Installation
Tiling around a Tub: Easy Steps from Measurement to Installation
Tiling around a Tub: Layout & Design
The tile layout is an absolutely critical element when discussing the steps for tiling around a tub enclosure; It is the difference between a successful or a botched installation. The idea is to have at least one vertical guideline present on each wall in order to keep the installation level.
Give some thought to design before you start your measurements, and take into account the size of the space you want to tile, ideas for a small bathroom, will be different to that of a larger space to tile.
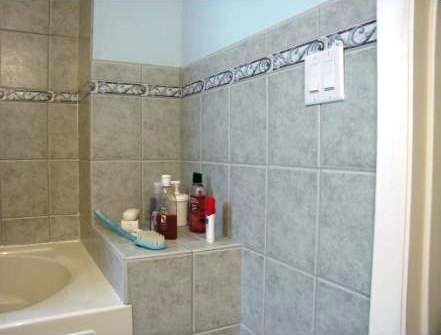
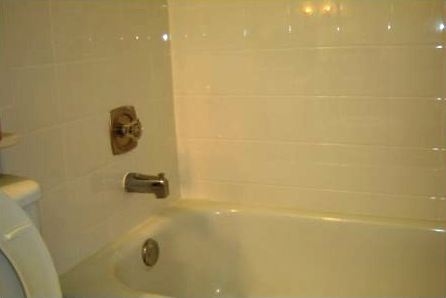
Images: Tiling Around a Tub
A Tub Surround Tile Installation(Tiling around Tub)A Wall Tile Installation(Tiling around Tub)
Tiling around a Tub: Row and Column Spacing
The first step is to measure the row and column spacing, which is the length or width of the tile plus the joint width, respectively. This will produce both the horizontal and vertical spacing. Keep adding the figure, and write the series of these numbers down.
As an example, a rectangular tile, 10” wide and 14” high and a 1/8” spacing:
This is a foolproof method. For example, for the column spacing on a five-foot-wide wall, keep adding the width and joint up to 60 inches. This will provide easy reference to where each column will be on the wall.
Marking the Midpoints (Tiling around Tub)
Measure and mark the horizontal and vertical midpoints on the back wall, and use the measurements obtained to position the layout. The positioning will be either the tile joint at the absolute center (at the midpoint mark) or the tile at the center. This will produce a symmetrical layout in either case. Use the positioning that produces at least half a tile for the first row and each side.
If the installation is not intended to reach the ceiling, then mark the last row, and measure for the first row from there. The official rule in gypsum applications states that “for tubs with showerheads, tile shall extend not less than 5 ft (1500 mm) above the rim of the tub or 6 in. (150 mm) above the height of the showerhead, whichever is higher.” (Water-Resistant Gypsum Backing Board for Ceramic Tile in Wet Areas, Gypsum Association)
After the positioning is clear, mark the first few horizontal rows and one central joint vertically. Use a level to draw in these lines, and check to make sure that all of these lines are level and plumb. Extend the horizontal guidelines around the entire tub enclosure.
Now, mark the vertical end of the installation on each of the side walls. According to the Gypsum Association, an installation must extend four inches beyond the outside edge of the tub when installing tile around a tub.
Use the reference points to measure from this mark to the back wall, and check the width of the last column. Shift accordingly, if necessary. Finally, use a level to draw the vertical line in as plumb as possible.
Draw in the approximate placement of any accessories (soap dish, towel rack).
The next paragraph will treat the installation tools and materials, and get started with the installation in this exposition of steps for tiling around a tub.
Tiling around Tub Installation, Tools, and Materials
These are the necessary tools and materials for tiling around a bathtub enclosure:
Tile cutter
Angle grinder with a tile blade (can be substituted with tile snips and incredible patience, but not recommended)
Spacers (unless using tiles with built-in spacers), can substitute with kitchen matches, but remove the strike end for safety.
A margin trowel
A notched trowel (notch size depends on tile size and adhesive, specifications generally found on the label of the adhesive)
A grout trowel
Two buckets
A sponge (or two)
Adhesive (Acrylic mastic or thin-set, depending on the tile, the manufacturer provides specifications for the size of the trowel notch and coverage based on tile size. A small amount of thin-set will be needed to attach a soap dish and towel rack.)
Grout (Un-sanded for joint widths 1/8” or less, sanded for 1/8” and above, the manufacturer provides the estimated coverage on the label. It is possible to dry mix two different colors for a custom color.)
Enough wood to attach a batten around the tub enclosure
Caulk and caulking gun
Recommended tools for tiling around a bathtub:
Wet saw (Usually available as a tool rental. Can be substituted using a wet sponge and the angle grinder. Sometimes necessary if the tile cutter is ineffective, and leads to broken tiles.)
A battery drill and paint mixer (Ensures a proper mixing of grout and thin-set.)
A tile (carbide) hole-saw (To cut holes in the tiles for plumbing.)
Tiling around Tub Installation: Getting Started
Make sure that the notch size of the trowel used corresponds to the tile size, which will be stated in the instructions provided by the manufacturer of the adhesive.
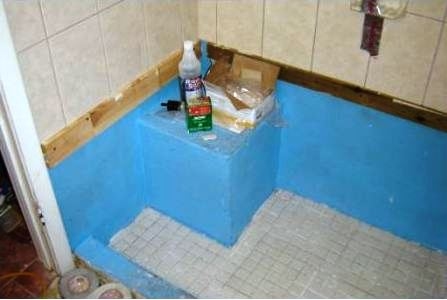
Begin the installation by attaching a wood batten, such as a 1” x 4” along one of the marked guidelines, where the bottom of a row will be. Do this around the entire enclosure, and make sure that they are all level. What this does is, to provide a level and even surface to start the installation from, and allows a start with a full tile.
It is almost impossible to cut the first tiles exactly uniform, and this unevenness will cause the installation to need constant adjustment. Save time and achieve professional results by using the batten (although it is not absolutely necessary), and install the first row(s) last.
Using A Wood Support for Installing Wall Tile (Tiling around Tub)
Next steps for tiling around a bathtub, including the installation procedure, grouting, and finishing.
Tiling around a Tub Installation: Procedure
With bathroom tiling, it is best to start with the back wall and proceed by spreading the adhesive evenly, and at a comfortable rate, one to two rows at a time for larger tiles, and two to four for small tiles. Make sure that it does not dry, though. Keep an eye on the vertical guideline, and adjust the installation as necessary, if it seems to go askew. Rip cardboard from the tile packaging, and use this along with spacers to make slight adjustments.
Check the smoothness of the surface from time to time, and add or remove extra adhesive if any corners of tiles are raised.
Cut the end pieces with an approximate 1/8” spacing between the side walls and the tile, and the same with the ceiling.
Remember to cut holes in the tile for any accessories (soap dish, towel rack, i.e.) using the angle grinder.
Repeat the same process for the side wall, and keep the vertical end as plumb as possible. Cut holes for any accessories, and use the angle grinder and the hole saw to cut the access holes for the plumbing. The carbide hole-saw bit makes a very tidy cut into most tiles and can be used with most drills.
Let the installation set for a minimum of twelve hours, and remove the wood supports. Finish the first rows, and finally install the bull-nose trim.
Attach any accessories last using fortified thin set. They can be braced using a wooden support or tape. Air conditioning duct-tape works best for this, which is not the same as normal grey duct-tape. Painter’s tape also works with light accessories.
Grouting (Tiling around a Tub)
If incorporating any natural stone into the bathroom tiling, it is usually necessary to seal it before grouting. Check the manufacturer’s recommendation to see if this is the case.
Have an additional bucket of water available. Use the grout trowel to spread the grout at a 45-degree angle to the joints, and add water if the mixture begins to feel too stiff and does not fill the joints agreeably. However, make sure to observe the drying time, and grout only an area that can be washed within a reasonably short time. Grout that has dried excessively is very difficult to remove, so it is definitely a good idea to grout small areas at first.
Once the entire tub enclosure is grouted and scrubbed once, change the water in the bucket and wash the surface again. Use each side of the sponge only in one pass. Rinse in between after using each side, and repeat the process until there is no more grout residue on the wall.
When the grout has cured completely, according to the specifications on the packaging, it is ready to be sealed. Seal the grout with an appropriate sealer using a small paint brush or sponge to add longevity to the installation.
After the sealer has dried completely, the very last step is to caulk the corners with a silicone sealant. This ensures that the entire installation surface is as waterproof as possible. Caulk the joint between the tub and the tile and both corners. Sealants come in a variety of colors; however, if nothing comes close enough to the color of the grout, use clear.
Once this is done, then bathroom tiling around a tub enclosure has been performed successfully and in a professional manner.
A Professional Wall Tile Installation (Tiling around Tub)