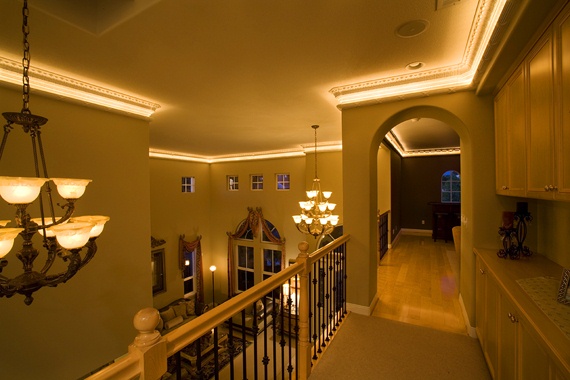
Applying lighted crown molding may seem like a daunting task. This article will provide you with the simple steps of installation to improve your lighted features quickly.
Lighted crown molding can improve the look of your ceiling to create a whole new effect. It will add a finishing touch to your light fixture and improve the whole look of your room. Your easy crown Molding will not take long to complete and will prove to be a worthwhile task.

Follow the simple steps below to install your lighted crown molding.
Read Also:
Planning is the key to any successful project and the same goes for this project. You must first gather some crown molding ideas before starting your project. To find crown molding ideas you should search the Internet or visit a local hardware store.
You can add baseboard molding, casing, chair rail, panel molding or a ceiling trim. Once you decide the kind of molding you want to install, you will need to decide where do you want to add the molding, as this is the molding where lighting would later be added once you make the channels.
You must create a strip in order to attach your crown molding. To do this simply remove a strip of lumber using your saw or another sharp cutting item. You should ensure that this is the same size and shape as your crown molding. You should attach the nailing strip and crown molding together and try them against the wall of your ceiling to ensure they are the correct size and fit. And you can change anything that requires changing now.
You should use a pencil or pen to create an outline of where the lighted crown Molding will be placed. This will provide you with a guideline of where the molding will be applied. Pay special attention here as the wrong markings can lead you to restrained the whole installation process again.
You must now place the nailing strip onto the wall, meeting the lines that you have marked onto the ceiling. Find the studs in the ceiling and nail your nailing strips to them.
To attach the molding to the wall you need to nail it to the nailing strip. Ensure that the nails are securely connected to the nailing strip so that your molding remains secure. This will also disguise the nails for a better effect.
The final step is to apply some form of rope lighting along the molding. This should be run down and attached to an electrical outlet. You have now completed your easy crown molding.
Lighted crown molding can be used for various forms of lighting, such as cove lighting, up lights and indirect lighting features. Ensure that you check the processes for your specific lighting needs prior to commencing the installation of your molding. To do this search for your specific type of lighting using the Internet or ask in your local hardware store.
You are now ready to start the improvements on your home and the installation of your molding.
View Comments
I have the standard, fluorescent, two tube lighting fixture in my apartment kitchen. It is most hideous and is not even flush with the eight foot high ceiling. What do you suggest I replace that ugly old fixture with? Thank you!