Epoxy is very versatile as it has many uses from commercial applications in warehouses down to personal jewelry.
In the past decade and especially during the pandemic a lot more people discovered their uses in DIY woodworking projects for the home, especially for tabletops.
Epoxy is a wonderful material for tabletops, it is durable yet classy and it gives an air of exclusivity as each table is a unique piece of art.
While epoxy can be poured over the whole surface of a table or bar top, most DIY’ers choose to create an epoxy resin river table.
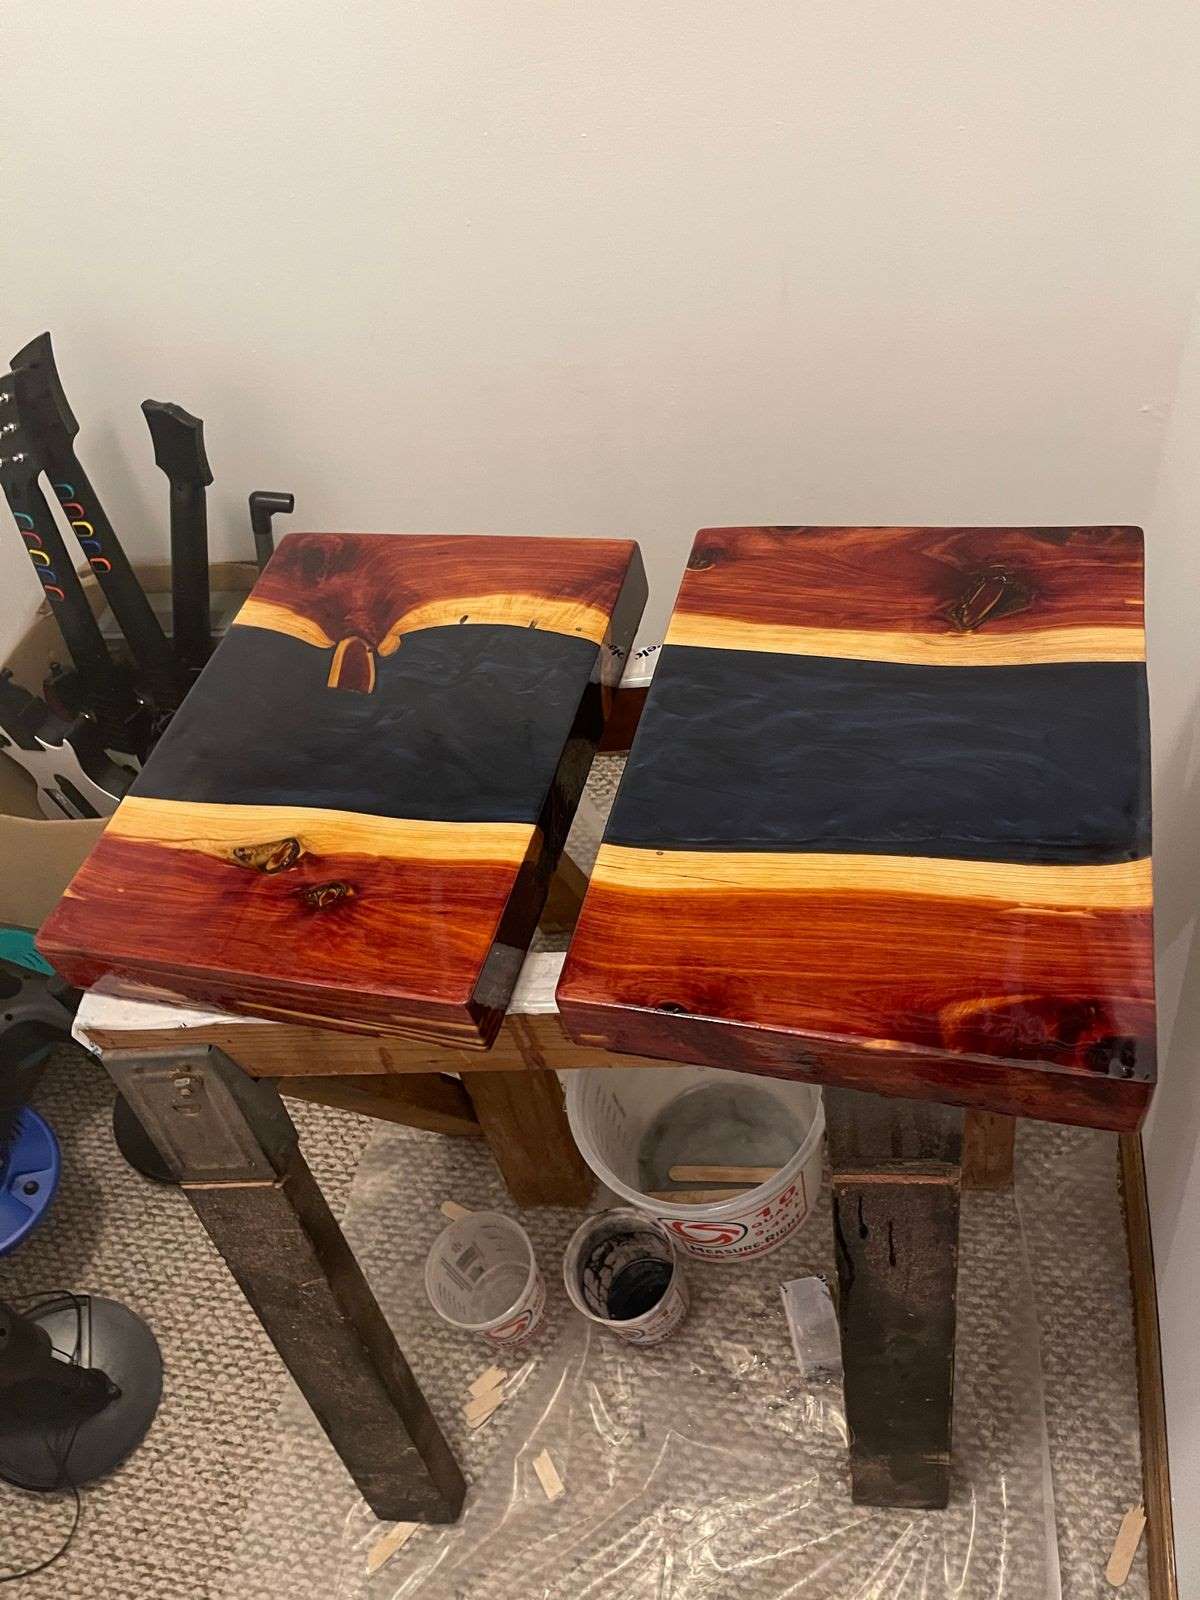
A river table is formed by pieces of wood that are split into two by a “river”, usually epoxy that can be any color. This river part of the table is not a straight line, it can take any shape and form and this is where each table becomes unique.
Besides the shape, the other unique part of the table is given by the river’s color. While generally, people opt for blue (as that is the color of a real river), there are no limitations in this sense and by mixing mica powder with the epoxy resin, one can create any color or color combination.
One of the most important aspects of a table is the quality of wood. Obviously, for a DIY project like this, the quality of the wood should be high.
It is of utmost importance that the wood you get for the table is dry. The moisture should not be over 10% and the wood should be thick, ideally 2 inches thick at least.
As with all wood projects, removing the bark and chiseling the wood is necessary before preparing the epoxy resin. The inner edges where the resin will be poured should be thoroughly sanded.
Read Also:
Before preparing the resin you need to make sure there are the right conditions to prepare it as too much moisture might make it behave differently.
It is very important that the table is perfectly in balance before starting to pour the resin or else it will not be evenly distributed.
Afterward, you need to calculate how much epoxy you need for your project. There are epoxy calculators available online for this part.
It is advisable to round up that number, it is better to have some leftover epoxy rather than not having enough of it.
While mixing the deep pour epoxy resin, remove any bubbles that might have formed with a hot air blow-drier. Add in the color pigments afterward.
You will add the epoxy in two layers, but make sure the second layer is added while the first one is still sticky. Afterward, you can use a blow dryer to help dry the epoxy but make sure not to overdo it as that can lead to decoloring.
The last touches are also important. With an oily cloth, apply oil on the whole surface of the table if you want to achieve a matt look. If you want the surface to be glossy, you may choose to coat the surface with crystal clear resin.