Diy Kitchen Cleaning Tips for End of Lease Cleaning: a Comprehensive Guide to Leaving Your Kitchen Spotless
As your lease comes to an end, ensuring that your kitchen is thoroughly cleaned is a crucial step in getting your security deposit back and leaving a positive impression on your landlord or property manager.
End-of-lease cleaning requires meticulous attention to detail, especially in high-traffic areas like the kitchen.
Diy Kitchen Cleaning Tips for End of Lease Cleaning: a Comprehensive Guide to Leaving Your Kitchen Spotless
In this comprehensive guide, we will provide you with a variety of do-it-yourself (DIY) kitchen cleaning tips specifically tailored to the end-of-lease cleaning process.
From appliances to cabinets, from floors to hidden corners, we’ve got you covered with practical and effective solutions to leave your kitchen spotless.
Table of Contents:
1. Gathering the Necessary Cleaning Supplies
Before diving into the cleaning process, it’s important to gather all the essential cleaning supplies you’ll need for a thorough end-of-lease kitchen cleaning:
Microfiber cloths
White vinegar
Baking soda
Dish soap
Lemon
Olive oil
All-purpose cleaner
Degreaser
Rubber gloves
Scrub brushes
Sponges
Trash bags
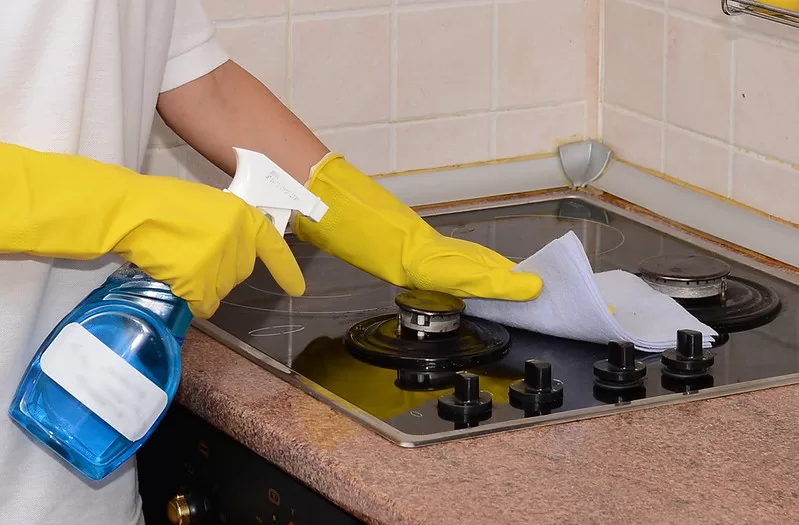
2. Deep Cleaning Appliances
Refrigerator: Empty the refrigerator and freezer, remove shelves and drawers, and wash them with warm soapy water. Wipe down the interior with a solution of water and baking soda. Don’t forget to clean the condenser coils at the back of the fridge.
Oven: Use a mixture of baking soda and water to create a paste. Apply the paste to the interior of the oven, including racks and trays. Let it sit for a few hours or overnight, then scrub away the grime and residue.
Microwave: Wipe down the interior with a damp cloth. For stubborn stains and odors, heat a bowl of water and lemon slices inside the microwave, then wipe clean.
Dishwasher: Remove debris from the filter and clean the interior with a mixture of water and vinegar. Run an empty cycle with a cup of vinegar on the top rack to remove buildup.
3. Cabinets and Drawers
Empty and Declutter: Remove all items from cabinets and drawers. Sort through items and decide what to keep, donate, or discard.
Wipe Down Surfaces: Clean the inside and outside of cabinets and drawers using a solution of warm water and mild dish soap. Pay special attention to handles and knobs. If you’re looking to do DIY then cabinet knobs will be happy to help you.
Lining and Shelving: Consider using shelf liners to protect surfaces and make cleaning easier for the next tenant.
4. Countertops and Backsplash
Surface Cleaning: Wipe down countertops and backsplash with an all-purpose cleaner. For stubborn stains, create a paste with baking soda and water and gently scrub.
Grout and Tile: Use a mixture of vinegar and water to clean grout lines and tiles. A toothbrush or small scrub brush can help remove grime.
5. Sink and Drain
Stainless Steel Sink: Scrub with a mixture of baking soda and water to remove stains and sanitize. Don’t forget to clean the faucet and handles.
Drain Maintenance: Pour a mixture of baking soda and vinegar down the drain to break down buildup and eliminate odors.
6. Floor Cleaning
Tile or Vinyl Floors: Sweep or vacuum the floor to remove debris. Use a mop and a gentle floor cleaner to mop the area, paying attention to corners and edges.
Hardwood Floors: Use a damp mop with a hardwood floor cleaner to clean and shine the surface. Be cautious not to use excessive water.
Window Cleaning: Mix water and white vinegar in a spray bottle, clean windows using a microfiber cloth, and use a squeegee for a streak-free finish.
Window Sills and Frames: Wipe down window sills and frames with a damp cloth.
8. Finishing Touches and Final Checks
Light Fixtures: Dust and clean light fixtures, replacing any burnt-out bulbs.
Exhaust Fan: Clean the exhaust fan cover and filter if applicable.
Final Inspection: Go through the kitchen with a critical eye, ensuring that every surface is clean and free of debris.
9. Keeping a Cleaning Checklist and Documentation
Checklist: Create a detailed cleaning checklist to keep track of each task completed.
Photographic Evidence: Take clear photos of the cleaned kitchen as evidence of your efforts in case of any disputes.
10. Dealing with Stubborn Stains and Problem Areas
Grease Buildup: For stubborn grease stains on surfaces and appliances, mix a solution of warm water and dish soap. Apply and let it sit for a few minutes before scrubbing.
Burnt-On Residue: If you encounter burnt-on residue on stovetops or oven surfaces, create a paste using baking soda and water. Apply the paste, let it sit, and then scrub with a non-abrasive scrubber.
Hard Water Stains: Vinegar is your ally against hard water stains on faucets, sinks, and glass surfaces. Soak a cloth in vinegar and wrap it around the affected area. Let it sit for a few hours, then scrub away the residue.
11. Disposing of Cleaning Waste Responsibly
Recyclables: Ensure that any recyclable materials, such as cardboard packaging and glass containers, are properly sorted and disposed of in designated recycling bins.
Hazardous Waste: If you have cleaning materials that are considered hazardous waste, such as old cleaning chemicals, dispose of them following local regulations and guidelines.
12. Time Management and Organization
Create a Schedule: Plan your end-of-lease cleaning well in advance. Break down tasks into manageable chunks and allocate specific time slots to each task to ensure a systematic and efficient cleaning process.
Room by Room: Focus on cleaning one area at a time. Starting with the kitchen, move through each room in a logical sequence to avoid feeling overwhelmed.
13. Seeking Professional Help if Needed
Complex Tasks: If you encounter tasks that seem too challenging or time-consuming, such as cleaning the exhaust fan or addressing major appliance issues, consider seeking professional help to ensure these areas are properly cleaned and maintained.
14. Maintaining Open Communication
Landlord or Property Manager: Keep open communication with your landlord or property manager throughout the cleaning process. Address any concerns or questions they may have promptly and provide updates on your progress.
15. Final Walk-Through and Inspection
Thorough Inspection: Before handing over the keys, conduct a final walk-through of the kitchen and the entire property. Use your cleaning checklist to ensure all tasks have been completed to the highest standard.
16. Documenting Your Efforts
Photographic Evidence: Take clear and detailed photographs of the cleaned kitchen, highlighting specific areas that were addressed. These photos can serve as evidence of your efforts in case any disputes arise regarding the condition of the property.
17. Completing the Handover
Key Return: Return the keys to the landlord or property manager in person, ensuring all cleaning tasks have been completed and documented.
Conclusion
Successfully completing an end-of-lease kitchen cleaning requires dedication, attention to detail, and a well-organized approach.
By following this comprehensive guide, you’ll be equipped with the knowledge and strategies needed to leave your kitchen in impeccable condition and meet the requirements of your lease agreement.
Remember, a thoroughly cleaned kitchen not only ensures the return of your security deposit but also reflects your responsibility as a tenant and leaves a positive impression on future occupants.
With careful planning, effective cleaning techniques, and proper documentation, you can confidently hand over a spotless kitchen and transition smoothly to your next living arrangement.