DIY Indoor Water Features — Water can be transformed into a work of art that enriches the environment through the senses. Water features are more than decorative, they help clean the impurities in the air that cause allergies and foster an atmosphere of tranquility that is good for the nervous system.
DIY Indoor Water Features: Your Options in Easy Make Steps
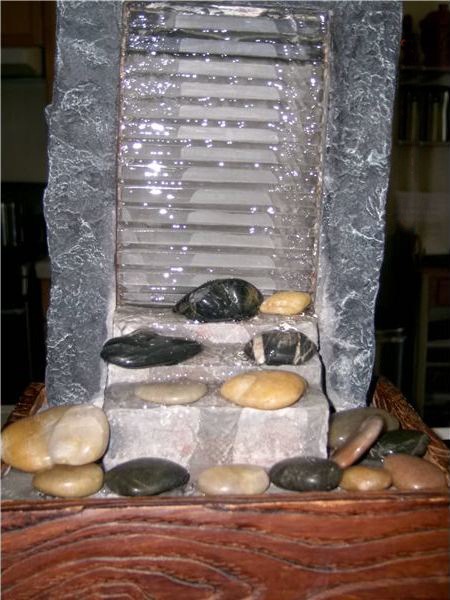
Table Top Water Fountain: DIY indoor water features
Table Top Fountain
You will need some basic supplies for your DIY indoor water features, but the design, size, height, and color scheme will be whatever fits the space and how imaginative and creative you want to be.
A typical table-top fountain can resemble a garden oasis with small plants embedded around the container, or a basic kit that has built-in steps to allow the water to trickle down and where small river rocks are strategically placed to increase or decrease the sound of water rushing. The good thing about small river rocks is that variations in color are brought to life when they are wet and add another dimension of visual pleasure.
Regardless of what is listed here to use as decor, if you don’t have it handy or have something else in the garage or attic, feel free to use it because creativity is part of the fun.
Must Have:
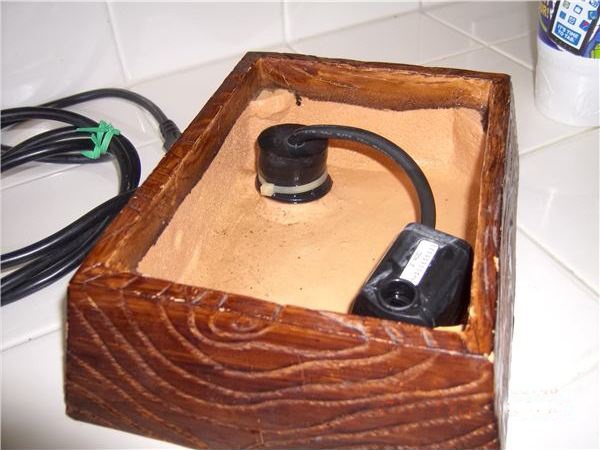
Submersible water pump with variable speed setting – Can be purchased at home improvement centers, aquarium supply stores or craft stores.
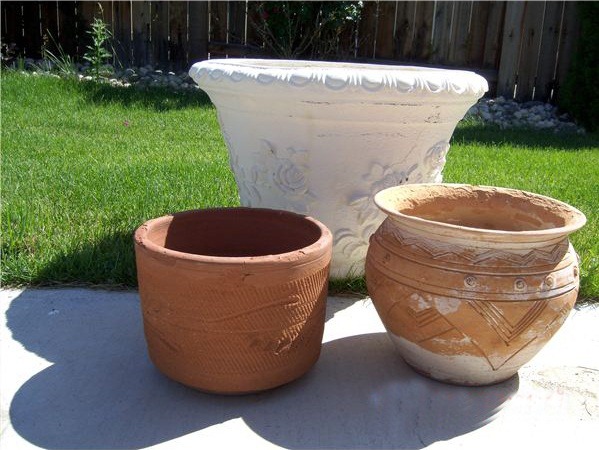
Containing vessel for the pump and water (see picture below)
Water Fountain Base (DIY indoor water features)
Cordless drill with a bit to make the hole for the electric cord.
Aquarium sealant.
Plastic tubing.
Nozzle – Purchase the right size for the tabletop container you will be using — you can get these at garden centers in various sizes.
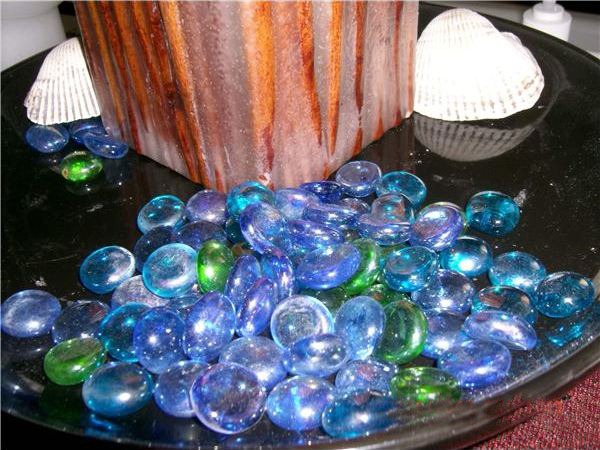
For decorative purposes, you can use river rocks, pebbles, sea shells, colorful glass beads, or anything you desire to cover the surrounding area to create visual depth and varying water sounds. On the picture shown, a small bag of rocks purchased at a dollar store was sufficient for the “earthy” tones I was going for, but glass beads and small sea shells work just as well.
Instructions:
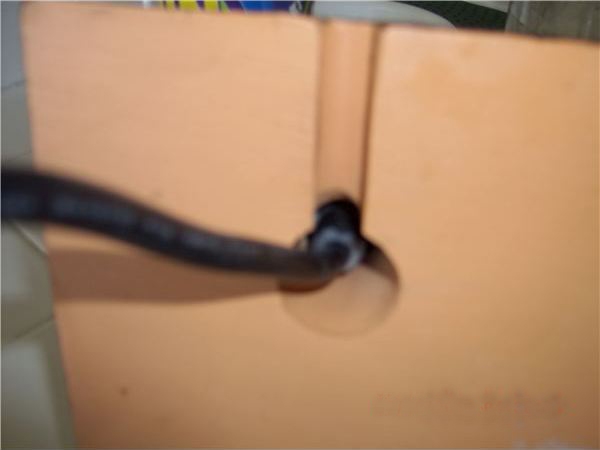
Make a hole for the electrical cord to pass through the bottom of the holding container and carve out the trench, to allow the container to sit flat, or glue small round dowels to the corners of the base to create “feet.”
The underside of Base (DIY indoor water features)
Position the pump in a corner of the vessel and attach the electrical cord.
Pass the electrical cord through the hole.
Seal the hole with sealant and allow it to dry completely.
Attach tubing to pump and nozzle.
Add your ground covering.
Plug it in and test the water flow and sounds. Adjust the flow of water as necessary and rearrange the rocks or pebbles to maximize or minimize the sound. You can hide the water spout or leave it visible depending on your arrangement.
Note:
Distilled water will protect the finish of untreated containers, but it can become expensive to refill on a daily basis. You can use tap water and change it regularly and use products found at garden supply stores to treat the water periodically to inhibit mold and bacterial growth.
Large Wall Water Feature
Glass Pebbles (DIY indoor water features)
Have you ever been to a doctor’s office and see a large sheet of copper against the wall drizzling water into a container bellow filled with rocks and plants? Here are simple DIY indoor water features that will make you proud and won’t cost you a fortune.
DIY Indoor Water Features, You will need:
A full-length mirror – Inexpensive full-length mirrors cost less than $10 at WalMart and Target stores in a variety of frame colors. Choose one with a plastic frame instead of wood to eliminate extra work to waterproof the frame.
Submersible pump with variable speed setting.
An inexpensive plastic container bigger that’s taller than the pump — used to protect the pump from the weight of rocks.
Rectangular potting planter wider than the mirror — this will allow you to insert small plants on the side.
Marine sealant.
Screws.
Double-sided tape.
Drill and drill bits.
Two 3-inch plastic or acrylic solid rounds – found at the most craft store or use plastic caps from bottles.
Glass beads or rocks, and plants in small plastic containers.
Plastic cornice to affix to top of the mirror. You can find these in the window covering department stores, or you can make your own with some inexpensive plywood and paint to match. This will serve to hide the tubing that will drip water onto the mirror surface.
DIY Indoor Water Features, Instructions:
Place the pump on a solid surface and cover it with the plastic container. If the container is higher and wider than the pump, you have got the right size. Ensure the bottom of the container is made of solid/rigid plastic. You will use this container to protect the pump.
Use the drill to make small, medium and large size holes around all container sides. This will allow the water to flow freely into the pump.
Drill hole on the base of the rectangular planter and insert electrical cord through it.
If the planter does not have feet, hot glue round dowels or whatever you choose to elevate the container off the ground and allow the electrical cord to move freely underneath.
Affix double-sided tape along the back of the mirror. You can cut it into squares or strips. You will need this to attach the water tubing all the way up the back and towards the front of the mirror.
Insert full-length mirror into the base and mark the inside of the base where you will affix the mirror.
Use marine adhesive to glue 3-inch thick plastic rounds to the inside of the container.
Route and secure the water tubing from the pump along the back of the mirror.
Use the marine adhesive to glue the mirror to the rounds you glued to the inside of the container and allow to dry completely. This gives you enough gap to adjust the tubing and prevent pinching.
Affix tubing to the front of a mirror with marine adhesive and allow to dry.
Glue or use small nails to attach the cornice to the top of the mirror.
Move the fountain to its permanent location, fill with enough water to cover the pump and test. If it works properly, fill with large rocks 2/3 of the way, bury the small plant containers into the rocks, fill with some more rocks, add water and enjoy your tropical water feature.
Make It Personal:
You can attach an inexpensive compact shower head to the tubing to change the water spray to your liking, the cornice will hide this little gem nicely.
Depending on the weight of the fountain and the size you choose for its base, the feature can be affixed to a wall with brackets or allowed to sit on the floor as a stand-alone piece. Ensure the wall and brackets will be able to support the weight of your finished creation.
Kits To Purchase
Planter containers (DIY indoor water features)
Water fountain kits can be found at most craft stores such as Michael’s, Ben Franklin Stores, home improvement and gardening centers.
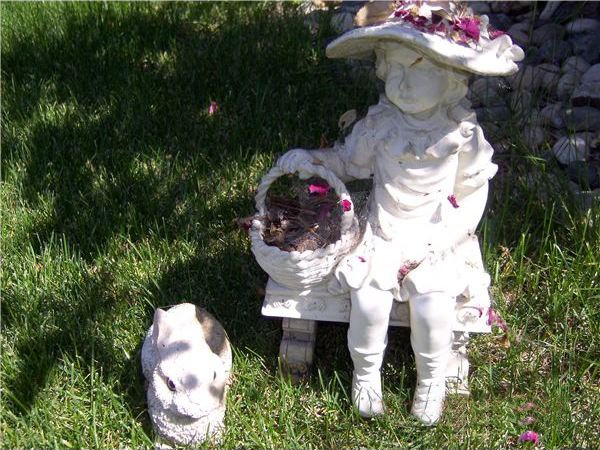
Garden Statuary (DIY indoor water features)
Almost any planter can be turned into a water feature to be used indoors or outdoors and you can personalize it by using small statuary found at garden centers. The main thing about DIY indoor water features is the ability to be as creative as we want to be in matching and complementing existing decor while having fun doing it.