How to Make a Stunning Garden Bench Out of Pallets in 8 Easy Steps
Introduction
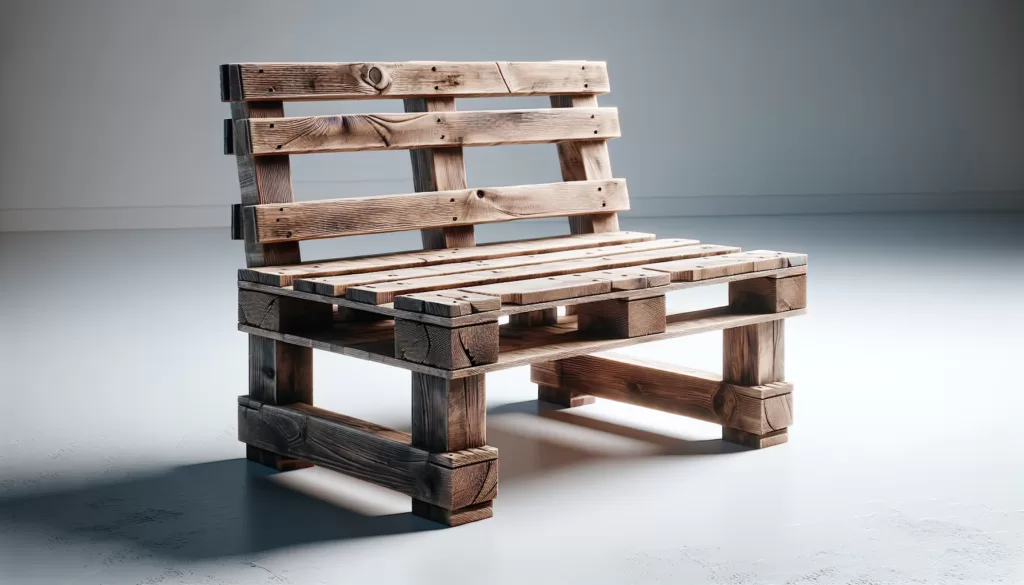
Upcycling pallets is becoming increasingly popular in the DIY community due to its environmentally friendly and cost-effective nature. With a little creativity, you can transform discarded pallets into beautiful and functional furniture pieces. One project that perfectly exemplifies this concept is creating a DIY garden bench using pallets.
Garden bench using pallets
Why Choose Pallets for Your Garden Bench?
Crafting a garden bench out of pallets offers several benefits:
Sustainability: By repurposing pallets, you’re reducing waste and giving new life to materials that would otherwise end up in landfills.
Affordability: Pallets are often available for free or at a low cost, making them a budget-friendly option for DIY projects.
Customizability: With various sizes and designs available, you can adapt pallets to suit your specific style and space requirements.
Now that you understand the advantages of using pallets for your garden bench, let’s dive into the step-by-step process of creating one!
Step 1: Selecting the Right Pallet
When it comes to building a garden bench out of pallets, the first and arguably one of the most crucial steps is selecting the right pallet. Not all pallets are created equal, and for a project like this, you’ll want a sturdy oak pallet.
Why Choose Oak?
Oak pallets are known for their durability and strength, making them an ideal choice for outdoor furniture that will withstand both use and weather.
Where to Find Oak Pallets?
A variety of sources! You might check with local businesses or warehouses. Often, they receive shipments on these pallets and may be willing to part with them for free or at a nominal charge. Online marketplaces like Craigslist or Freecycle often have listings for free pallets too. You could also consider purchasing from a local home improvement store if you’re in a pinch.
Additional Materials Required
Now that you’ve got your oak pallet, let’s talk about the additional materials required for this DIY bench project:
An 8-ft pressure-treated 2×4: This will serve as support for your bench’s structure.
Box of star-headed (Torx) no-drill-needed (self-tapping) 2 1/2-in deck screws: These screws make assembly easier and provide a stronghold.
Tools: Including a circular saw or reciprocating saw with a wood-cutting blade, nail-pulling crowbar, hammer, power screw-gun, tape measure, carpenter’s square, and marker.
Remember to double-check that you have all these materials before progressing to the next step. Trust us; it’s easier than realizing halfway through that something’s missing!
Step 2: Cutting the Pallet for the Bench Seat and Back
The art of cutting pallets is a lot like taming a wild, wooden beast. Armed with nothing but your trusty circular saw or reciprocating saw, and a well-honed sense of DIY adventure, you’re ready to sculpt that raw material into something truly beautiful – your garden bench’s seat and back.
Measuring and Marking the Pallet
Before you unleash your inner lumberjack, let’s talk dimensions. You’ll need to measure and mark the pallet where you want to make your cuts. A handy rule of thumb:
The bench seat should be about 17 to 20 inches high and 18 to 24 inches deep.
As for the backrest, aim for around 15 to 20 inches in height.
Grab that tape measure, carpenter’s square, and marker — it’s time to play Picasso with your pallet.
Choosing the Right Tool
Now, onto the cutting stage. Your tool of choice here is either a circular saw or a reciprocating saw.
Safety Alert! Always remember to protect your peepers with safety glasses and ensure the cutting area is clear of any potential hazards before you start sawing.
Getting that Clean Cut
To get that clean cut, use a wood-cutting blade suitable for rough-cut lumber. If you’re using a circular saw, keep the blade depth just slightly deeper than the thickness of the board. This reduces kickback and makes it easier to control the saw.
And voila! You’ve successfully tamed your pallet and created the foundations of your soon-to-be stunning garden bench. But don’t rest on those laurels just yet – we still need legs for our masterpiece-in-progress! So, dust off those wood shavings, grab another sip of that well-deserved coffee, and get ready: next stop is the bench leg station.
Step 3: Attaching Legs to the Bench
Attaching legs to your pallet garden bench is like giving it the power to stand tall and proud in your green oasis. Let’s roll up those sleeves and get those legs on!
Preparing the Legs and Support Structure
First things first, you’ll need your pressure-treated 2x4s at the ready. Why pressure-treated? These bad boys are tough against rot and pests—just what you want for a piece that’s going to brave the elements outside.
Cutting to Size: Measure twice, cut once! Cut four pieces of the 2x4s with your trusty saw—these will serve as the legs of your bench.
Creating Supports: You’ll also need horizontal supports that will connect the legs and provide extra stability. Cut two more pieces of 2×4 for this job.
Securing the Legs
Let’s attach those legs! You’re building a bench, not a flamingo, so let’s make sure all four are firmly attached.
Positioning: Stand up one leg at each corner underneath your pallet seat. It should look like it’s about to leap into a dance number.
Joining Forces: Using your power screw gun, drill two pilot holes through the pallet into each leg. Pilot holes prevent wood from splitting so consider them a peacemaker between materials.
The Final Union: Grab those star-headed (Torx) deck screws and secure each leg by driving two screws into each pilot hole. These screws don’t mess around—they bite in without a pre-drill plea and hold tight.
Adding Horizontal Supports
Almost there! Your bench needs something to lean on—those horizontal supports you cut earlier.
Aligning Supports: Place each support between the front and back legs, creating a frame effect. This isn’t just for looks—it’s for structural integrity too!
Securing Supports: Pilot holes come back into play here. Drill them through the supports into each leg, then screw them in place with more deck screws.
Now step back and admire your work—the bench stands! It has legs that could run a marathon (if benches could run, that is). With this solid base, you’re well on your way to creating an outdoor masterpiece where many a sunset can be enjoyed.
Step 4: Making and Attaching Armrests
Armrests can elevate the comfort and style of your garden bench, making it the perfect place to linger on sunny days. The armrests should complement the size of your bench while also providing enough support for a casual rest or a cozy read.
Design Considerations
When designing and attaching armrests to your garden bench, consider the following factors:
Ergonomics: Aim for armrests that are high enough to rest your arms comfortably, usually 8-12 inches above the seat.
Width: Choose an appropriate width for the armrests, often around 2-3 inches, to provide ample space without being too bulky.
Length: Extend the armrests slightly beyond the seat’s length for a visually appealing overhang.
Cutting and Shaping Armrests
To create your armrests, follow these steps:
Using your chosen dimensions, mark the outline of each armrest on your pallet wood using a carpenter’s square for accuracy and a marker for visibility.
Cut along the marked lines with your saw. Remember, steady hands result in cleaner cuts!
Shape any sharp edges or corners for a more refined look. A simple round-over can do wonders for comfort and aesthetics.
If you’re feeling fancy, why not add a decorative notch or curve? Personal touches make your bench truly one-of-a-kind.
Attaching Armrests
To attach the armrests to your garden bench, follow these steps:
Position each armrest flush with the top of your bench’s back support, ensuring they are parallel to each other.
Secure them using those trusty self-tapping deck screws from earlier — their star-headed design ensures a tight fit without pre-drilling.
Double-check that they’re fixed solidly; no wobbly arms here!
With the armrests now part of your burgeoning bench, it’s coming together like bees to blossoms. Next up, we’re talking comfort with cushions — because let’s face it, wood is nice, but cushy is cozy!
Creating a garden bench from pallets is not just about achieving a rustic charm; it’s also about crafting a space of relaxation and enjoyment. A crucial element to this comfort is adding cushions to your outdoor seating masterpiece.
Choosing the Right Cushions
When you’re selecting cushions for your garden bench, consider these aspects:
Materials: Look for fabrics designed for the outdoors. These materials are crafted to withstand sun exposure, moisture, and temperature variations without losing their color or comfort. They resist mildew and fading, often made from synthetic fibers like polyester or acrylic.
Filling: Opt for cushions with polyurethane foam or polyester fiberfill. These materials provide a cozy feel while offering quick-drying properties – essential if left out during an unexpected rain shower.
Style: Choose colors and patterns that complement the natural beauty of your garden. Vibrant hues can add a pop of color, while neutral tones may blend seamlessly with the outdoor surroundings.
Securing Your Cushions
Once you’ve picked the perfect cushions, let’s ensure they stay put:
Velcro Straps: Sew Velcro strips to the bottom of your cushions and attach the corresponding pieces to the bench itself. This allows easy removal when necessary but keeps them secure while in use.
Ties: Another simple method involves sewing fabric ties at the corners of each cushion, which can then be tied around bench slats or legs.
Non-Slip Mats: Place non-slip rubber matting cut to the cushion’s size underneath them; this provides friction to keep cushions from sliding.
With these tips, you’ll have plush outdoor seating that invites you and your guests to sit back and enjoy the fruits of your labor – in absolute comfort.
Step 6: Finishing Touches and Sanding
Crafting a stunning garden bench out of pallets is not just about assembly—it’s also about achieving a polished look with a smooth, safe-to-touch finish. Here’s how to put those finishing touches on your bench:
Sanding Wood Surfaces
Begin with a coarse-grit sandpaper to remove any splinters and rough areas. Pay special attention to edges and corners; these are spots where hands and clothing are most likely to catch.
Progress to a medium-grit sandpaper next, refining the surface even further. This step ensures that the top layers of rough wood are smoothed out, prepping for a more detailed finish.
Finish with fine-grit sandpaper for that silky-smooth feel. Run your hand over the wood; it should feel as smooth as a pebble skipped across a tranquil pond.
Protective Finishes or Paint
Consider applying a wood preservative or sealant. This acts like sunscreen for your bench, shielding it from UV rays and repelling water—essential for outdoor furniture.
If color tickles your fancy, grab some outdoor paint. A splash of color can transform your bench from rustic to radiant or from simple to spectacular.
For those who appreciate the natural look, opt for a clear varnish or polyurethane. It enhances the wood’s natural grain while providing armor against the elements.
Remember, patience is key in this step—allow adequate drying time between coats. Rushing might seem tempting, but like watching paint dry, good things come to those who wait.
By attending to these details, you’re ensuring that your garden bench won’t just be comfortable but will also stand up against time and weather.
Step 7: Safety Considerations
When diving into the DIY world, especially when it involves power tools and sharp objects, keeping safety at the forefront isn’t just smart—it’s essential. Here’s how to keep your digits intact and ensure your garden bench doesn’t become a safety hazard.
Handle With Care: Power Tools & Sharp Objects
Read the Manual: Yes, it can seem tedious, but familiarizing yourself with the user manual for each power tool is like having a mini safety seminar. Know your tools’ ins and outs before you start.
Suit Up: Proper attire can be a game-changer. Don protective eyewear, gloves, and ear protection to shield yourself from flying debris, accidental slips, and noise pollution.
Stay Sharp: Keep your tools in top form. A dull blade requires more force and can slip more easily than one that’s properly sharpened.
Secure Materials: Before cutting or drilling, make sure your pallets are clamped down or otherwise secured to prevent movement.
Keep a Clean Workspace: A tidy space minimizes risks. Clear away sawdust, wood scraps, and any other potential trip hazards regularly.
Building for Longevity: Stability & Sturdiness
Double Check Your Work: After each step in the construction process, pause to ensure everything is aligned correctly and screws are tightened appropriately.
Stress Test: Apply pressure to parts as they’re assembled to mimic future use. If there’s wobbling or creaking, reinforce before proceeding.
Regular Inspections: A quick check-up on your bench now and then can prevent mishaps. Make sure screws remain tight and the wood hasn’t splintered or weakened.
Crafting a garden bench from pallets isn’t just about following steps; it’s about building something that’s both beautiful and safe for years of enjoyment. Keep these safety tips in mind as you work towards completing your project—and remember, haste often makes for a less-than-sturdy waste!
Step 8: Maintenance and Care
To keep your garden bench inviting and resilient, regular maintenance is key. Here are essential tips for preserving your handcrafted piece:
Regular Cleaning
Gently brush off debris and dust to prevent accumulation.
Wash with a mild soap solution and a soft-bristle brush to tackle any stains or mildew.
Rinse with water and allow the bench to air dry completely before use or covering.
Weather Protection
Apply a waterproof sealant annually to shield against rain and sun damage. This will also help maintain the wood’s natural color and prevent graying.
Consider using a UV-protective varnish if the bench is exposed to direct sunlight for extended periods.
Store cushions indoors when not in use to avoid moisture and fading.
Inspection and Repairs
Inspect your bench at the start of each season for any signs of wear or damage.
Tighten any loose screws and replace them if rusted.
Sand away splinters or rough patches that could snag clothing or skin.
Address small issues promptly to prevent them from becoming major problems later on.
A stitch in time saves nine, so taking these steps to care for your garden bench will ensure it remains a cherished spot in your outdoor haven for years to come.
Conclusion
The magic of upcycling pallets into a stunning DIY garden bench is nothing short of amazing. With a little patience and elbow grease, you’ve transformed something seemingly ordinary into an extraordinary piece that adds charm to your outdoor space. Not only do you get to feel the pride of creation, but there’s also the added bonus of making sustainable choices and saving some money in the process.
Just imagine it, a mild evening, a cup of tea in hand, and your favorite book, all while lounging comfortably on your own DIY garden bench. Sounds idyllic, doesn’t it? The best part is, that scenario can be a reality!
Trust me when I say, the feeling of accomplishment when you sit back and admire your handiwork is worth every sawdust-covered moment.
And remember, this DIY adventure doesn’t have to end here.
Eager to build more? Say no more!
If this guide has sparked your interest in creating functional art from reclaimed materials, then why not venture further? You could start by building a dining table or planter box next – all from upcycled materials. Let’s keep riding this creative wave of upcycling together. So go ahead, roll up those sleeves, and let’s bring those DIY dreams to life!
Building a Public Bench From Old Pallets
Citation
Foster, Tom. 2021. Woodworking Projects. Accessed January 6, 2024.
Bunde, Karah. 2014. DIY Wood Pallet Projects. Simon and Schuster.
Hartman, Samantha, and Danny Darke. 2024. The Essential Guide to Wood Pallet Projects. Simon and Schuster.
Phill Wyatt Projects. 2020. ‘How to Make a Garden Bench (Using Pallet Wood).’ YouTube video, 12:01. https://www.youtube.com/watch?v=3RqfnIZ_QI0. Accessed January 20, 2024.
WeekendWorkbench. 2015. ‘How to Build a Pallet Bench.’ YouTube video, 14:09. June 29. https://www.youtube.com/watch?v=InsRxIOl8Ik.
Ideas Creative SB. 2019. ‘How to make PALLET BENCH under 10 Minutes 2019 – Without Finishing and painted.’ YouTube video, 10:14. https://www.youtube.com/watch?v=-ORE7fkkEVw. Accessed January 23, 2024.
Bacalhau, Bernardo. 2021. ‘Building a Public Bench From Old Pallets.’ Video, 19:45. https://www.youtube.com/watch?v=xFArfIEYIPw.
FAQs(Frequently Asked Questions)
Why choose pallets for your garden bench?
Crafting a garden bench out of pallets offers several benefits, including cost-effectiveness, sustainability, and the opportunity to customize the design to fit your personal style and needs.
Why choose oak?
Oak pallets are known for their durability and strength, making them an excellent choice for building a garden bench that will withstand outdoor conditions and heavy use.
Where to find oak pallets?
You can find oak pallets from a variety of sources, including local businesses, warehouses, distribution centers, and online marketplaces. It’s important to ensure that the pallets you acquire are in good condition and safe to use for your project.
How do I secure cushions for my garden bench?
Once you’ve selected the right cushions for your garden bench, you can secure them by using straps, ties, or Velcro fasteners to prevent them from shifting or slipping off the bench.
How do I sand wood surfaces for finishing touches?
Begin with a coarse-grit sandpaper to remove any splinters and rough areas. Then, gradually move to finer-grit sandpaper to achieve a smooth and polished finish on the wood surfaces of your garden bench.
What safety considerations should I keep in mind when building a garden bench from pallets?
When building a garden bench from pallets, it’s important to handle power tools and sharp objects with care, read the manuals for all tools used, prioritize stability and sturdiness in construction for longevity, and regularly inspect and maintain the bench for safety.