How to Build an Ottoman with a Decorative Nailhead Design
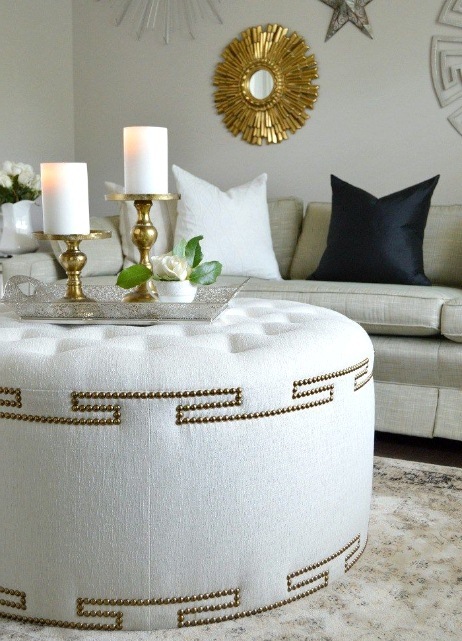
How to Build an Ottoman with a Decorative Nailhead Design — Decorative nailhead designs on furniture add a detail to the living room decor that simple wood and paint cannot. Simply adding a line of interestingly shaped nails to the edge of an ottoman brings the room into modern or industrial decor without the need to spend hundreds of dollars on one piece of furniture.
How to Build an Ottoman with a Decorative Nailhead Design
How to Build an Ottoman with a Decorative Nailhead Design
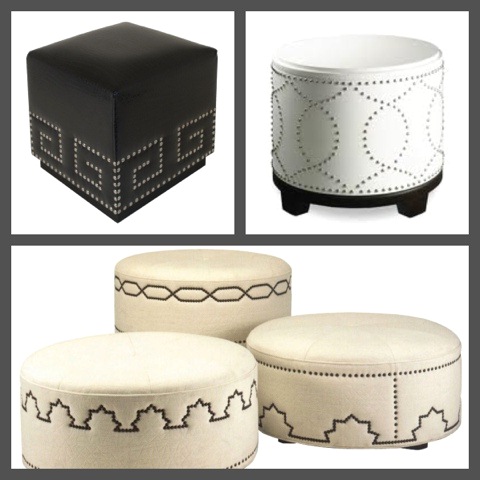
Some decorative nails are made with shapes or decals built into the head, while others are curved bars on nails or tacks that push right into the wood. To make installation easier, some decorative nails and tacks come with a thin, invisible tack strip. These special nails with larger heads than typical nails are used for adding appeal to furniture and are not capable of holding wood together.
To build an ottoman with this special flair, you must create the basic wooden ottoman frame and work from there.
Materials Needed
2 pine boards, 32-by-12-by-1-inch
And 2 pine boards, 14-by-12-by-1-inch
2 plywood sheets, 32-by-16-by-1/2-inch
2-inch wood screws
1-inch wood screws
Cordless drill
Four 4 caster feet
32-by-16-by-1-inch foam
Spray adhesive
Three 3 yards faux leather fabric
1/2-inch staples
Staple gun
Scissors
Decorative nails
Hammer
Instructions
Attach two 32-by-12-by-1-inch pine boards flush with the outside edges of one end of a 14-by-12-by-1-inch pine board using 2-inch wood screws and a cordless drill.
Attach a second 14-by-12-by-1-inch pine board to the open end of the 32-inch boards using 2-inch wood screws and a cordless drill. This is the ottoman frame.
Attach a 32-by-16-by-1/4-inch plywood sheet to the ottoman frame using 1-inch wood screws and a cordless drill.
Flip over the ottoman frame and attach a second plywood sheet to the bottom of the frame with 1-inch wood screws and a cordless drill.
Pre-drill holes centered in each corner 1/2-inch from the edges. Insert a caster foot into each corner hole.
Flip the ottoman over and spray adhesive on the top plywood sheet. Attach a 32-by-16-inch sheet of foam to the top.
Center three 3 yards of faux leather fabric on the top of the ottoman. Place a staple in each corner to hold the fabric in place.
Flip the ottoman over to have the bottom so the bottom is facing up. Fold the faux leather fabric over 1/4-inch of the edge of the bottom of the ottoman and staple the fabric to the bottom with 1/2-inch staples and a staple gun. Set the staples at 1-inch intervals. Trim any excess with scissors.
Nail decorative nails 1/2-inch from the edges of all four sides of the ottoman using a hammer. Hammer one nail over the staple placed earlier to hold the fabric.
Ottoman with a Decorative Nailhead Design
Tips
Draw a design for the nailhead pattern before beginning to build the ottoman.
Make the top plywood a lid to create a ottoman storage chest. You simply add an inner base of 1-by-1-inch blocks, an inch in from the edge, that will hold the lid on to the ottoman. Line the inside of the ottoman with cedar, or create the entire ottoman out of cedar. Staple the fabric inside the ottoman base and under the ottoman lid.
This type of nailhead design works on other pieces of furniture, such as the couch, loveseat or recliner. You can add a strip of nailheads to the headboard of your bed or over a doorway on the top jamb. Be creative in your home decorations.