Granite kitchen countertops remain the top choice for residential and commercial building owners. Granite mixes form and function well as the most versatile and elegant-looking countertop material.
Extreme temperatures and sharp materials aren’t enough to damage this tough kitchen material. It’s pretty easy to install, as long as you know the crucial elements to look out for. With that said, below, you’ll find the basics of fixing granite countertop in your kitchen.

Getting the proper measurement is one of the most crucial factors in getting granite countertop installation right. Most homeowners and skilled do-it-yourselfers (DIYers) will have to measure the kitchen countertop before ordering a custom-cut and shaped product. Getting the correct measurement makes your installation seamless.
The best way to measure is to add anywhere from one and a half inches to save some room for the overhang when dealing with kitchen cabinets. Additionally, be aware that granite countertop thickness varies, with most choices measuring from 3/4 up to 1 1/4 inches. More importantly, measure the sink cutout accurately so that you won’t end up with extra spaces in between the countertop and the edge of the sink.
Better support may be needed if you’re placing the countertops on the island or workspace, as these often have larger overhangs. Add up to eight inches of overhang when placing countertops in these areas.
If you haven’t given much thought to the colors, designs, and type of granite countertop your kitchen needs, you’ll be spending a great deal of time browsing through a vast array of options. Granite countertops are versatile; they come in multiple colors, shapes, sizes, and designs.
Design patterns and colors aside, granite counters can come in slabs or tiles. If you’re looking at a mid-cost kitchen renovation project, it is best to choose tiles since they’re cheaper. Conversely, slabs look more elegant but are costlier than tiles. They’re better used in large areas and are less expensive to install than their fragmented counterpart.
If you want to arrive at a good style choice, look at the kitchen layout and paint color, also include the type of flooring in this section of your home, pick out a design compatible with them. Otherwise, use kitchen design software to visualize how your top choices would look like using virtual technology.
Read Also:
One of the most frustrating things when doing a DIY project is realizing that you don’t have all the materials you need with you. Failure to complete your tool checklist can significantly delay and negatively impact your project.
For your granite countertop installation, you’ll need a power drill, circular saw, caulk, silicone gun, putty knife, pencil, epoxy, screws, among many tools. Don’t forget to take out your safety materials, too.
Apart from taking the correct measurements and gathering all your power tools and materials, don’t forget to make safety your prime concern. Don’t forget to include safety gloves and goggles in your materials checklist. At the same time, keep your workspace clutter-free in order for you to focus and work efficiently. You’ll be needing electricity to turn on your power tools. Check that the plugs aren’t exposed to water and other forms of hazards. Turn the devices off when not in use.
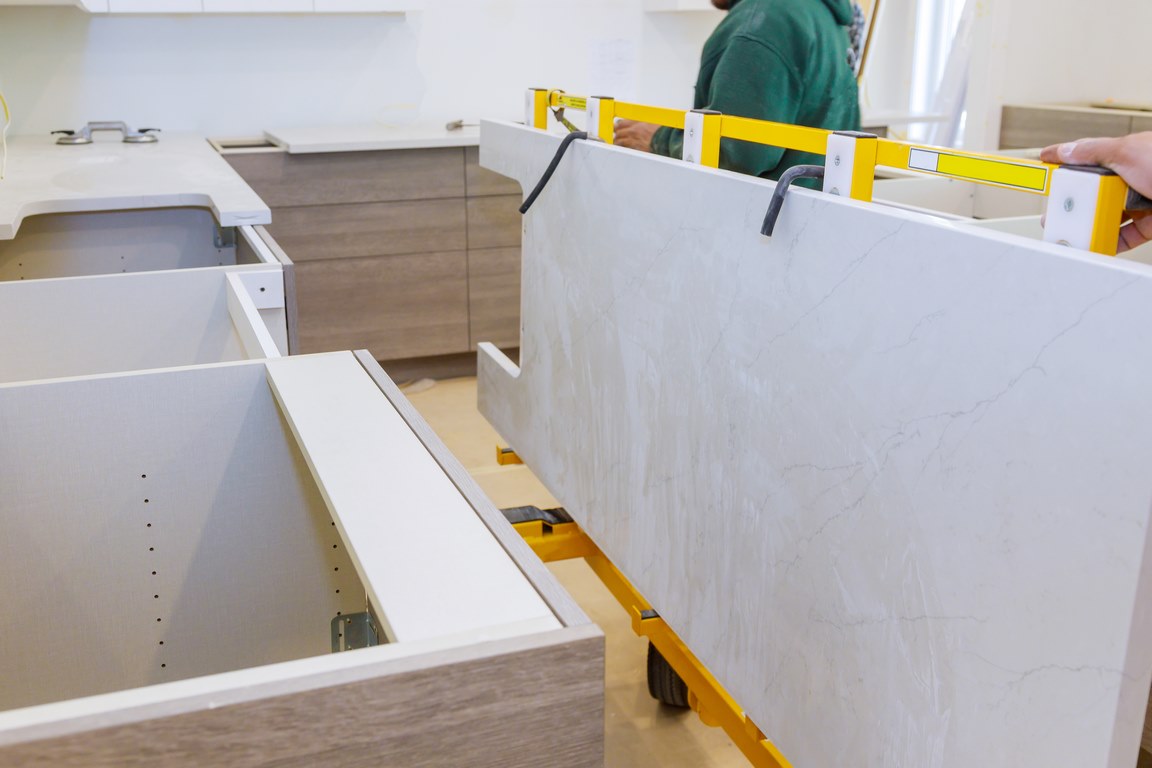
In most cases, you’ll need extra hands to help you with the heavy lifting and keep the countertop in place. You’ll be setting yourself up for failure if you do everything by yourself. In addition, check out these few tips about the things to avoid while remodeling your kitchen.
Granite slabs are weighty and need sturdy support, so make sure the cabinets underneath hold it up. Look for ways to reinforce the edges of your wardrobe before attaching the countertop to be sure.
Perform trial-and-error by creating a mock-up of each countertop section to see how it fits once installed. If the granite countertop you ordered is too large, trim the extra area carefully. Take precautions as you could damage the slab with too much force.
While granite comes with a prepared sinkhole, check whether the granite slab is cut accurately. If not, make the necessary adjustments. However, in cutting the sinkhole, ensure that there’s about a 1/8-inch buffer.
While installing the counter, you may notice that the cabinet’s surface isn’t completely flat. Before installing the material, add a thin wedge between the surface and the granite to even it out.
Installing a granite countertop can be challenging, but with the right precautions and tools, you’ll be able to install one successfully. Remember the tips discussed in this article, and don’t hesitate to ask for help when you need it.
Once you’ve affixed your new countertop, keep it clean by wiping it often and checking whether it needs additional work like resealing or re-caulking.