Painting your home can be a fun and rewarding project, but it can also be a bit daunting if you’re not sure where to start. Whether you’re a seasoned DIYer or a beginner, there are some painting tips and techniques that can help you achieve professional-looking results. In this article, I share seven tips to help you get started on your home painting project.
First, it’s important to properly prepare your walls before painting. This includes cleaning the walls, filling any holes or cracks, and sanding down any rough spots. Additionally, if you’re painting over a dark color, it’s a good idea to use a primer to help the new paint adhere properly.
Another important tip is to choose the right paint for your project. Consider factors such as the room’s lighting, the type of surface you’re painting, and the desired finish.
For example, a glossy finish is great for high-traffic areas like kitchens and bathrooms, while a matte finish is better for walls with imperfections as it helps to hide them. By taking the time to properly prepare and choose the right paint, you can ensure a successful painting project.

Before you begin painting your home, it’s crucial to prepare your space properly. This preparation is essential for ensuring that your paint job not only looks professional but also lasts for years to come.
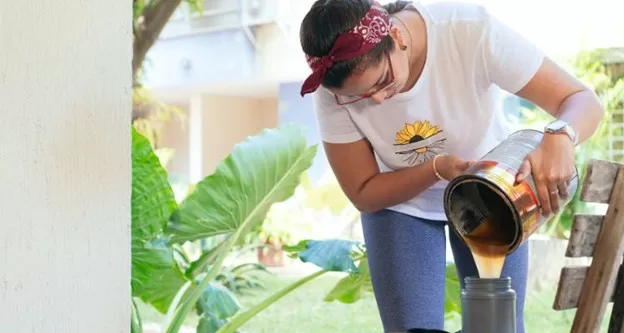
While a DIY paint job can be a rewarding project, especially for small areas, hiring a professional painter is often the way to go for larger or more intricate jobs. Professional painters have the expertise to achieve a flawless finish, can recommend the right type of paint for each surface, and can save you time and effort in the long run.
When it comes to painting your home, it’s important to choose quality paints that will stand up to wear and tear. Look for paints that are specifically designed for the type of surface you will be painting, such as interior or exterior walls. You should also consider the finish of the paint, such as matte, eggshell, or glossy. Matte finishes are great for hiding imperfections, while glossy finishes are more durable and easier to clean.
To prepare your space for painting, you will need a few essential tools. Here are some tools you should consider gathering before you begin:
By following these tips and gathering the necessary tools, you’ll be well on your way to preparing your space for a professional-looking paint job.
Before applying primer, you need to prepare the surface properly. This will ensure that the primer adheres well to the surface and provides a smooth base for the paint. Here are some tips for surface preparation:
Once the surface is properly prepared, you can apply the primer. Here are some tips for applying primer:
By following these priming techniques, you can ensure that your paint job looks professional and lasts longer.
Mixing colors is an essential part of painting. It allows you to create custom shades that can make your artwork stand out. Here are some tips to help you master the art of mixing colors.
Before you start mixing colors, it’s essential to understand color theory. The color wheel is a useful tool that can help you understand how colors work together. The primary colors are red, yellow, and blue. By mixing these colors, you can create secondary colors such as green, orange, and purple.
Additionally, complementary colors are colors that are opposite each other on the color wheel. When used together, they create a high-contrast effect. For example, red and green are complementary colors. When used together, they create a bold and striking effect.
Creating custom shades is all about experimentation. Start by mixing small amounts of paint and gradually add more until you achieve the desired shade. Remember to mix the darker color into the lighter color to avoid overpowering the lighter color.
You can create brown by mixing all three primary colors together. For lighter shades, consider working with complementary colors. For example, mixing red and green can create a muted shade of brown.
In conclusion, mixing colors is an essential part of the painting. By understanding color theory and experimenting with different shades, you can create artwork that truly stands out.
When it comes to painting your home, there are two main paint application methods: brushwork and roller techniques. Each method has its own unique advantages and disadvantages, and choosing the right one for your project can make all the difference in achieving a professional-looking finish.
The brushwork is a classic painting technique that has been used for centuries. It is ideal for painting small areas, corners, and edges. To achieve a smooth and even finish, it is important to use the right brush and apply the paint in thin, even coats.
Here are some tips to help you improve your brushwork skills:
Roller techniques are ideal for painting large areas, such as walls and ceilings. They are faster and more efficient than brushwork and can help you achieve a smooth and even finish.
Here are some tips to help you improve your roller techniques:
By using these tips and techniques, you can improve your paint application skills and achieve a professional-looking finish for your home.
When it comes to painting, adding texture can bring a whole new dimension to your walls. Here are two techniques you can use to master textures in your home:
Sponging is a technique that involves using a sponge to apply paint to your walls. It creates a mottled, textured effect that can add depth and interest to your space. Here’s how to do it:
Stippling is a technique that involves using a stippling brush to create a textured effect. It’s a great way to add depth and dimension to your walls. Here’s how to do it:
These are just two of the many techniques you can use to add texture to your walls. Experiment with different colors and tools to create a look that’s uniquely yours.
Once you have completed the bulk of your painting project, it’s time to focus on the finishing touches. This is where you can really make your paint job stand out and look professional. Here are some tips and techniques to help you achieve a flawless finish.
When it comes to the finishing touches, it’s all about the details. Take the time to go back over your work and touch up any areas that need it. Use a small brush to carefully paint around edges and corners, ensuring that the lines are crisp and clean. This will give your paint job a polished look that will impress anyone who sees it.
Another important detail to consider is the hardware on your walls. If you have light switch covers, outlet covers, or other hardware that needs painting, take the time to remove them and paint them separately. This will ensure that they match the rest of your paint job and look clean and professional.
Once your paint job is complete, it’s important to seal and protect it to ensure that it lasts as long as possible. One way to do this is to apply a clear coat over the top of your paint job. This will protect it from scratches, scuffs, and other damage that can occur over time.
Another way to protect your paint job is to use a paint sealant. This will help to prevent moisture from penetrating the paint, which can cause it to peel or crack. Be sure to choose a sealant that is appropriate for the type of paint you use and follow the manufacturer’s instructions carefully.
By taking the time to focus on the finishing touches, you can turn a good paint job into a great one. Use these tips and techniques to achieve a flawless finish that will make your home look beautiful for years to come.
Cutting in is the process of painting a room’s edges and corners with a brush before painting the walls with a roller. The best way to cut in is to use a high-quality angled brush and paint in short strokes, keeping a wet edge to avoid visible brush marks. You can also use painter’s tape to create straight lines and protect adjacent surfaces.
One trick to painting walls more efficiently is to use a roller with an extension pole to reach high and hard-to-reach areas. Another is to paint in a “W” or “M” pattern to evenly distribute the paint and avoid roller marks. You can also use a paint grid to remove excess paint from the roller and prevent drips.
If you’re a beginner, start with small projects like painting a piece of furniture or an accent wall. Use high-quality paint and tools, and always prep the surface by cleaning and sanding it. You can also use a paint additive like Floetrol to improve the paint’s flow and reduce brush marks.
When choosing paint colors, consider the room’s purpose, lighting, and existing decor. Neutral colors like white, beige, and gray are versatile and easy to work with, while bold colors like red and blue can add personality and drama. You can also use color swatches or a paint visualizer tool to test different colors and see how they look in your space.
To achieve a pro-level paint job at home, start by prepping the surface, including cleaning, sanding, and priming it if necessary. Use high-quality paint and tools, and apply the paint in thin, even coats, allowing each coat to dry completely before applying the next. Use a brush to cut in and a roller to paint the walls, and remove painter’s tape before the paint dries.
While there’s no secret ingredient to make paint smell better, you can add a few drops of essential oil like lavender or peppermint to the paint to mask the odor. You can also open windows and doors and use a fan to improve ventilation or choose low-VOC or odorless paint options.
Author Bio:
Howard Griner is a General Contractor with a Bachelor’s in Building Science from the University of Southern California. He specializes in large-scale renovations to fine-tuning the details of home repairs. His hands-on experience allows him to provide practical, real-world solutions to homeowners’ everyday problems.