The use of PEX pipe has become increasingly popular in recent years due to its durability and cost-effectiveness.
PEX pipe is an ideal choice for underground installations and can be used for a variety of applications, from water supply lines to radiant heating systems. Installing PEX pipe underground can be tricky, however, and requires a thorough understanding of the best practices for proper installation.
In this article, we will discuss the best practices for installing PEX pipe underground, so that you can ensure that your installation is done correctly.
The first step in installing a PEX pipe underground is to choose the right type of PEX pipe for the job. There are several different types of PEX pipe, and each type has its own advantages and disadvantages.
The type of pipe you choose will depend on the application and the environment in which it will be installed. Consider factors such as the temperature of the environment, the pressure of the system, and the type of chemicals or solvents that might be present in the soil or water.
Read Also:
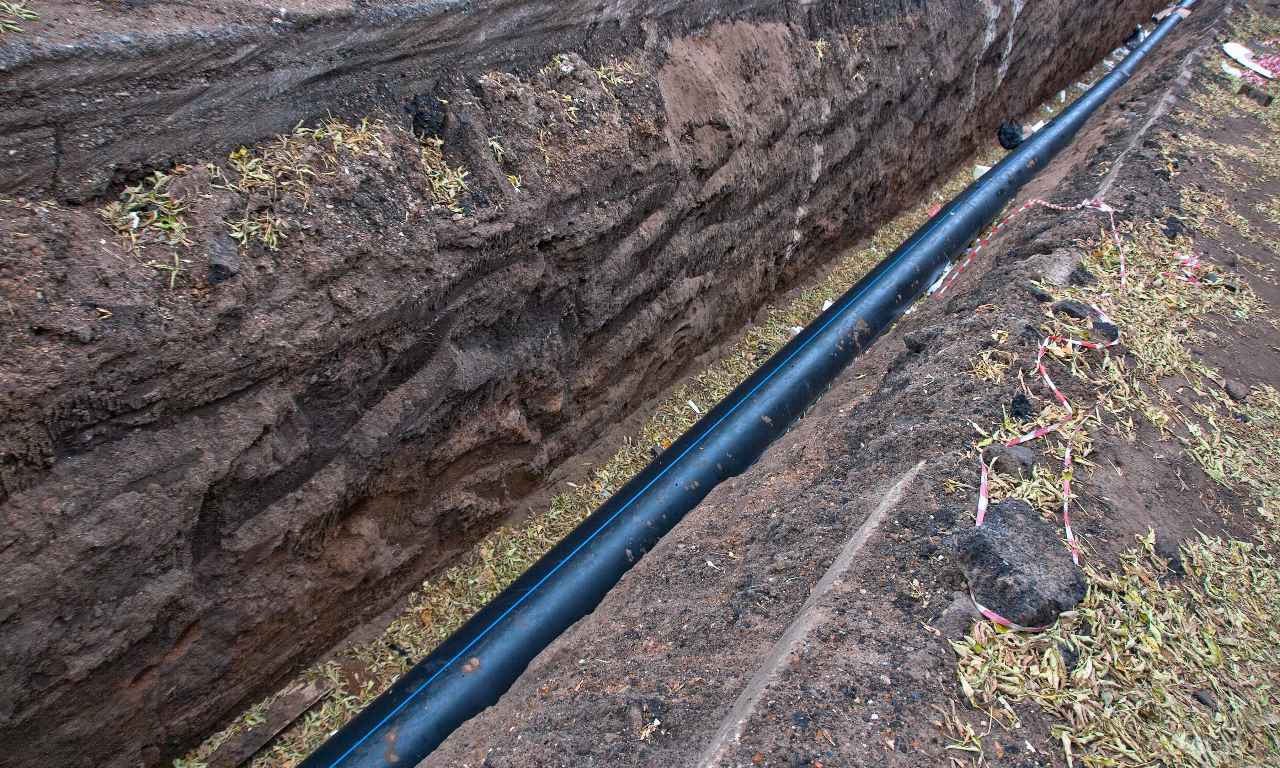
Once you have chosen the type of PEX pipe you need for your installation, the next step is to dig a trench for the pipe. Digging the trench is important to ensure that the pipe is properly secured and that the system is properly sealed.
When digging the trench, it is important to make sure that it is deep enough and wide enough to accommodate the pipe. Make sure to account for the depth of the pipe plus any additional insulation or fill material that may be needed.
Once the trench has been dug, it is time to install the PEX pipe. It is important to ensure that the pipe is properly secured in the trench so that it does not move or shift.
Use a trench box or a backhoe to keep the pipe in place and use sand or gravel to fill in any gaps between the pipe and the sides of the trench. Make sure that the pipe is properly connected and sealed at the joints.
Furthermore, installing 1 inch PEX pipe underground is more resistant and is less likely to freeze, which can extend the lifespan of the pipe and provide more consistent water pressure.
In order to ensure that the PEX pipe is properly insulated, it is important to use the proper insulation material when installing it. Various types of insulation can be used, such as polyethylene foam or PVC.
The type of insulation you use will depend on the type of pipe you are using and the environment in which it will be installed. Make sure to use enough insulation to ensure that the pipe is properly insulated and that it does not become damaged over time.
Once the PEX pipe has been installed and the insulation has been applied, the final step is to cover the pipe. This can be done using backfill material, such as sand or gravel, to help secure the pipe and to keep it in place.
It is important to make sure that the backfill material is packed around the pipe to prevent shifting or movement.
Once the pipe has been installed, it is important to test the system to ensure that it is working properly. This can be done by running water through the pipe and checking for any leaks or other issues.
If any issues are found, it is important to make the necessary repairs before proceeding with the installation.
Once the PEX pipe has been tested and is functioning properly, it is time to connect it to the existing system. This can be done by connecting it directly to the existing pipes or by using an adapter.
Make sure to use the appropriate fittings and connectors for the type of pipe you are using and that the connection is secure.
Once the PEX pipe has been connected to the existing system, it is important to inspect the installation to make sure that everything is working correctly. Check for any signs of leaks or other issues and make sure that the pipe is properly secured and sealed.
Once the installation has been inspected and any necessary repairs have been made, the final step is to backfill the trench.
This is important to ensure that the pipe is properly secured and that it does not become damaged over time. Make sure to use enough backfill material to cover the pipe and to keep it in place.
Once the PEX pipe has been installed, it is important to monitor the system for any signs of problems or issues. This includes checking for leaks or other problems on a regular basis.
Make sure to inspect the pipe and the system periodically to ensure that the installation is functioning properly.
By following these best practices for installing PEX pipe underground, you can ensure that your installation is done correctly and that it will last for many years.
PEX pipe is an ideal choice for underground installations, and by following these practices, you can ensure that your installation is done correctly and that it will provide you with years of reliable service.