It may interest you to know that felling a tree requires professional handling.
Cutting down a tree may not be as easy as taking up a chainsaw axing down the tree without taking into consideration some safety tips and techniques on how to go about the same.
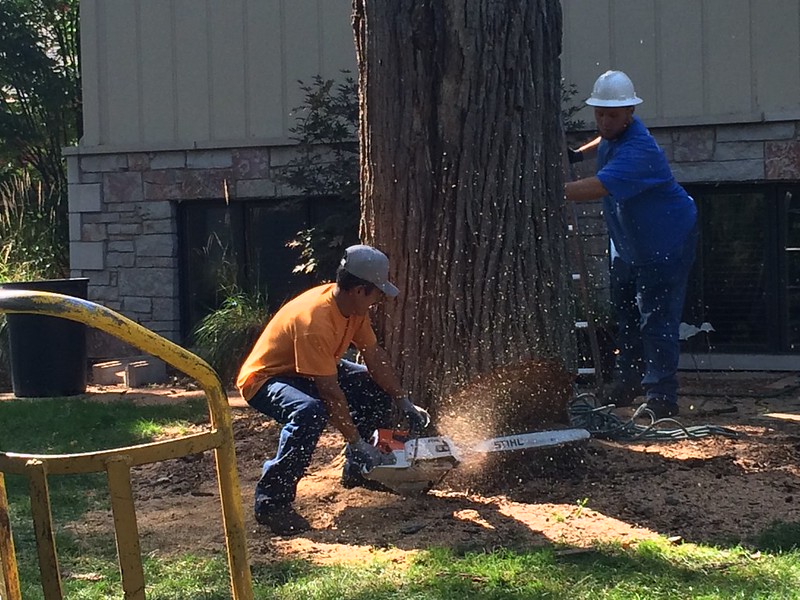
Below is a step-by-step guide on how to cut and fall a tree. Also, you can get professional tree removal rhode island.
Before thinking of getting down to the business of cutting down the tree, assemble all the equipment and gears you will be needing. This includes;
Protective Gear: there is a great percentage of you getting injured while felling on a tree. Reduce this risk by wearing leg coverings, a hard hat or helmet, steel toe boots, goggles, and heavy-duty gloves.
First Aid Kits: these are medical supplies for emergency purposes in case something goes wrong.
Cutting Tools: these by and large are your necessities. For this part, have your chainsaw in proper working mode with a sharp chain and a tankful of oil and gas. Ladder, rope, Ax, and wedges for support.
Read Also:
Before you commence operation, you must check for the following;
When you ascertain the above, you will be able to map out an escape route for yourself when things don’t go as planned.
Also, you will be able to conceive a strategy to fell the tree in such a way that it will be less detrimental to the surroundings. Also, you should clear the area around the tree.
Pruning the trunk is to ensure that hanging branches and twigs don’t get in your way. The best way to do this is by making use of a pulling chain, from the top to the bottom of the tree.
You must determine the fall path of the tree before you start cutting. If the tree is leaning, that direction to which it leans is the best direction for it to fall provided it Is clear.
Have clear surroundings to ensure that the tree doesn’t fall on other trees as it topples. This can cause grave harm or result in reducing the value of the tree.
Your escape route should always be towards the side of the fall path and not behind the same. This is to protect you from the butt kicks of the tree as it topples.
Here is the most important aspect of the felling process. Ensure you do the following:
You will want to knock around as much as possible to ensure you get a convenient part to start sawing.