Most families own at least one car. But with more and more children choosing to remain at home and families getting bigger, your outside space may need re-thinking.
Most of us choose houses based on current circumstances, but sometimes things change and we find we need to extend our space.
If you have several vehicles that are parked at your home regularly you may be considering extending your available space by building a residential driveway.
What do you need to consider before embarking on this project?
If you plan on laying a large driveway you will need to consider drainage; it’s an important issue and you may need planning permission.
You need to decide where rainwater will drain off and include it in your plan.
However, if you choose to use a material such as gravel or asphalt it will be less of an issue as these materials are water-permeable meaning that water can drain through its structure, and be absorbed, rather than run off elsewhere.
If you are using certain concrete, then you will have to allow an area such as lawn or gravel for water drainage.
You could also install a drain but will need to discuss this with the local council.
Drainage is crucial so as not to cause local sewers to get polluted or flooded.
Existing drains generally can’t cope with extra water from badly built driveways lacking drainage, and flooding becomes a real risk if appropriate measures are not in place.
Using non-water permeable materials can cause water to stay on your driveway creating a hazard and is dangerous in freezing temperatures. If the water flows towards your home you may get a damp problem causing black mold that is hazardous to health.
Excess water also causes cracks on your driveway’s surface which can be an expensive job to repair.
So using water-permeable materials is the best option for a long-lasting and cost-effective driveway, and if you click here you’ll find a comprehensive explanation of the advantages of asphalt such as fast installation time and durability.
Using asphalt is also environmentally friendly; great for reducing your carbon footprint.
If you are looking at design features of your driveway you could consider using different materials for the areas down the side where your cars won’t be parked.
To avoid driveways looking bland and boring try adding turfed or flowerbed borders or a gravel pathway switching direction for an interesting style.
You can choose to edge to supplement your drive or add details that make a statement and sums up your house’s true quality.
One that personalized it so it’s a joy to return home after a hard day.
Read Also:
Once you’ve decided what materials you will use and decided on the drainage options, you need to measure out the area where you will build your driveway.
This is an important step as miscalculation could be costly and not give you the results you need. Measuring the cars that will be parked on the driveway is crucial to ensure that there will be enough ground space to accommodate them; after all, it’s the whole purpose of building it.
You can use wooden stakes to mark out the boundaries and smaller ones to visualize how you would like your edging or borders.
You should also check out your land boundaries so you don’t accidentally encroach on your neighbor’s space.
Before you start the next stage you must hire a skip to hold all the debris from digging.
Skips are available in various sizes, and prices vary so investigate the options and think about the different rules and weight restrictions.
You will not want to be ferrying stuff to and from the dump.
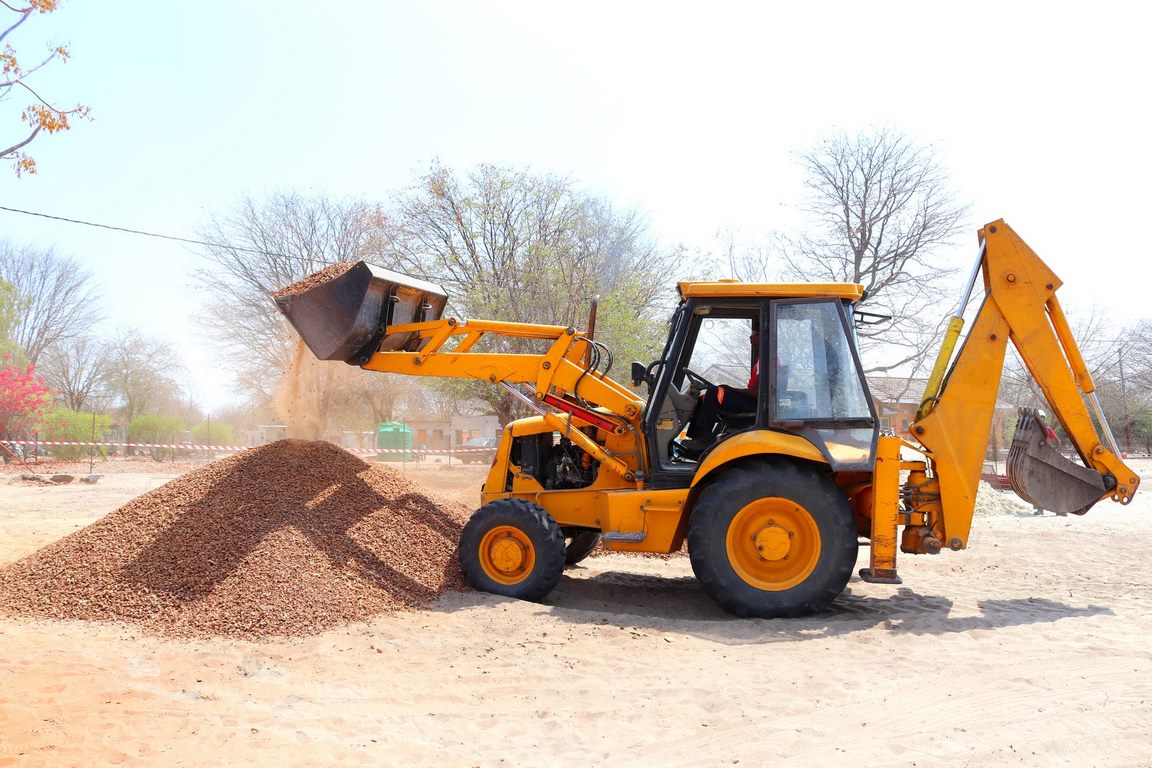
Now all the planning is done, it’s time to start the real work of preparing the land. If you are embarking on the project yourself, you will need to hire an excavator.
If you’re not sure what size you need, call the professionals and discuss the options with them.
Mini diggers will be much cheaper but it depends on the size of the space. If you’re trying to keep costs low then using the digger yourself will make the job much cheaper, however, if you have no experience of using one, it may be quicker and easier to hire an operator.
You can compare prices online to get an idea of the overall cost. Make sure you hire a reputable company and do your research first, you do not want the added problem of trying to fix a mistake at this stage.
Any drainage that needs adding should be added and hunched with concrete for protection if you are using permeable materials this won’t be needed.
After excavation, the sub-base must be added. The most popular sub-base material is MOT Type 3 stone which is strong and ideal for drainage.
The stone should be spread evenly and any voids filled and compacted. Geo membranes can also be added if needed to support the sub-base.
You should also add the edging at this point. It’s useful to use measuring lines to make sure edges are straight (or the shape required).
Once the edging is complete it can act as a guide for the rest of the project.
Once the edges are in place and all the sub-base filled and even, the laying course can be laid.
The important factor at this stage is to get the material spread evenly and as smoothly as possible.
It’s crucial not to rush, and the surface should look similar to the finished driveway.
Once all the preparation is done you can add the final layer of concrete paving or asphalt. By now you should be seeing your driveway form.
If you have hired a professional to do the work you can sit back and watch your new space appear before your eyes.
Once your driveway is completed you don’t need to do much maintenance however if you use asphalt it’s wise to apply a sealant every 2-4 years to help avoid cracks but other than that, it’s time to enjoy your extra space.