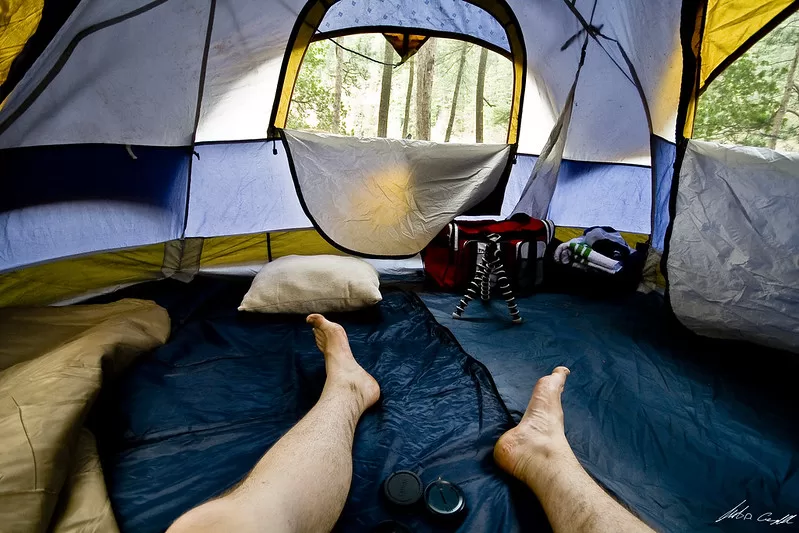
Having the right camping pillow can make all the difference when you’re out on the trail. A good pillow can provide neck and head support, reduce muscle tension and promote restful sleep outdoors. On the other hand, a bad one will leave you uncomfortably sore in the morning.
There’s no dearth of pillows for camping and backpacking in the market Even then, making your own pillow for your next adventure can be a fun and rewarding DIY project. It will not only save you money and also let you customize the pillow to your specific needs.
If you want to say no to generic backpacking pillows and wish to create your own, personalized versions, you’re in luck! In this guide, we’ll walk you through all the things you need to know to get started with your DIY project.
For your easy understanding, we have included the most popular types of pillows for camping and discussed the step-by-step process of making each. From the materials needed to the estimated cost, the time required, and even useful tips for customizing the pillow – we’ve covered everything!
There are three main types of camping and backpacking pillows: inflatable, self-inflating, and non-inflatable.
Lightweight and durable, inflatable pillows are a great choice for backpackers who want to travel light. They are easy to pack and can be easily inflated to the desired firmness. They come in a variety of sizes, which helps you find the perfect fit for your needs.
The downside to inflatable pillows is that they can easily deflate and may require refilling throughout the night. Also, if such a pillow leaks, there’s no way to repair it. Throwing it out and buying a new camping pillow is the only choice.
Nevertheless, they are ideal for backpacking and camping trips where weight and space are a concern.
Self-inflating pillows are easier to use since they are designed to self-inflate. They are more comfortable and supportive than inflatable pillows. Furthermore, these pillows offer better insulation and are perfect for those who prefer a cushier camping pillow.
Pillows that are self-inflating have a foam core that can be inflated by opening a valve. They are more comfortable than inflatable pillows. The downside is that they are heavier and bulkier, so they can take up valuable space in your backpack.
Non-inflatable pillows are the simplest and most affordable option. They are made from materials such as foam or down and are designed to provide maximum comfort and support.
They are lightweight and durable compared to regular pillows and are simply great for those who need extra cushioning. The downside is that they are not as comfortable as the other types of camping pillows.
Also, non-inflatable pillows tend to be bulky and are certainly not recommended for backpackers who like to travel light.
Read Also:
Most inflatable camping pillows are made of lightweight and durable materials like nylon, polyester, or TPU (Thermoplastic Polyurethane). The internal bladder of the pillow is typically made of PVC (Polyvinyl Chloride) or TPU, which can be inflated manually or using an air pump.
The valve used for inflating and deflating the pillow is typically made of plastic or rubber. Some inflatable camping pillows may also include additional materials like foam or down to enhance comfort and support.
Total estimated cost: $18 to $85.
The cost of scissors, ironing board, and the sewing machine are excluded from the cost breakdown as these tools are typically found in every household. Also, keep in mind that these are rough estimates and the cost may vary depending on the specific materials you choose and the shop from where you purchase them.
However, you can expect to spend around $18 to $85 or more for the materials needed to make a basic inflatable camping pillow. Keep in mind that if you decide to add additional materials like foam or down, the cost will increase accordingly.
The time required for making an inflatable camping pillow will vary depending on your sewing skills and experience. However, it should take around 1 to 2 hours to complete the project.
Here’s a step-by-step guide on how to make your own inflatable camping pillow.
Using the scissors, cut two pieces of fabric and one piece of Nylon or Polyester fabric/TPU film to the desired size and shape of your pillow. The fabric pieces should be slightly larger than the Nylon or Polyester fabric/TPU film.
Place the two fabric pieces together, with the right sides facing each other, and sew around the edges, leaving a small opening. Turn the fabric to reveal the other side and press it with an iron.
Using the scissors, cut a small hole in the center of the Nylon or Polyester fabric/TPU film. Insert the valve into the hole and attach it securely to the Nylon or Polyester fabric/TPU film.
Place the Nylon or Polyester fabric/TPU film onto one side of the fabric cover, with the valve facing up. Pin the edges of the Nylon or Polyester fabric/TPU film to the fabric cover and sew around the edges to attach the Nylon or Polyester fabric/TPU film to the fabric cover.
If using a PVC bladder, blow into the valve to inflate the pillow to your desired firmness. If using a TPU bladder, use an air pump to inflate the pillow to your desired firmness.
Once the pillow is fully inflated, seal the valve securely to prevent any air leaks.
Congratulations, you have now made a basic inflatable camping pillow from scratch! Remember, you can customize this design by adjusting the size, shape, and materials used to create a pillow that is perfect for your camping needs.
A self-inflating camping pillow typically consists of a combination of foam and air. The pillow has a valve that allows air to flow in when it is opened and a foam interior that expands to create a comfortable sleeping surface.
The foam is often made of open-cell foam, which allows air to circulate and compress when the valve is closed, making the pillow easy to pack and transport. The outer material of the pillow is typically made of a durable and lightweight nylon or polyester fabric that is easy to clean and resists water and stains.
Some self-inflating camping pillows also feature adjustable firmness settings, which allow the user to customize the level of support provided by the pillow.
Total estimated cost: $29 to $65.
The cost of scissors and the sewing machine are excluded from the cost breakdown as these tools are typically found in every household. Also, keep in mind that these are rough estimates and the cost may vary depending on the specific materials you choose and the shop from where you purchase them.
Overall, you can expect to spend around $29 to $65 or more on a DIY self-inflating camping pillow project depending on the quality and features of the materials used.
The total time to make a self-inflating camping pillow will depend on how fast and efficiently you can sew. However, it should take approximately 1 to 2 hours to complete the project.
Here’s a step-by-step guide on how to make your own self-inflating camping pillow.
Cut your foam to the desired size and shape for your pillow. This will be the interior of your pillow. Cut your fabric to the same size and shape as your foam, leaving an extra inch or two of fabric around the edges for seam allowance.
Place the fabric right side down on a flat surface, and place the foam on top of the fabric, centered. Fold the excess fabric around the foam, pinning or clipping the edges to hold the fabric in place. Sew around the edges of the fabric, leaving a small gap for inserting the self-inflating valve.
Insert the self-inflating valve through the gap, and use seam grip or another adhesive to secure the valve to the fabric. Follow the manufacturer’s instructions on how to dry the adhesive after applying it.
Inflate the pillow by opening the valve and allowing air to flow in. The foam will expand to create a comfortable sleeping surface.
Optional: If you have an adjustable firmness insert, insert it into the pillow through the valve to customize the level of support. Close the valve to keep the air inside, and your self-inflating camping pillow is complete!
The materials used in a non-inflatable camping pillow can vary, but they typically include some type of filling and a fabric cover. Common filling materials include foam, memory foam, cotton, down, or synthetic materials like polyester.
The cover can be made from a variety of fabrics such as cotton, flannel, fleece, or even waterproof materials like nylon or polyester.
The filling is usually contained within the cover, which can be zippered or sewn shut. Non-inflatable camping pillows can come in a variety of shapes and sizes, depending on the brand and type of pillow.
Total estimated cost: $14 to $95.
The cost of scissors, sewing machine, measuring tape, and ruler are excluded from the cost breakdown as these tools are typically found in every household. Also, keep in mind that these are rough estimates and the cost may vary depending on the specific materials you choose and the shop from where you purchase them.
Overall, you can expect to spend around $14 to $95 or more on a DIY non-inflatable camping pillow project depending on the quality and features of the materials used.
Making a non-inflatable camping pillow can take anywhere from 30 to 60 minutes, depending on your level of experience with sewing.
Here’s a step-by-step guide on how to make your own non-inflatable camping pillow.
The first step in making a non-inflatable camping pillow is to determine the size of the pillow you want to create.
Once you have determined the desired size, measure and cut the fabric cover material to the appropriate dimensions, allowing for a seam allowance of approximately 1/2 inch on all sides. You can use a measuring tape or ruler to ensure the dimensions are accurate.
After you have cut the fabric, pin the fabric pieces together with the right sides facing each other, leaving a small opening for the filling material to be inserted.
The opening should be approximately 3 inches wide. Next, sew around the perimeter of the fabric, leaving the small opening unsewn. Use a sewing machine or needle and thread to stitch along the pinned edges.
Once you have sewn around the perimeter of the fabric, turn the fabric right side out. This will leave the stitching on the inside of the pillow, creating a seamless finish on the outside. Next, insert the filling material into the cover through the small opening. Fill the pillow to the desired firmness or thickness.
After you have inserted the filling material, sew the small opening closed using a needle and thread or a sewing machine. Make sure the stitches are tight so that the filling material does not spill out.
To keep the filling material securely inside the pillow, attach a zipper or other closure to one end of the pillow. You can follow the manufacturer’s instructions for installation or use your own preferred method.
If you want to add some personal touches to your non-inflatable camping pillow, you can embellish it with embroidery thread, patches, or other decorations. This is optional and can be skipped if you prefer a simpler look.
You can now take your new non-inflatable camping pillow on your next outdoor adventure and enjoy it!
Please note that if you do not have access to a sewing machine, you can sew the fabric pieces together by hand using a needle and thread. Additionally, if you prefer a different type of closure or embellishments, feel free to customize your pillow to your liking.
Here are some tips for customizing your camping pillow:
Camping and backpacking are popular outdoor activities that allow people to escape the hustle and bustle of their daily lives and immerse themselves in nature. However, one essential item that many people overlook when preparing for these activities is a camping pillow.
A good camping pillow can make a big difference in the quality of your sleep and ultimately affect your overall experience. Not only does it support your neck and head, but it can also help prevent stiffness and soreness.
Not all backpacking pillows are created equal, which is why DIY-ing one is most recommended. Making your own pillow has a lot of benefits. Firstly, it’s much cheaper than buying one from a store.
You can also choose the exact materials and fabrics that you want to use. Plus, you get the satisfaction of creating something with your own two hands. Also, by making your own travel pillow, you can customize it to fit your specific needs and preferences.
So, when are you DIY-ing your camping pillow?