Learn how to make your own crown molding using a router, planer, table saw, and architectural molding router bits.
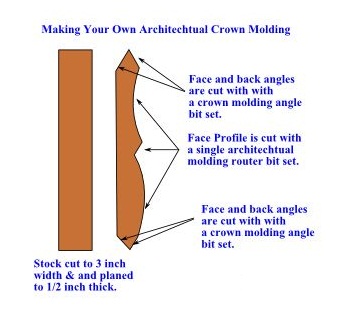
Start by cutting your stock to size and planing it down to the correct thickness. Cut your profile on the face of the stock and add the spring angles with another bit set or saw.

You can make your own architectural crown molding using standard woodworking shop tools, a little ingenuity, and good machine setups.
This is a woodworking project for the novice to an intermediate woodworker, although just about any woodworker will make molding when necessary. Using readily available lumber and a few specialty router bits, anyone with a router table, planer and table saw can make their own crown molding.
Cut the lumber to width, plane it to the correct thickness and begin routing the profiles on the face of the stock. Add the angle cuts for the back and front at the top and bottom and finish by sanding the pieces.
Read Also:
You can make your own crown molding if you have a router and decorative bits, a top bandsaw, and possibly a planer. Although crown molding may be a little more challenging to install than the casing, baseboard, or quarter-round, it isn’t much harder to make.
Most crown moldings incorporate an “ogee” or “S” shape on their face, along with various grooves and beads at the top and/or bottom. These shapes are cut with architectural molding router bits with cutters as long as 3 1/2 inches.
The key to making a production run of molding is to complete each step on all the pieces before progressing to the next step. This ensures that all the pieces will be exactly the same. Start by milling all your wood stock to the correct width and thickness.
Eight-foot lengths are easy to handle, but once you have the hang of it, you could make 12-foot lengths of crown almost as easily. Be certain your machine setups include outfeed and infeed tables to support your stock.
Your setups need to be right on for these multiple operation procedures. Once you get it right, don’t change it until you have processed all your pieces through that step.
Use a fence on your router table high enough to fully support your stock on edge. If you are making 5 1/2 inch molding with a pair of cutters, make sure your fence is 6 inches high at a minimum.
Use feather boards to keep the stock tight against the fence. Architectural router bits can take a big bite out of the wood, making a 3 horsepower router mounted in your router table a necessity and multiple passes a probability in order to make your own crown molding.
Cut your stock to width on the table saw or quality band saw. You can use standard S4S stock cut down to the correct width for the router bit set you will be using on small runs of molding.
Router bit sets are sold in sets of two for wide moldings—you will have to determine the correct width of the stock from the size of the bits you use to shape the molding. After the stock is cut to width, plane it to a 1/2 inch thickness or whatever the bit set requires.
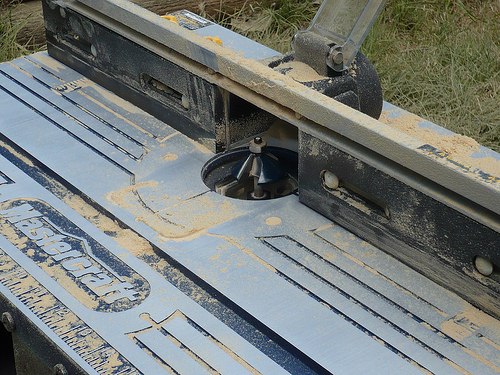
Set up the router table with the first molding bit on the table. You may need to run the pieces over the bit two or three times to cut them to the correct depth.
Start shallow and run all the molding, then cut deeper on the second pass and make the third pass at the final depth. If you are using a two-piece bit set, be sure to save a couple of test pieces for setting up the second bit.
There are two ways to cut the molding angles, with the router and a crown molding angle bit, or on the table. Standard crown molding can be cut at 38 degrees on one flat, and 53 degrees on the other. Another way is to cut 45-degree angles on both edges with the table saw.
Router bits are available in sets to cut all three angles and put a nice bevel on your crown molding at the same time. As before, set up the router, run a test piece and make any adjustments, then run all your stock through.
Complete making your own crown molding sanding it, first with 100 grit and then with 220 grit sandpaper.
Making your own molding might not be practical unless you are making enough molding for a house or have access to a lot of lumber, but it is a fun woodworking project that produces something useful. The architectural molding router bits are not cheap, but they will cut a lot of molding before wearing out.