When you’re painting furniture and don’t want to see brush strokes or any other uneven paint lines, I recommend using a spray gun to paint your furniture.
I know it can be quite intimidating to use these paint sprayers, but with a little practice, you can become a pro.
If you’re a fan of quick and easy painting without leaving smudges on your furniture, spray paint is the way to go.
Choosing the best paint sprayer for furniture to Improve your home decorations, such as renovating old furniture is not at all an easy task to do.
But first, you need to learn how to paint furniture with a spray gun. Spray painting has quite a few advantages compared to its brush-applied counterparts.
There’s typically little prep or sanding needed, it boasts super fast dry times, and you don’t have to worry about messy brush strokes showing up on your work.
However, first-time users may find it quite difficult to get used to using this paint. This article will show you how to restore old furniture using a paint sprayer. Scroll down to read it.
No matter how you’re applying paint to furniture, I always recommend that you prep your furniture for proper painting.
Beginning furniture painters will paint a piece of furniture and find the paint peeling and flaking super fast. This is likely because they did not prepare the furniture.
First, clean your wooden furniture with a soft sponge and mild soapy water to remove any dirt or grime.
Next, fill the cracks with wood putty. Once the wood filler dries completely, continue to the next step.
Smooth out any excess padding. You can use sandpaper with a sanding block or an electric sander at your disposal. Lightly sand along the grain of the wood.
Read Also:
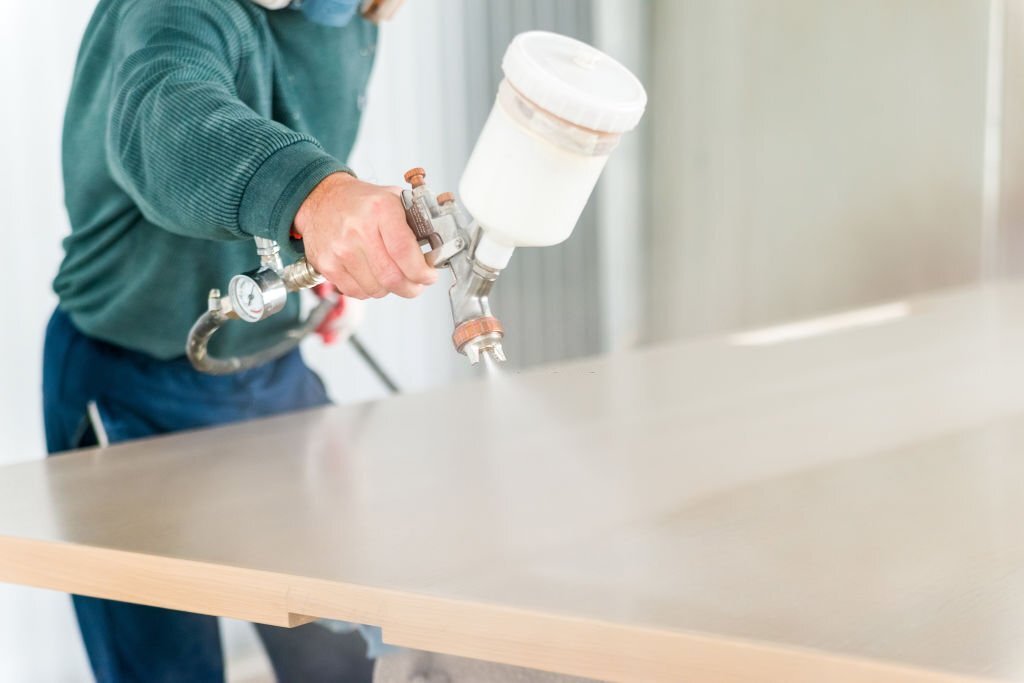
Our furniture is ready to paint, now it’s time to prepare our spray gun. Preparing your spray gun will become second nature after regular use, but this can be tricky from the start.
Of course, your spray gun setup will be different depending on which one you have. Preparing your sprayer means using the proper parts recommended for spraying furniture, and any gun I’ve used provides good details in their manuals.
Then when you prepare your paint sprayer, you need to prepare your paint as you add it to the container.
I only use water-based paints, so I dilute my paints with about 10% water, or follow the directions on the paint can if I’m having trouble. Thinning the paint for the spray gun is an important part of preparing the sprayer.
If the paint is too thick your spray gun will struggle and you will get a rough surface to the touch, this has happened to me several times.
Spray the first coat of paint in thin layers. Then, let it dry completely for as long as the paint container recommends: about 1 hour for water-based paints and up to 4 hours for oil-based paints.
Spray a thick coat of paint on the second coat for a long-lasting, flawless finish. Let dry and sand before applying the third coat if you consider it necessary.
Keep the same distance from your furniture for a consistent professional finish.
Once you pull the trigger on the gun, keep your arms moving at a steady pace from one end of the cabinet to the other. If you pause or slow down on the spot, you’ll end up spraying too much paint and causing it to run.
Occasionally use a damp cloth to clean clogged paint from the tip of the nozzle.
The most common way to finish your furniture is by applying polyurethane or a clear coat of wax.
You can spray water-based polyurethane, such as polyacrylic, on your furniture by following the spraying procedure above.
If you choose to apply wax, use a lint-free cloth to spread it evenly over the painted surface, especially if you choose to chalk paint for your furniture.
When you are done spraying paint on your furniture you need to protect it in one way or another. The most common ways to protect furniture are by using wax or applying a clear coat product like polyurethane.
I’ll quickly explain the process here, but reading that article gives the full guide on how to do it. When I add Polycrylic to my spray gun container, I always dilute it with 10% water and no more.
Adding too much water will only cause problems. Be sure to stir the water in the poly for at least a minute, otherwise, you’re defeating the purpose of thinning because the water will just sit on top.
After thinning, test sprays again to ensure proper consistency and efficient spraying.
The most important tip is to make sure you spray super light coats because Polycrylic and other finishes drip and smear very easily.
After going through the 5 steps to painting furniture with a spray gun, going into details, I hope it helps you understand what to do so you can give it a try.
I want this guide to be simple and include products you can buy to start spraying furniture yourself.
Prepare your furniture, paint and spray gun, spray and then apply a protective sealant, that’s all there is to upcycling old or fresh wood furniture.
Using a spray gun to paint furniture is easier than it sounds, try it on some free or cheap old flippers to get the hang of it. Good luck spraying your furniture!