Do you like having a little touch of nature in your back yard? Well, you are not the only one. Trees in the yard provide both a breath of fresh air and an aesthetic appeal.
However, when tree limbs grow over your roof you must take action. Overhanging tree limbs pose several dangers to your property.
Apart from the peril of the limb falling onto the roof and damaging it, wildlife can also get access to your home using the branches.
Nevertheless, chopping the overhanging branches can be quite a dangerous task. But don’t worry.
We have prepared a step-by-step guide on how to cut tree limbs over the house, so you can efficiently and safely cut the tree limbs.
While cutting the tree limbs, they can fall the wrong way and cause harm to yourself or your property.
Therefore, read the following steps to know everything there is to know about cutting overhanging tree limbs safely.
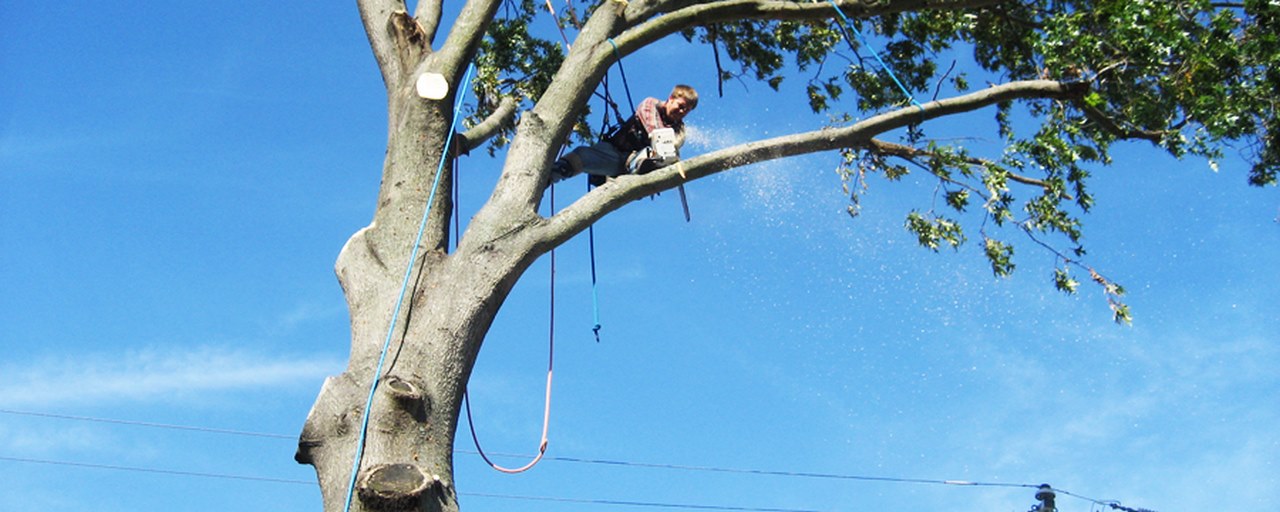
Check it out for cutting tree limbs with Chainsaw.
You will require a few tools and safety equipment at ready before starting this project. For reaching the tree, you will need an extension ladder.
A chainsaw, pruning saw or pole saw is required for cutting the tree limb.
Other pieces of equipment you will need are dense nylon ropes and a tree felling wedge. Moreover, safety gear like eye goggles, thick gloves, and fast aid should be ready nearby.
With these tools, you will be ready to take on the tree limbs safely.
Read Also:
If you need to use a ladder to get onto your roof, first place your ladder against the house. Make sure to keep the ladder at a seventy-five-degree angle to the roof.
Also, make sure three feet of the ladder is above the roof.
After climbing up, pull the ladder up onto the roof. Then place it securely against the tree branch and follow the next steps carefully.
Firstly, you must ensure that the tree branches won’t fall on your roof when you cut them. Create a few knots using a strong nylon rope for securing the cut off limbs.
Reach the end of the branch with your ladder and tie knots on it.
Then tie the opposite end of the rope with a branch that is in a secure place. After this tie a few more notches if the branch is long. For heavier tree limbs, more knots are required.
The brand collar is the place where the tree limb grows from the tree. After tying the knots securely, locate the brand collar. Typically, you will start cutting around this area.
However, it is simpler to cut around the knot as it entails less labor. Cutting in small sections from the end of the branch is safer too.
Therefore, after you find the tree collar where you want to start cutting, prepare your cutting tools.
The power tool you need for cutting depends on the branch thickness. A quality cordless pole saw will be of great help if you are dealing with a thick branch.
For thinner tree limbs, a pruning saw can be used.
Cut at a downward angle to prevent water from being stored at the place you cut. This will protect the tree from rotting. Before starting, make sure you have taken safety measures.
When you finish cutting, the tree limb must come off easily. The knots you tied earlier will prevent the branch from collapsing on your roof.
For allowing the tree to heal, finish cutting properly. Don’t leave a longer portion of the branch attached to the tree. This can prevent the tree from creating callus properly.
By this time, the tree limb will be hanging with the rope you attached to the other branch. You will need the help of others who will pull the rope away safely after you cut the branch.
Then untie the knots and take away the tree limbs.
This article has provided all the instructions on how to cut tree limbs over the house properly.
Nonetheless, this job is risky and can cause more damage than good if you are not careful. Therefore, if you are a newbie, we advise you to work cautiously and take appropriate safety precautions.
However, if you are not confident, call professional arborists. They will be able to handle the tree branches properly.
What’s more, in case of any damage, the repair will be covered by the insurance.