The cost of professional recording studio time can be prohibitive for many musicians, but with today’s technology, it’s easier than ever to set up a high-quality home studio. By investing in a few key pieces of equipment, you can create a workspace that is both comfortable and capable of producing professional-sounding recordings.
With your studio, you’ll have total control over the recording process, and you’ll be able to create professional-quality recordings at a fraction of the cost of going into a commercial studio. Of course, setting up a home studio can be a daunting task and a hurdle that most people find hard to go past.
When you buy the right hardware for your home studio, you can create a workspace that is both comfortable and capable of producing professional-sounding recordings. The first step is to choose the right room.
A smaller space with fewer hard surfaces will help to reduce echoing and produce a warmer sound. Once you’ve chosen the perfect space, it’s time to start filling it with equipment. So, what hardware do you need for your home studio?
This post will discuss the hardware you should need when starting a home studio. Read on for more information.
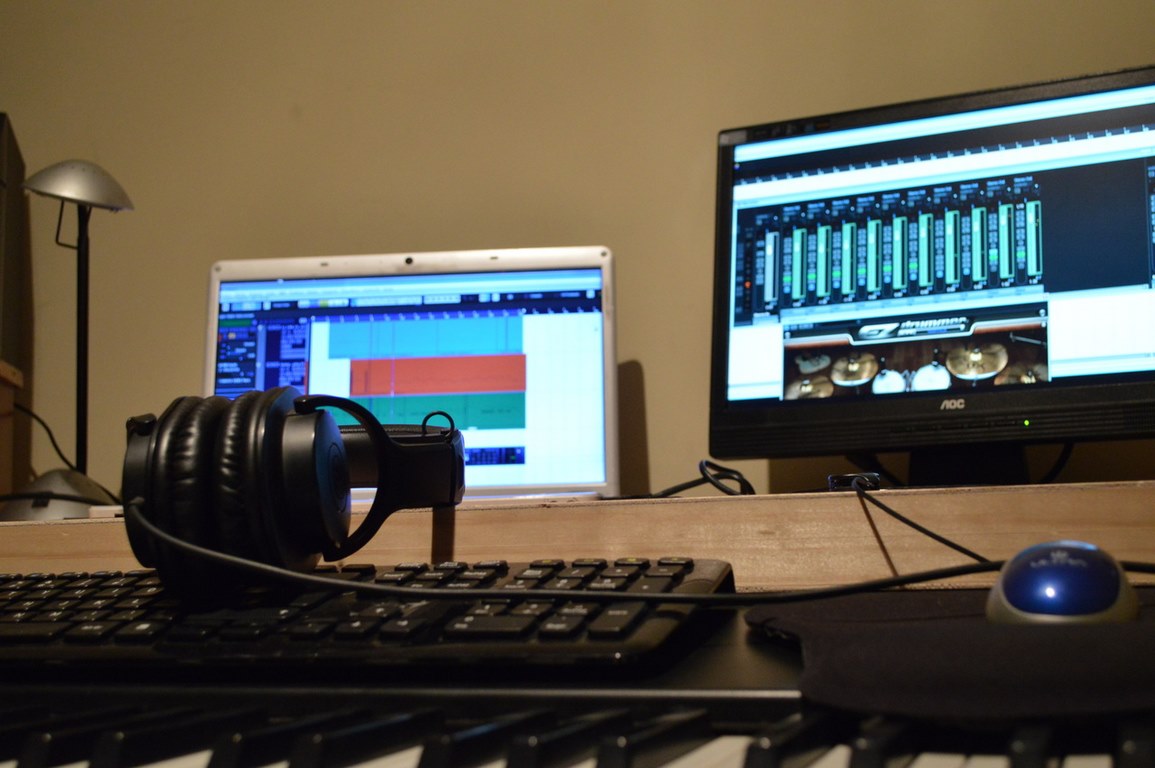
The first piece of hardware you’ll need for your studio is a computer. If you’re planning on doing any serious recording, you’ll need a powerful machine to handle the software you’ll be using.
You don’t need the most expensive top-of-the-line model, but you should ensure that your computer has enough RAM and processing power to run the recording software without too much lag.
In addition to a fast computer, you’ll also need a good sound card. This will allow you to connect your other studio equipment to your computer to be used in the recording process.
Another essential piece of hardware you’ll need for your studio is a microphone. If you’re planning on recording vocals or instruments, you’ll need a good-quality microphone to get a clear sound.
Generally, condenser microphones are well suited for studio settings, including home studios, because of their sound quality.
Here are some of the DPA Condenser Microphones specifications to consider when choosing a condenser microphone:
The first thing to consider when choosing a condenser microphone is the pickup pattern. This determines how the microphone will capture sound. There are three main types of pickup patterns: omnidirectional, cardioid, and bidirectional.
Omnidirectional microphones capture sound evenly from all directions, making them ideal for recording multiple instruments at once. Cardioid microphones are more focused and pick up sound primarily from the front, making them ideal for recording vocals or single instruments.
Bidirectional microphones pick up sound from both the front and back, making them suitable for recording two people at once, such as in an interview setting.
Another important consideration is the frequency response of the microphone. This determines the range of sounds that the microphone can pick up. For most home studio applications, you’ll want a microphone with a wide frequency response to capture a wide range of sounds.
The sensitivity of a microphone determines how much sound it takes to activate the microphone. This is expressed in dB, and the higher the number, the more sensitive the microphone. For most home studio applications, you’ll want a microphone with a sensitivity of -40 dB or higher.
The next piece of hardware you’ll need for your studio is an audio interface. This is a device that connects your microphone and other outboard gear to your computer so that it can be used in the recording process.
Audio interfaces come in various shapes and sizes, so it’s essential to choose one that will work well with the other hardware in your studio. In addition, you’ll want to make sure that the audio interface you choose has enough input and output channels to accommodate all of your gear.
To connect all of your studio equipment, you’ll need various cables. The most common type of cable used in studios is an XLR cable. These are used to connect microphones and other outboard gear to audio interfaces and mixers.
You’ll also need instrument cables to connect guitars and other instruments to your audio interface or mixer. And, if you’re using a laptop in your studio, you’ll need a USB cable to connect it to your audio interface.
Headphones are an essential piece of equipment for any studio, as they allow you to hear what you’re recording without disturbing the other people in the room.
When choosing headphones for your studio, it’s essential to find a pair that is comfortable to wear and that has a good frequency response. In-ear headphones are a good choice for many studios because they are less likely to cause distractions than over-ear headphones.
The last hardware you’ll need for your home studio is a pair of monitors. Monitors are speakers that are specifically designed for studio use.
They allow you to hear what you’re recording with more accuracy than regular speakers, and they come in various sizes and shapes.
When choosing monitors for your studio, it’s essential to find a good frequency response pair that is comfortable to listen to for long periods.
Building a home studio doesn’t have to be expensive or complicated. With the right mix of hardware, you can put together a studio that sounds great, which will help you take your recordings to the next level. So, what are you waiting for? Get started today!