You don’t have to be a handyman to perform DIY repairs for the basic problems you have with your appliances.
There may be good air conditioning professionals in Miami, but you can cut the cost if you take the time to learn what to do with simple problems you can handle on your own.
Before trying any DIY step in fixing your AC problem, you must analyze the situation first.
If your answers to the questions are all yes, you can move on to research the common materials in your AC that commonly require replacement. This way, you will know what product to buy if needed.
Here are the AC parts you need to know about. You have to get the unit’s serial number and model to determine the right product or size:
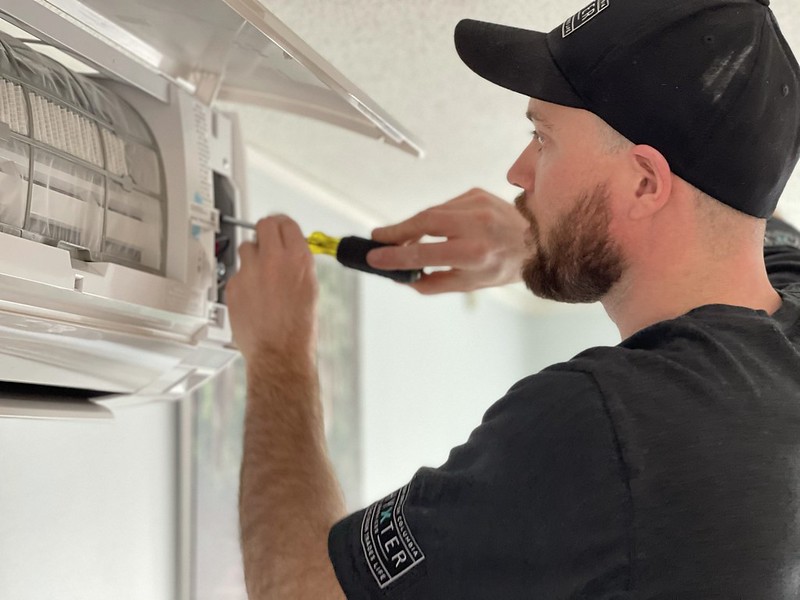
Here’s a list of the tools typically needed in performing DIY AC repair. Make sure that you have these before opening your unit:
After checking that you have the tools and know which is which when it comes to AC parts, it’s time to get a brief about the common and most basic AC problems and what you can do to fix them.
Read Also:
Many homes with central air conditioners have experienced units that will not turn on all of a sudden despite having no issues the last time they used the unit. There are many reasons why this can happen, including the following:
These are the problems that you can try fixing on your own before calling for professional help. The first thing you need to do is turn the power off. This is necessary before opening the unit or the furnace’s panels for your safety.
Check that the power is completely turned off by testing the breaker with a multimeter. Take pictures of how the wires are connected, so you will have an easier time placing them back.
Carefully disconnect the wires before installing a new contactor. Check your photos in reconnecting the wires to ensure you do it right.
Look at the photos again to check if you have everything connected properly. Turn on the power and check if the AC is working.
If the compressor and condenser fan isn’t working, but the contractor is pulled in, you may need to replace the AC’s capacitor.
First, make sure that the dual start or run capacitor is discharged before starting. Note that even after removing this part from power, it still holds a large electric charge.
To discharge the capacitor:
If you are using single-mode capacitors, you only need to make a short between the terminals.
Once discharged, you have to replace the capacitor. Each AC unit has at least one capacitor. It aids in normalizing the grid’s voltage fluctuations. It also keeps electricity and releases it at the startup of the condenser fan and compressor.
Again, take photos of the capacitor and wires to have a detailed guide on how to replace them once you have them removed.
Use needle-nose pliers and an insulated screwdriver to disconnect the wires. Remove the capacitor and put in a new one. Use your photo as a guide in reconnecting the wires.
This may be caused by a faulty evaporator coil, which can only absorb heat from the air if it gets sufficient airflow. This part is a component of the HVAC system located indoors.
The evaporator coil will end up freezing if it continues getting insufficient return air. To check the problem, make sure that the filter is not causing it. If it is, then the problem can be quickly solved by cleaning the filter.
If it’s not the filter, you need to inspect the vents. You have two types of vents, but for this purpose, you need to focus on the return air vents. The other kind is the discharge vents.
Return air vents are bigger than discharge vents, which is why they accumulate more dirt. Once you have found the return air vents, ensure they are clean and not blocked by anything, including boxes or a door.
Use a long brush to clean the vents from grimes and dust. They get too dirty faster than the discharge vents since they suck air into the unit, while the other vents deal with already filtered air by blowing it out.
These vents need to get the required air supply to keep working at their best. They have to suck in and blow enough air, or else your AC unit will fail to produce sufficient coolness.
All these common problems encountered by AC units can be prevented. Aside from using the unit properly, you must keep it clean and have it regularly checked for maintenance.
It is best to leave regular maintenance solutions to the pros. The task requires more tools and the steps are more complicated than the DIY solutions discussed above.
There are cases wherein they need to get the unit out and clean it thoroughly before putting it back.
If you live in Miami and nearby places, you may want to check out a reputable company that deals with HVAC maintenance, installation, replacement, and repairs.