In the quest for a sparkling, pristine exterior, pressure washing emerges as the unsung hero of home maintenance.
Whether you’re a first-time homeowner or a seasoned DIY enthusiast looking to elevate your cleaning game, “10 Easy Steps to Pressure Washing Success: A Beginner’s Guide” is your roadmap to achieving a glistening facade with minimal effort.
As we embark on this journey together, we’ll demystify the art of pressure washing and equip you with the knowledge and skills needed to transform grimy surfaces into spotless showcases.
Before you begin pressure washing, prioritize safety.
Wear protective gear such as safety goggles, gloves, and closed-toe shoes.
Clear the area of any obstacles or potential hazards. Familiarize yourself with the pressure washer’s manual and follow all safety guidelines provided by the manufacturer.
Take a close look at the surface you plan to clean.
Identify any areas with loose paint, cracks, or delicate materials that may require special care.
Understanding the surface’s condition will help you determine the appropriate pressure settings and cleaning techniques for optimal results.
Remove any objects or debris from the area you’ll be pressure washing.
This includes furniture, vehicles, and loose items that could be damaged by the high-pressure spray.
Cover plants, electrical outlets, and sensitive surfaces with plastic sheeting or tarps to protect them during the cleaning process.
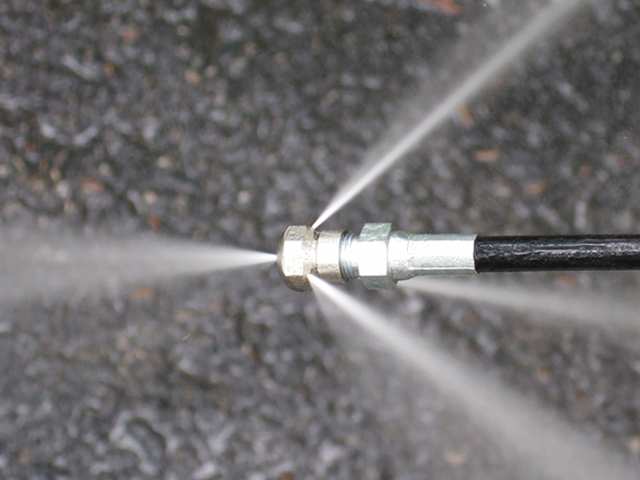
Pressure washers come with different nozzle attachments, each designed for specific tasks.
For general cleaning, a 25-degree or 40-degree nozzle is typically suitable.
If you need more power for stubborn stains or heavily soiled surfaces, a 15-degree nozzle can provide additional pressure.
Choose the appropriate nozzle based on the surface and cleaning requirements.
Most pressure washers allow you to adjust the pressure output.
Start with a low-pressure setting and gradually increase it as needed.
Read Also :
Test the pressure on a small, inconspicuous area to ensure it won’t cause damage.
Remember, using excessive pressure can result in surface damage, so err on the side of caution.
For particularly dirty or stained surfaces, consider using a cleaning solution.
Choose a solution specifically formulated for pressure washing and follow the manufacturer’s instructions for dilution ratios.
Apply the solution evenly to the surface, allowing it to sit for a few minutes to loosen dirt and grime.
Begin pressure washing from a safe distance, typically around 2 to 3 feet away from the surface.
Hold the wand at a slight angle and move it in a sweeping motion, overlapping each pass.
Keep the nozzle moving to prevent streaks or etching on the surface.
Take your time and work in small sections to ensure thorough cleaning.
Maintain a consistent distance between the nozzle and the surface as you work.
Avoid getting too close, as it can cause damage, and don’t hold the nozzle in one spot for too long.
For stubborn stains, you can move the nozzle closer momentarily, but be cautious and test the pressure to avoid harm.
After you’ve finished pressure washing a section, rinse the surface with clean water.
This will remove any remaining dirt, cleaning solution, or debris. Again, maintain a consistent distance and even motion while rinsing to ensure thorough coverage.
Once you’ve completed your pressure washing project, clean up the area by removing any protective coverings and storing equipment properly.
Take the time to clean the pressure washer by flushing out any remaining cleaning solution and debris.
Perform regular maintenance checks, such as inspecting hoses and filters, to keep your equipment in top condition.
While pressure washing can be highly effective, using excessive pressure or incorrect techniques can damage certain surfaces.
It’s important to assess the surface and adjust the pressure settings accordingly.
Delicate materials, such as wood or painted surfaces, may require lower pressure or special care to avoid damage.
Always start with a lower pressure setting and test a small area before proceeding.
Not all surfaces require cleaning solutions, but they can be beneficial for tackling tough stains and grime.
Cleaning solutions formulated for pressure washers can help break down dirt, oil, mildew, and other stubborn substances.
Follow the manufacturer’s instructions for dilution ratios and application techniques.
Be sure to rinse the surface thoroughly after using cleaning solutions.
Pressure washing is highly effective in removing many types of stains, including dirt, mold, mildew, and algae.
However, some stains, such as rust, oil, or deep-set discoloration, may require additional treatments or specialized cleaning methods.
It’s important to set realistic expectations and understand that not all stains can be completely eliminated with pressure washing alone.
Pressure washing a roof can be risky and potentially cause damage.
The high-pressure water can dislodge shingles, remove protective coatings, or lead to leaks if not done correctly.
It’s generally recommended to avoid pressure washing roofs and instead consider alternative methods, such as gentle cleaning solutions or hiring professional roof cleaners who specialize in non-pressure methods.
Pressure washing should typically be performed outdoors due to the high-pressure water and the potential for water and debris splatter.
Indoor use can result in water damage, electrical hazards, or slip-and-fall accidents.
If you need to clean indoor surfaces, such as tiled areas or concrete floors, consider using lower-pressure alternatives like a mop, sponge, or a wet vacuum for effective and safe cleaning.
Pressure washing success is within reach for both beginners and experienced users.
By following these ten easy steps, you can achieve outstanding cleaning results while ensuring safety and protecting surfaces.
Remember to assess the surface, prepare the area, and select the right nozzle and pressure settings.
Practice proper technique, apply cleaning solutions when needed, and rinse thoroughly.
With a little practice and attention to detail, you’ll be amazed at the transformative power of pressure washing and the sparkling results you can achieve.